WilliamLam.com

  • About
    • About
    • Privacy
  • VMware Cloud Foundation
  • VKS
  • Homelab
    • Resources
    • Nested Virtualization
  • VMware Nostalgia
  • Apple

How to upgrade from VCSA 5.x & 6.x to VCSA 6.0 Update 1?

09.11.2015 by William Lam // 100 Comments

I have seen quite a few questions come in on how to properly upgrade from an existing vCenter Server Appliance (VCSA) 5.x and/or 6.x environment to the latest vSphere 6.0 Update 1 which was just released today. Before I jump straight into the process, I think its worth covering on how updates (patches) and upgrades have traditionally been handled for the VCSA. In an update or patch scenario, you are staying within a major release of vSphere (e.g. vSphere 5.0) and moving to something like vSphere 5.0 p01 and in this case, an in-place update or patch is performed. In an upgrade scenario, where you are moving from one major release (e.g. vSphere 5.0) to another major release (e.g. vSphere 6.0), a "migration based" approach is taken. This means that you would need to deploy the new VCSA that you wish to upgrade to and then migrate the data from your old VCSA appliance to the new one which is part of the upgrade workflow. This "migration based" approach was also true for any "U" (Update) releases (e.g. vSphere 5.5 to vSphere 5.5 Update 1). 

For major releases, this makes perfect sense and provides customers a nice way to easily rollback if something goes wrong. You simply power off the new VCSA and then power on your original VCSA and you are back in business. For update releases, we have heard from our customers that this process was not ideal and though there is always a risk when updating software (which is why I always recommend customers test thoroughly in a Dev/Test environment before moving to production), the amount of changes in the code is significantly less when compared to a major upgrade. One of the new features that we have introduced in vSphere 6.0 Update 1 is an in-place upgrade for "U" (Update) releases which I have already blogged about here among other new features.

This means that if you are coming from a VCSA 6.x environment and you wish to upgrade to vSphere 6.0 Update 1, you simply just mount the vSphere 6.0 Update 1 Patch ISO to your VCSA 6.x environment and perform the update from the command-line via the appliancesh interface. This is quite nice as it reduces the need to copy data between your old and new appliance and helps reduce the overall downtime. In fact, you can upgrade to vSphere 6.0 Update 1 in about 10min or so using this new method. If you are coming from a VCSA 5.x (5.0, 5.1 or 5.5) environment, this would be consider a major to major upgrade and you would need to follow the "migration based" approach to upgrade to vSphere 6.0 Update 1. One other thing to note after you have upgraded to vSphere 6.0 Update 1, we have now re-introduced URL based patching via the VAMI interface. This means in the future, you no longer need to update or patch from an ISO but can do so directly from VMware's online repository.

Below are the instructions on upgrading from VCSA 6.x to VCSA 6.0 Update 1:

Note (09/14/15):

  • If you have an External PSC with your VCSA 6.x and wish to upgrade, the process shown below is the same for both the PSC and the VCSA. You will want to first upgrade your PSC first as that provides authentication to your vCenter Server. Once the PSC has been upgraded and accessible on the network again, you will then want to move to your VCSA. If you are interested in the proper sequence and ordering of VMware Products to update, you can also check out this handy VMware KB 2109760 which provides all the details
  • Thanks to fellow reader Idan for reporting this but it looks like after an upgrade of the VCSA, the default VMware URL for the VAMI is not working. You will need to update it to point to the following URL https://vapp-updates.vmware.com/vai-catalog/valm/vmw/647ee3fc-e6c6-4b06-9dc2-f295d12d135c/6.0.0.10000.latest/ instead of the default one as shown in the screenshot below. This is only applicable for upgrade scenarios. If you deploy a new VCSA 6.0 Update 1, it will automatically be using the correct URL

incorrect-vami-repo-url
Step 0 - Ensure you have a proper backup and take a snapshot of your VCSA 6.x appliance before beginning.

Step 1 - Download the VCSA 6.0 Update 1 Full Patch (VMware-vCenter-Server-Appliance-6.0.0.10000-3018521-patch-FP.iso) by visiting the VMware Patch Download site.

upgrade-from-vcsa-6.0-to-vcsa-6.0-update-1-0
Step 2 - Mount the VCSA 6.0 Update 1 Patch ISO to your VCSA 6.x appliance using either the vSphere Web/C# Client

Step 3 - Login to your VCSA 6.x appliance via SSH to the appliancesh interface. If you have disabled that, simply type "appliancesh" and login with the root credentials.

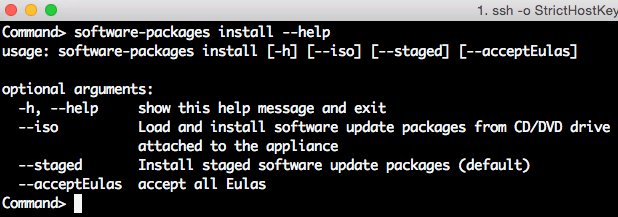
Step 4 - Run the following command to stage and install the patches from the VCSA 6.0 Update 1 Patch ISO:

software-packages install --iso --acceptEulas

upgrade-from-vcsa-6.0-to-vcsa-6.0-update-1-1
Note: If you run into any errors while either staging or installing the patches, you should drop into the bash shell and take a look at /var/log/vmware/applmgmt/software-packages.log file for additional information. One common issue that I have seen in the past is if your /storage/log partition is full and you may need to perform a clean up before continuing.

Step 5 - Once the upgrade has completed, you just need to reboot your VCSA by running the following command:

shutdown reboot -r "Updated to vSphere 6.0u1"

upgrade-from-vcsa-6.0-to-vcsa-6.0-update-1-2
Step 6 - A quick way to confirm that you have successfully upgraded your VCSA to vSphere 6.0 Update 1, simply open a browser to the following URL: https://[VCSA-IP]:5480 and it should take you to the new HTML5 VAMI interface.

upgrade-from-vcsa-6.0-to-vcsa-6.0-update-1-3
If you would like additional information, take a look at this VMware KB 2119924.

Categories // VAMI, VCSA Tags // appliancesh, upgrade, vami, VCSA, vcva, vSphere 6.0 Update 1

vCenter Server 6.0 Tidbits Part 5: New method of patching the VCSA/PSC

04.17.2015 by William Lam // 9 Comments

In previous releases of the VCSA, patching and updating of the VCSA was performed through what was known as the VAMI interface which provided both a UI as well as a command-line which I have blogged about here. The simplest and easiest method was of course using the UI which just required opening a browser to https://[VCSA]:5480 as seen in the screenshot below.

UPDATE (09/04/15) - In vSphere 6.0 Update 1, URL based patching is now available. You can find more details here.

patching-vcsa-6.0-0
In the VCSA 6.0, the old VAMI UI interface no longer exists and to update/patch the VCSA you will need to use the appliancesh command-line interface. There is a command called "software-packages" which is used to update/patch the software on the VCSA. This information is also documented here.

patching-vcsa-6.0-2
VMware just recently released a patch update to vSphere 6.0 and one of the updates is applicable to VCSA (Embedded) and VC/PSC (External) as noted in this VMware KB 211640. There are two patches (Third Party & Bug/Security Fix) which are available as an ISO which can be downloaded from here.

patching-vcsa-6.0-1
Before you can apply the patch/update, you will need to mount the patch ISO to your VCSA/PSC using either the vSphere C#/Web Client as you would with any other ISO. The second step is to login to the VCSA/PSC and if you have disable the appliancesh, you just need to type "appliancesh" and you will be prompted to login with your root credentials.

Once logged into the applianesh, the software-packages supports two options:

  • Stage patches from ISO and then install
  • Stage patches from ISO and install at a later time

If you wish to perform the update/patch in a single step by staging and installing, you can run the following command:

software-packages install --iso --acceptEulas

patching-vcsa-6.0-3
If you wish to only stage the patches but not install, you can do so by running the following command:

software-packages stage --iso --acceptEulas

Once you are ready to install the staged patches, you will need to run the following command:

software-packages install --staged

  • vCenter Server 6.0 Tidbits Part 1: What install & deployment parameters did I use?
  • vCenter Server 6.0 Tidbits Part 2: What is my SSO Domain Name & Site Name?
  • vCenter Server 6.0 Tidbits Part 3: Finding all deployed Platform Services Controller
  • vCenter Server 6.0 Tidbits Part 4: Finding all deployed vCenter Servers
  • vCenter Server 6.0 Tidbits Part 5: New method of patching the VCSA
  • vCenter Server 6.0 Tidbits Part 6: Customizing VCSA’s DCUI
  • vCenter Server 6.0 Tidbits Part 7: Connecting to SSO/PSC using JExplorer
  • vCenter Server 6.0 Tidbits Part 8: Useful ldapsearch queries for vmdird
  • vCenter Server 6.0 Tidbits Part 9: Creating & managing SSO users using dir-cli
  • vCenter Server 6.0 Tidbits Part 10: Automating SSO Admin configurations
  • vCenter Server 6.0 Tidbits Part 11: Automate SSO Admin password change
  • vCenter Server 6.0 Tidbits Part 12: New methods of downloading Support Bundles for VCSA / PSC

Categories // Automation, VCSA, vSphere 6.0 Tags // appliancesh, platform service controller, psc, software-packages, vami, VCSA, vcva

How to change/deploy VCSA 6.0 with default bash shell vs appliancesh?

03.06.2015 by William Lam // 10 Comments

When logging into the new VCSA 6.0 via SSH, you will notice that you are no longer dropped into a normal bash shell but into a new appliancesh (pronounced appliance shell) environment. This new interface provides basic set of virtual appliance management capabilities including Ruby vSphere Console (RVC) access which makes the majority of operations convenient to a vSphere Administrator but it also helps restrict unnecessary access to the underlying filesystem which can be helpful from a security standpoint.

If you need to access the underlying filesystem, you can temporarily enable it by running the following two commands:

shell.set --enabled True
shell

applianceshell-default-bash
If you need to transfer files to/from the VCSA via SCP/WinSCP, you will need to change the default shell from /bin/appliancesh to /bin/bash else the operation will fail. You can easily do this by using the chsh command:

chsh -s "/bin/bash" root

If you rather have the BASH shell configured as the default after deployment and not have to go through this manual process each time, you can actually configured using the following hidden option called guestinfo.cis.appliance.root.shell

This property allows you to specify the default shell for the "root" account and you can only modify this if you deploy the VCSA using ovftool. Here is the parameter you would append to the ovftool argument list:

--prop:guestinfo.cis.appliance.root.shell="/bin/bash"

You can leverage this new property and automate the deployment of the new VCSA 6.0 and for more details be sure to check out my VCSA 6.0 Automation Series.

Categories // Automation, OVFTool, VCSA, vSphere 6.0 Tags // appliancesh, guestinfo, ovftool, VCSA, vcva, vSphere 6.0

  • « Previous Page
  • 1
  • 2

Search

Thank Author

Author

William is Distinguished Platform Engineering Architect in the VMware Cloud Foundation (VCF) Division at Broadcom. His primary focus is helping customers and partners build, run and operate a modern Private Cloud using the VMware Cloud Foundation (VCF) platform.

Connect

  • Bluesky
  • Email
  • GitHub
  • LinkedIn
  • Mastodon
  • Reddit
  • RSS
  • Twitter
  • Vimeo

Recent

  • Programmatically accessing the Broadcom Compatibility Guide (BCG) 05/06/2025
  • Quick Tip - Validating Broadcom Download Token  05/01/2025
  • Supported chipsets for the USB Network Native Driver for ESXi Fling 04/23/2025
  • vCenter Identity Federation with Authelia 04/16/2025
  • vCenter Server Identity Federation with Kanidm 04/10/2025

Advertisment

Privacy & Cookies: This site uses cookies. By continuing to use this website, you agree to their use.
To find out more, including how to control cookies, see here: Cookie Policy

Copyright WilliamLam.com © 2025


Loading Comments...