After publishing my Running Nested ESXi, NSX-V or NSX-T on top of NSX-T article which actually turned out to be quite popular, I received an interesting question on whether ENS for NSX-T could also be configured within a Nested ESXi deployment? I was a little familiar with ENS, which I will explain in a second. However, I was not completely sure about the benefits of running ENS in a Nested environment.
With the help from my friend Frank Escaros-Buechsel, who actually works in our NFV group at VMware. Frank helped validate the instructions but he also provided some additional insights on why this could be useful in a lab setup for verifying configuration and behaviors when additional tuning maybe required. If you are NOT running NFV-based workloads, ENS is not something you need to configure when running NSX-T using Nested ESXi.
So what is ENS? Enhanced Network Stack (ENS) also referred to as Enhanced Data Path is an NSX-T capability which was first introduced with NSX-T 2.3. ENS is specifically designed for Network Function Virtualization (NFV) workloads that require a high performance data path. Such workloads include Telco, 5G and IoT based deployments where improved packet throughput is critical for the responsiveness of these applications.
To setup ENS in a physical NSX-T deployment, you will need to have a supported network adaptor on your ESXi host along with a vendor-specific Poll Mode Driver which can be downloaded from the VMware HCL. Since we are trying to configure ENS using Nested ESXi, we only have to ensure our Nested ESXi VM has been configured with the VMXNET3 Virtual NIC (which if you are using my Nested ESXi Virtual Appliance, this is already configured for you) and that you are running vSphere 6.7 Update 2 or newer. With the release of ESXi 6.7 Update 2, a new Native VMXNET3 ENS Driver is now included and when ENS is configured using Nested ESXi, this new driver will automatically be claimed when your ESXi hosts are prepped by NSX-T.
Step 0 (Optional) - Before prepping your Nested ESXi VMs in NSX-T, we can confirm that the standard nvmxnet3 (Native Driver for VMXNET3) is currently loaded. To do so, simply SSH to the Nested ESXi VM and run esxcfg-nics -e which will provide additional ENS specific information about the physical network adaptors.
You will see two interesting columns "ENS Capable" and "ENS Driven" and only the first column is currently showing true. We will return to this command in a bit.

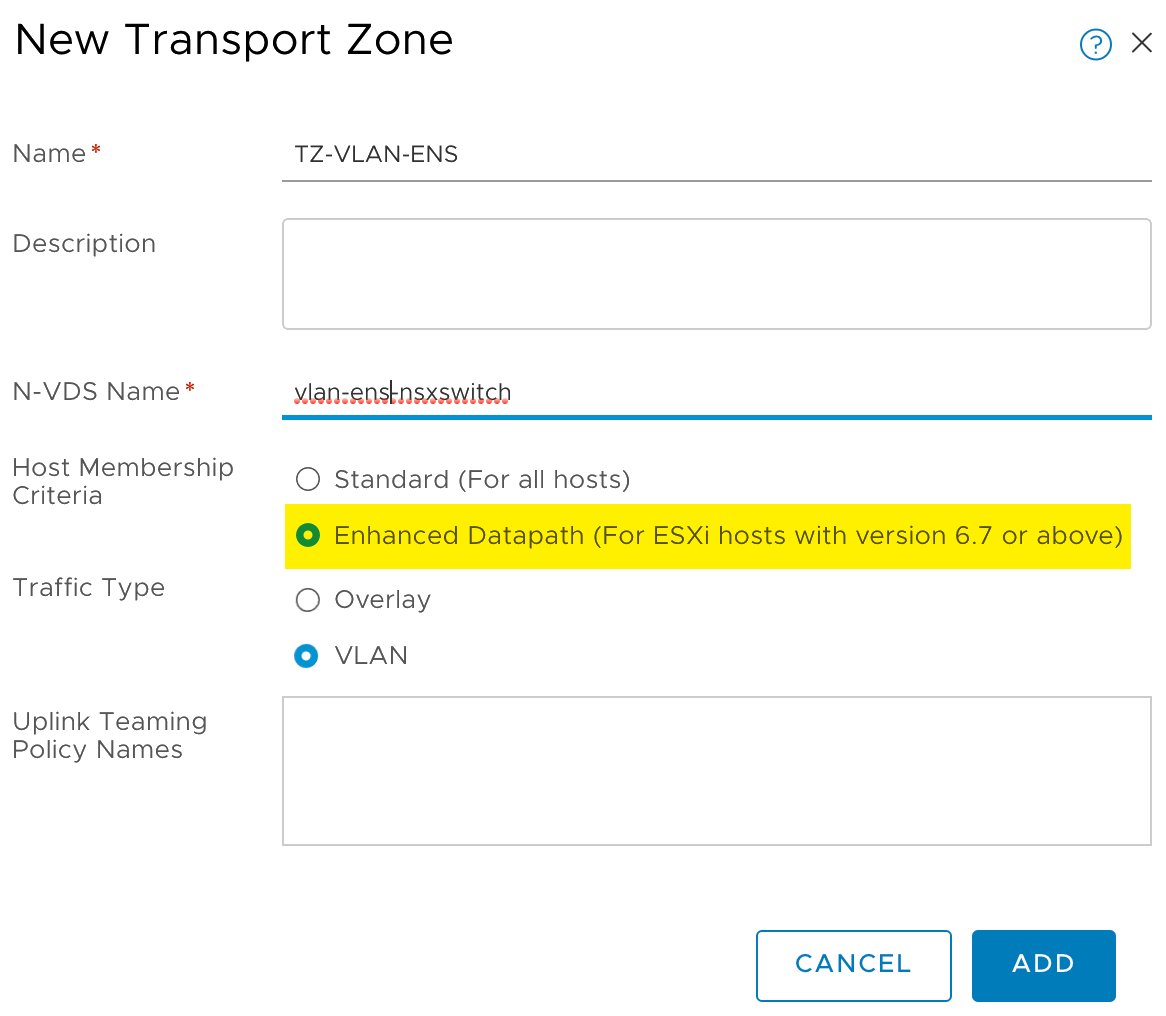
Step 1 - To enable ENS in NSX-T, you will need to create a Transport Zone and specify that the host switch type is ENS rather than the standard default.
If you are using the NSX-T 2.4 or newer release, specifying the host switch type is now available as part of the NSX-T Manager UI when creating a Transport Zone as shown in the screenshot below.
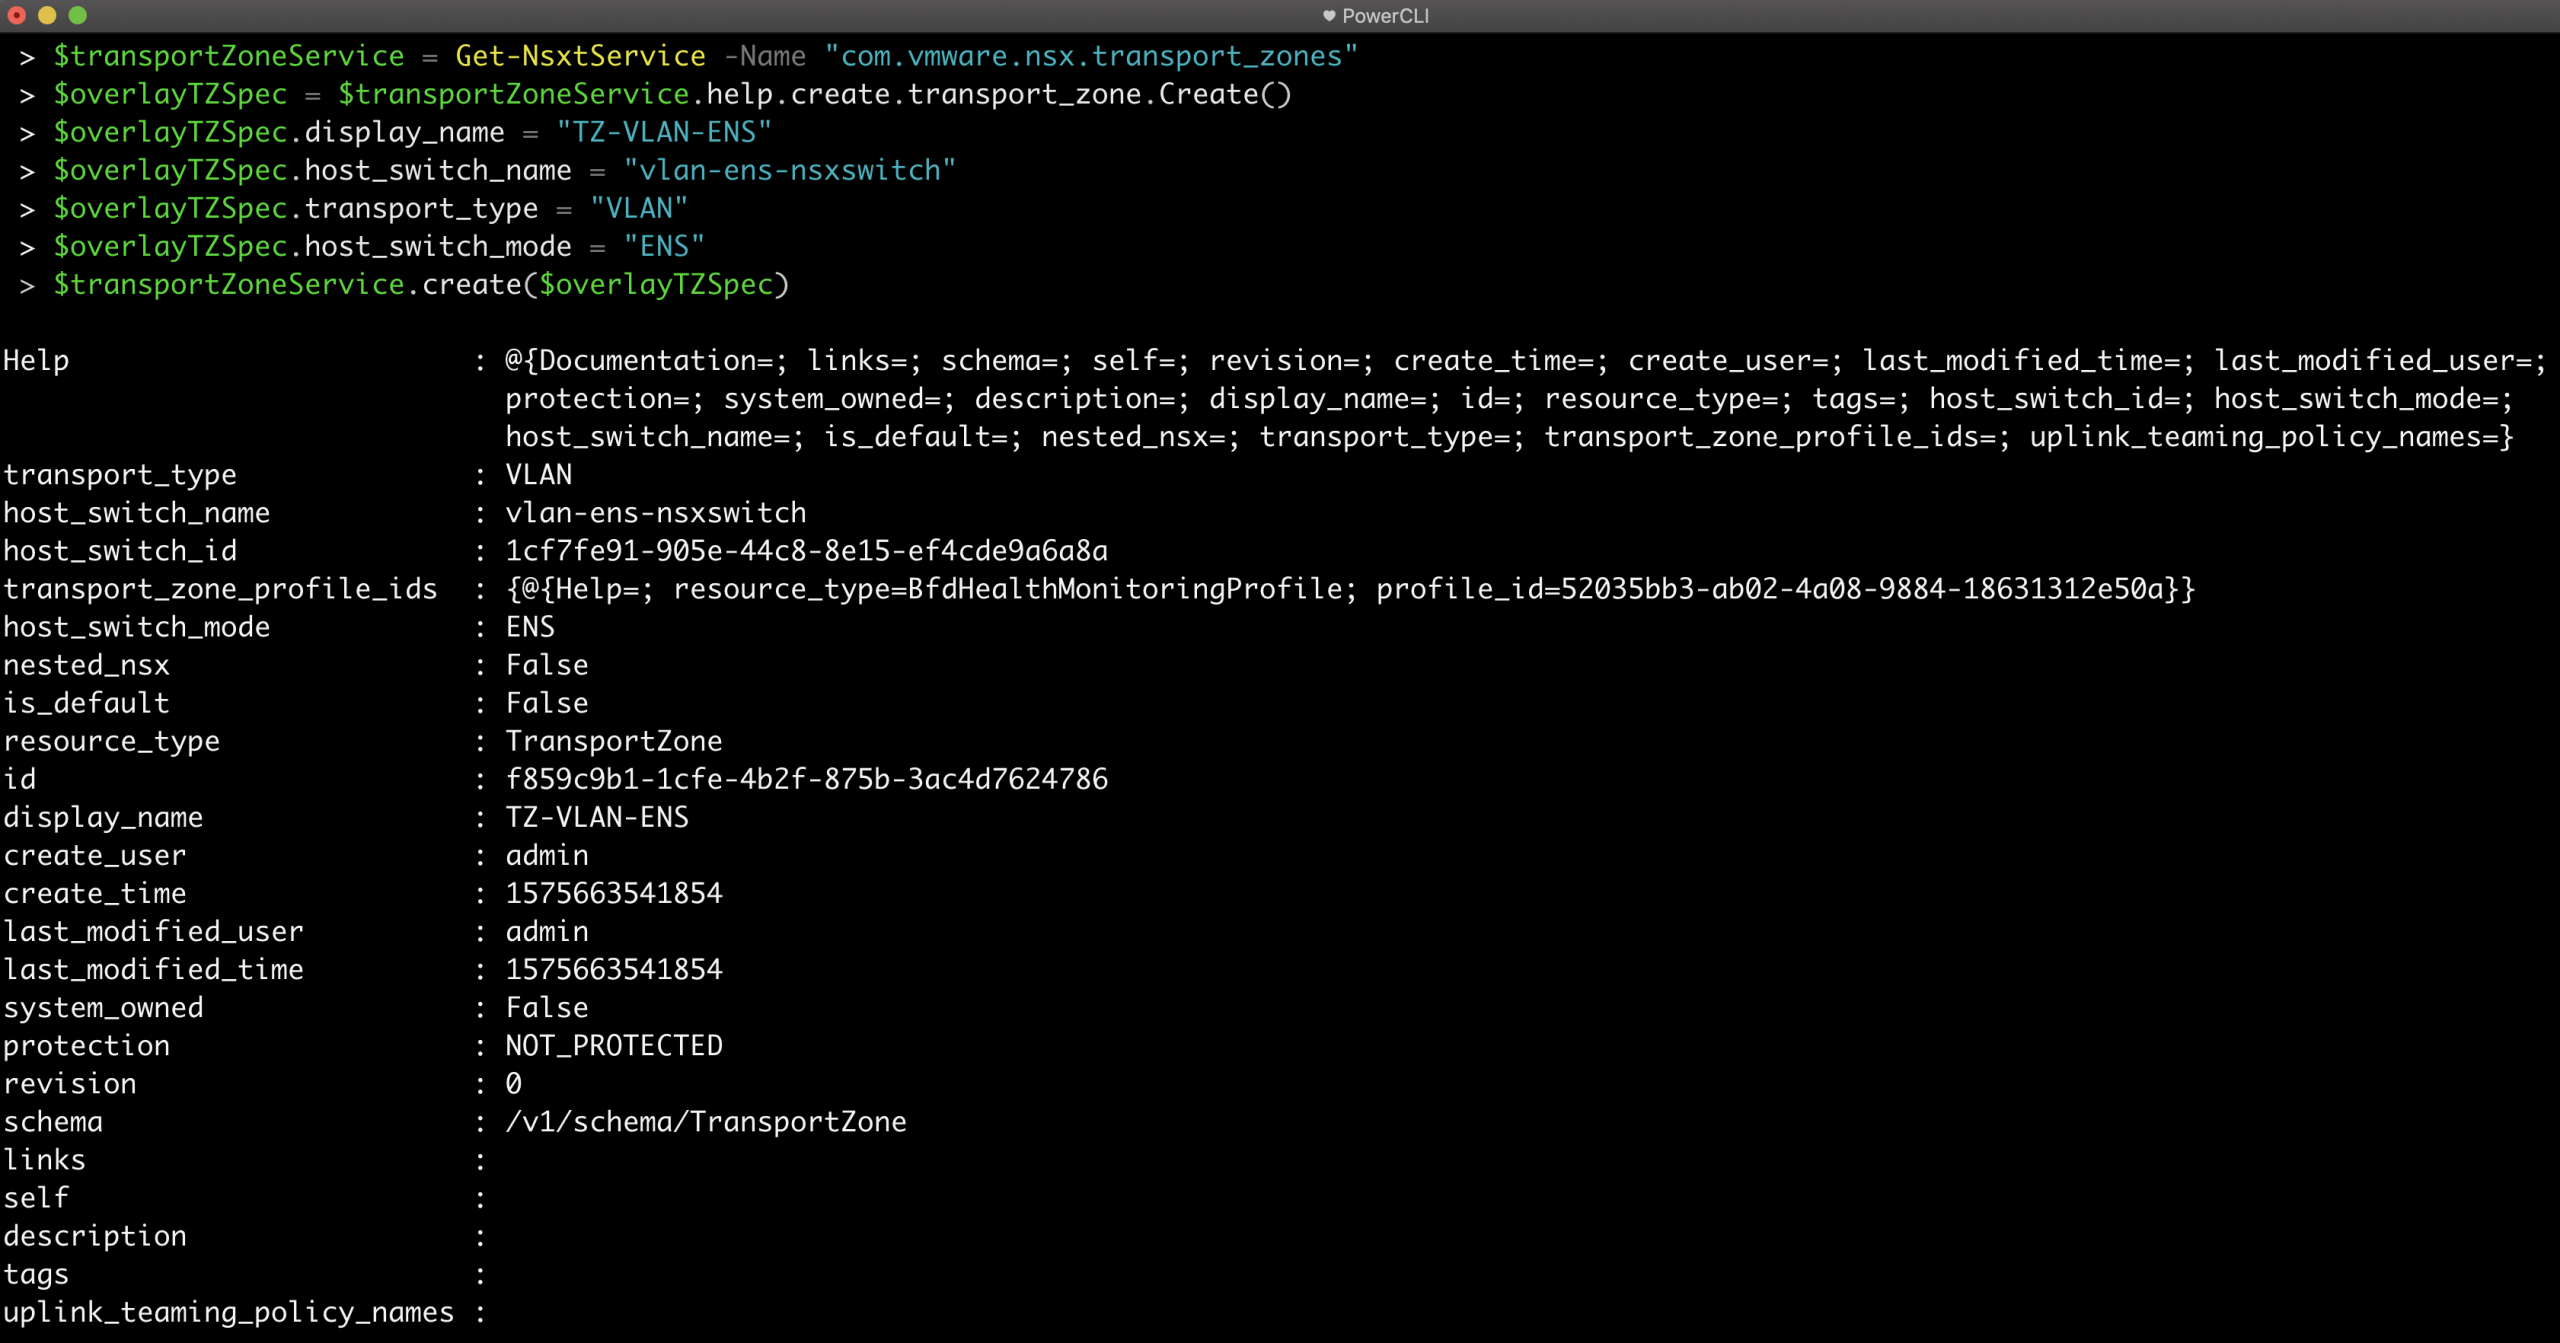
If you are not running NSX-T 2.4, then specifying the host switch type when creating a Transport Zone must be done using the NSX-T Manager API. Below is a PowerCLI snippet using NSX-T cmdlets to create a new Transport Zone and specifying ENS host switch type.
Connect-NsxtServer -Server nsx.primp-industries.com

$transportZoneService = Get-NsxtService -Name "com.vmware.nsx.transport_zones"
$overlayTZSpec = $transportZoneService.help.create.transport_zone.Create()
$overlayTZSpec.display_name = "TZ-VLAN-ENS"
$overlayTZSpec.host_switch_name = "vlan-ens-nsxswitch"
$overlayTZSpec.transport_type = "VLAN"
$overlayTZSpec.host_switch_mode = "ENS"
$transportZoneService.create($overlayTZSpec)
Step 2 - Once you have created your Transport Zone, then you can setup NSX-T just like you normally would and prep your Nested ESXi VMs.

Step 3 - Once the ESXi hosts have been prepped, let now go back and re-run Step 0 and what you should now see is a new nvmxnet3_ens driver is now claimed and we can now see both columns for ENS Capable/Driven is now showing true, meaning ENS has been properly configured for our Nested ESXi VMs.

As you can see, the process of enabling ENS for a Nested ESXi setup is pretty straight forward and can benefit those that with NFV-based workloads by first verifying this in a "Nested" environment before applying this to physical deployment.
Thanks for the comment!