Creating a custom ESXi Image Profile that incorporates additional ESXi drivers such as the recently released Community Networking Driver for ESXi Fling or Community NVMe Driver for ESXi Fling is a pretty common workflow. Due to the infrequency of this activity, many new and existing users sometime struggle with the process to quickly construct a new custom ESXi Image Profile. I personally prefer to use the Image Builder UI that is built right into the vSphere UI as part of vCenter Server.
There are a couple of ways to create a custom new ESXi Image Profile using the Image Builder UI, but the easiest method is to use the Clone workflow, which is especially helpful when you are selecting an ESXi patch release as your base image.
With a regular major release, you only have to deal with two image profiles: standard (includes VMware Tools) and no-tools (does not include VMware Tools).

With an ESXi patch release, you actually have four image profiles: standard (includes VMware Tools + all bug/security fixes), security standard (includes VMware Tools + security fixes only), security no-tools (does not include VMware Tools + security fixes only) and no-tools (does not include VMware Tools + all bug fixes)

If you start with an empty custom image profile and then select your ESXi base image, you will notice there are multiple VIB version packages to select from since patch release you had imported earlier actually contains four different ESXi image profiles. Below are a step by step instructions on using the cloning workflow since this is a question I get from users who run into package conflicts not realizing they have selected the same package multiple times.
To access the Image Builder UI, navigate to Menu->Auto Deploy and click on Image Builder.
Step 1 - Upload your ESXi Driver zip file (Component or Offline Bundle) by clicking on the Import button on the upper right hand corner.

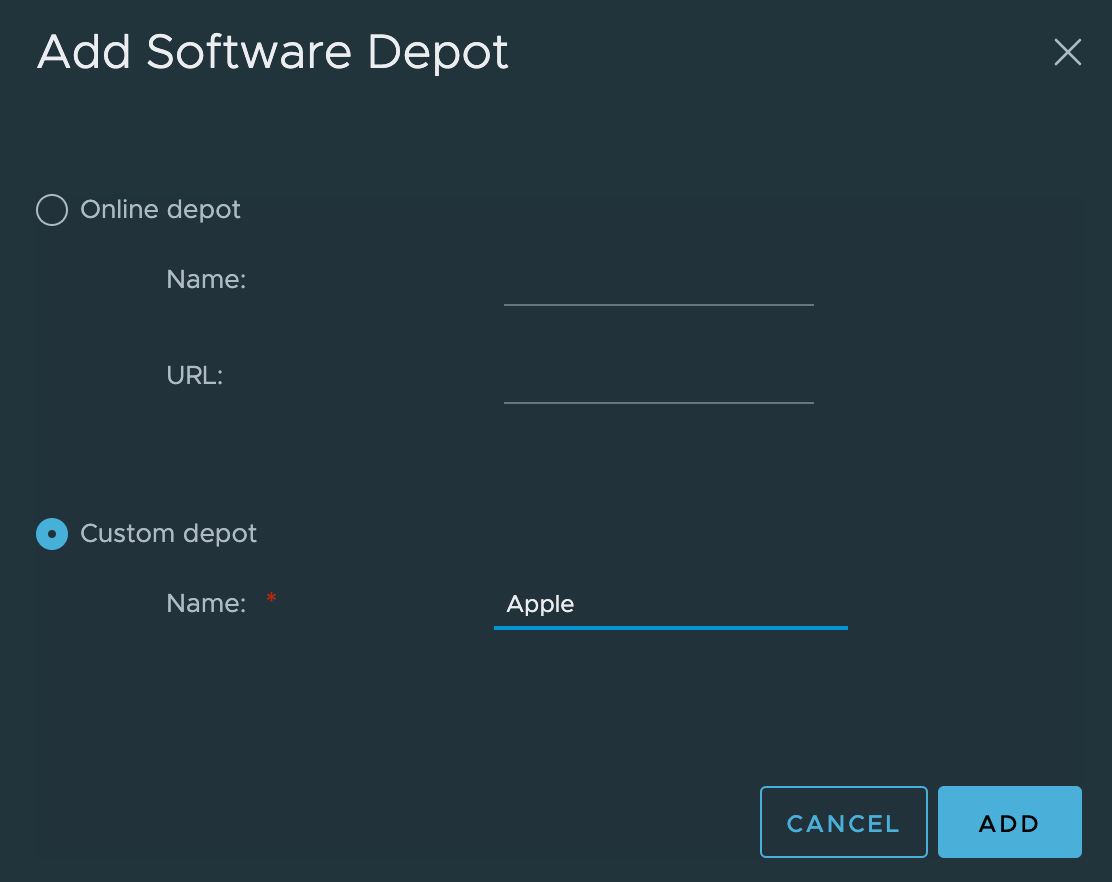
Step 2 - Create a custom depot which will house all your new ESXi custom images by clicking on the New button on the upper right hand corner.
Step 3 - Select the ESXi release from your desired software depot from the drop down menu and then choose on the specific ESXi Image Profile and then click on the Clone operation. This will now use create a new custom ESXi Image Profile using this as the baseline and you can then begin customizing it by adding additional drivers.
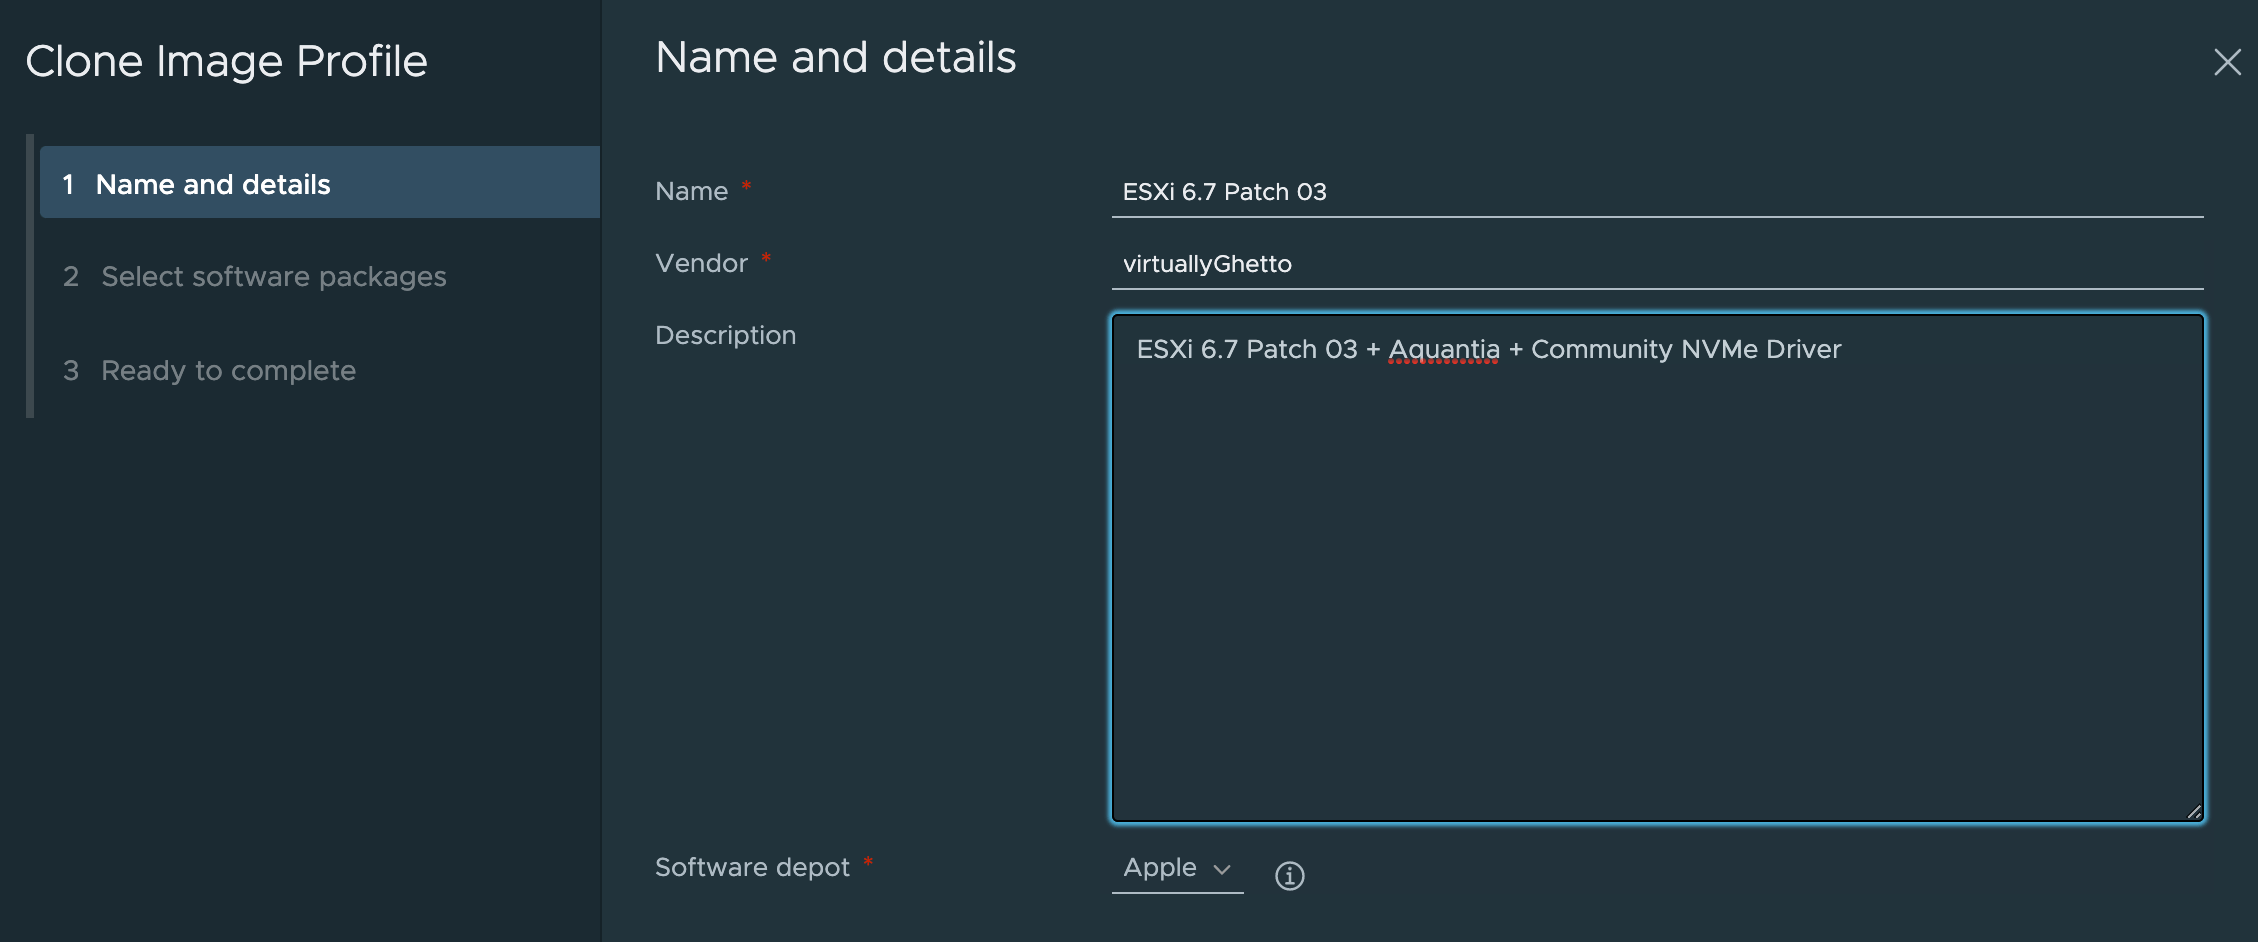
Step 4 - Provide a Name, Vendor and optional description for the new custom Image Profile and then select the new software depot that you had created in Step 2.
Step 5 - Specify the acceptance level if you need to change it and then use the Depot column to filter for the additional drivers you wish to incorporate. Repeat this process until you have selected all drivers you wish to include in this new Image Profile.

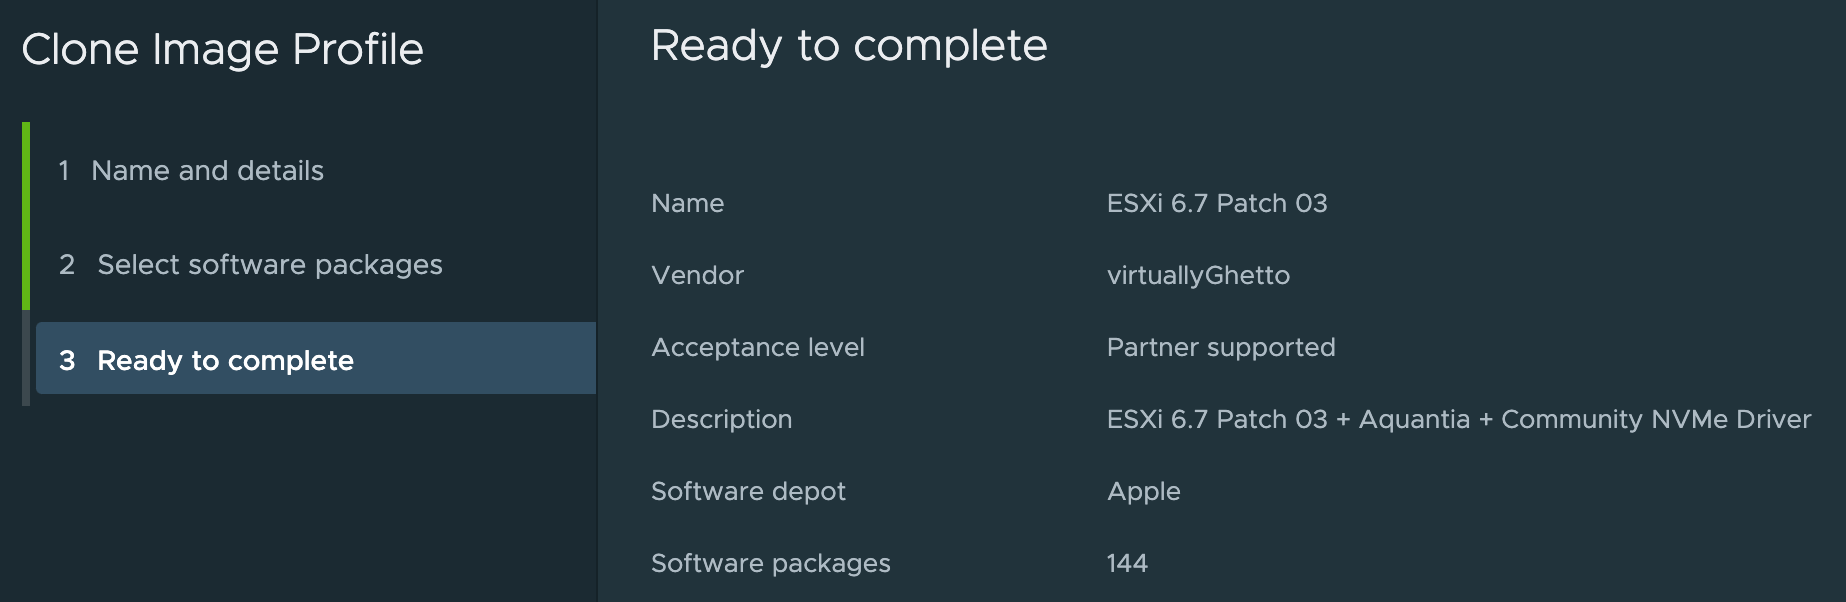
Step 6 - Click next to validate that there are no conflicts and this completes the custom Image Profile creation.
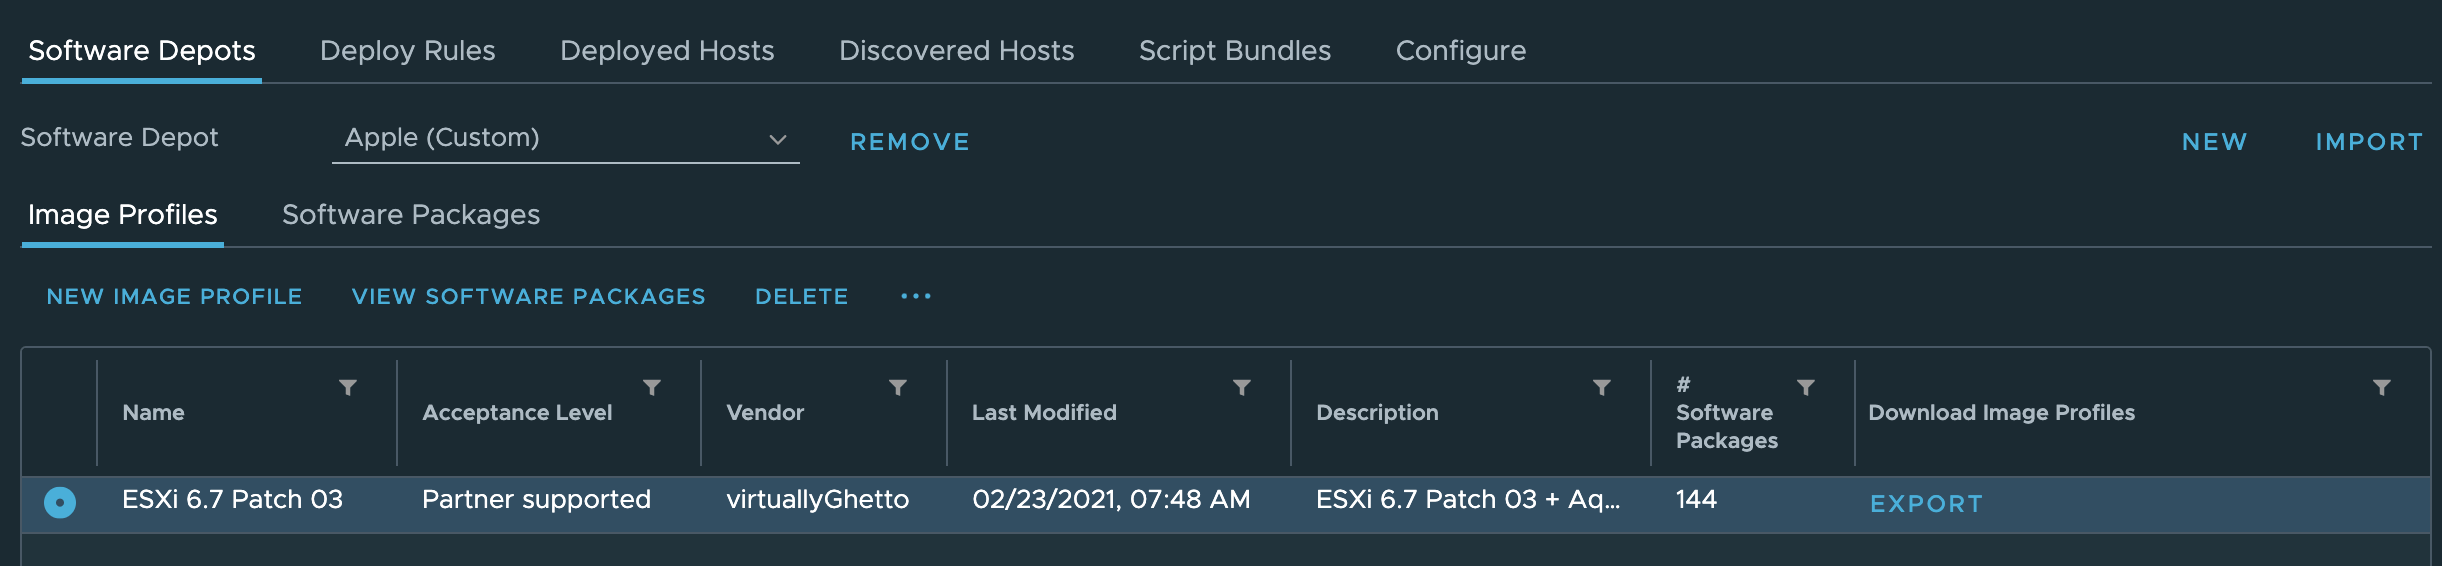
Step 7 - Finally, select the custom Image Profile and click export to the format of your choice (Offline Bundle or ISO) and then download the exported file to your desktop.
Your article was excellent
Thanks
Can this method be used to add drivers from older kernel mode drivers from older ESXI iso images into ESXI 7.0 images?
Nope. If you’re asking about vmklinux and 7.0, those don’t work and you’ll see compat warning. This doesn’t bypass what’s actually supported and vmklinux support has been removed completely as of 7.0 and any of those drivers will not work
That's what I expected was the case. Thank you.
I just got a NUC (NUC11PHKi7c), and need a custom ISO to include the net community driver for the i225-LM ethernet controller. I have an iMac, and it has proven to be a challenge to get the tools for the job. Would you have any pointers?
Not sure why a Mac would be challenge, everything I do is on my iMac 🙂
You will need vCenter access, you could look at deploying it on Fusion to create your custom ISO as one option
We need to incorporate custom ssh settings into all of our hosts (DISA STIGS) Is there a way to do this with image builder?
No. For configurations, this would happen outside for ease of management/scale. There's several options including vSphere Lifecycle Management (vLCM) which looks at this holistically including Image, Drivers & Config (desired state). vSphere Host Profiles to simply post-provisioning configuration are other options. If you want to do simple configs using Kickstart, you could bake that using New-PxeImage which simply outputs the extracted contents which can then be hosted for Scripted Deployment, but this is no different if you took the constructed ISO and extracted it to your system. You'd simply follow typical ESXi Kickstart workflow and I've got a ton of content including official VMware docs
vSphere Host Profiles to simply post-provisioning configuration are other options. If you want to do simple configs using Kickstart, you could bake that using New-PxeImage which simply outputs the extracted contents which can then be hosted for
We need to incorporate custom ssh settings into all of our hosts (DISA STIGS) Is there a way to do this with image builder?