
In this final blog series, we are now going to take a look at deploying our Nested Lab in an Oracle Cloud VMware Solution environment. Similiar to GCVE, we also will have the ability to run Nested vSAN on top of the physical vSAN within OCVS and by default, customers are provided with the full administrator credentials. For networking, customers also have full access to the NSX-T Manager instance and this means that MAC Learning can be enabled and will allow inner-guest workloads will be able to communicate properly within and outside of the Nested Lab deployment.
Disclaimer: Nested ESXi is not officially supported on Oracle Cloud VMware Solution or by VMware.
Pre-Requirements:
- 3-Node SDDC already deployed
- Bastion / Jumphost which has network connectivity to the SDDC Management network. In my setup, a Windows Server VM was deployed using Oracle Cloud Infrastructure Compute (OCI) service which also provided a local DNS (for Hybrid DNS configuration setup, please see to this blog post) server for my nested environment. You will also need to configure access from the Windows VM to your SDDC
- PowerCLI 12.x installed on the Bastion/Jumphost
- Download the desired version of OVAs (vCenter Server Appliance (VCSA) and Nested ESXi Appliance)
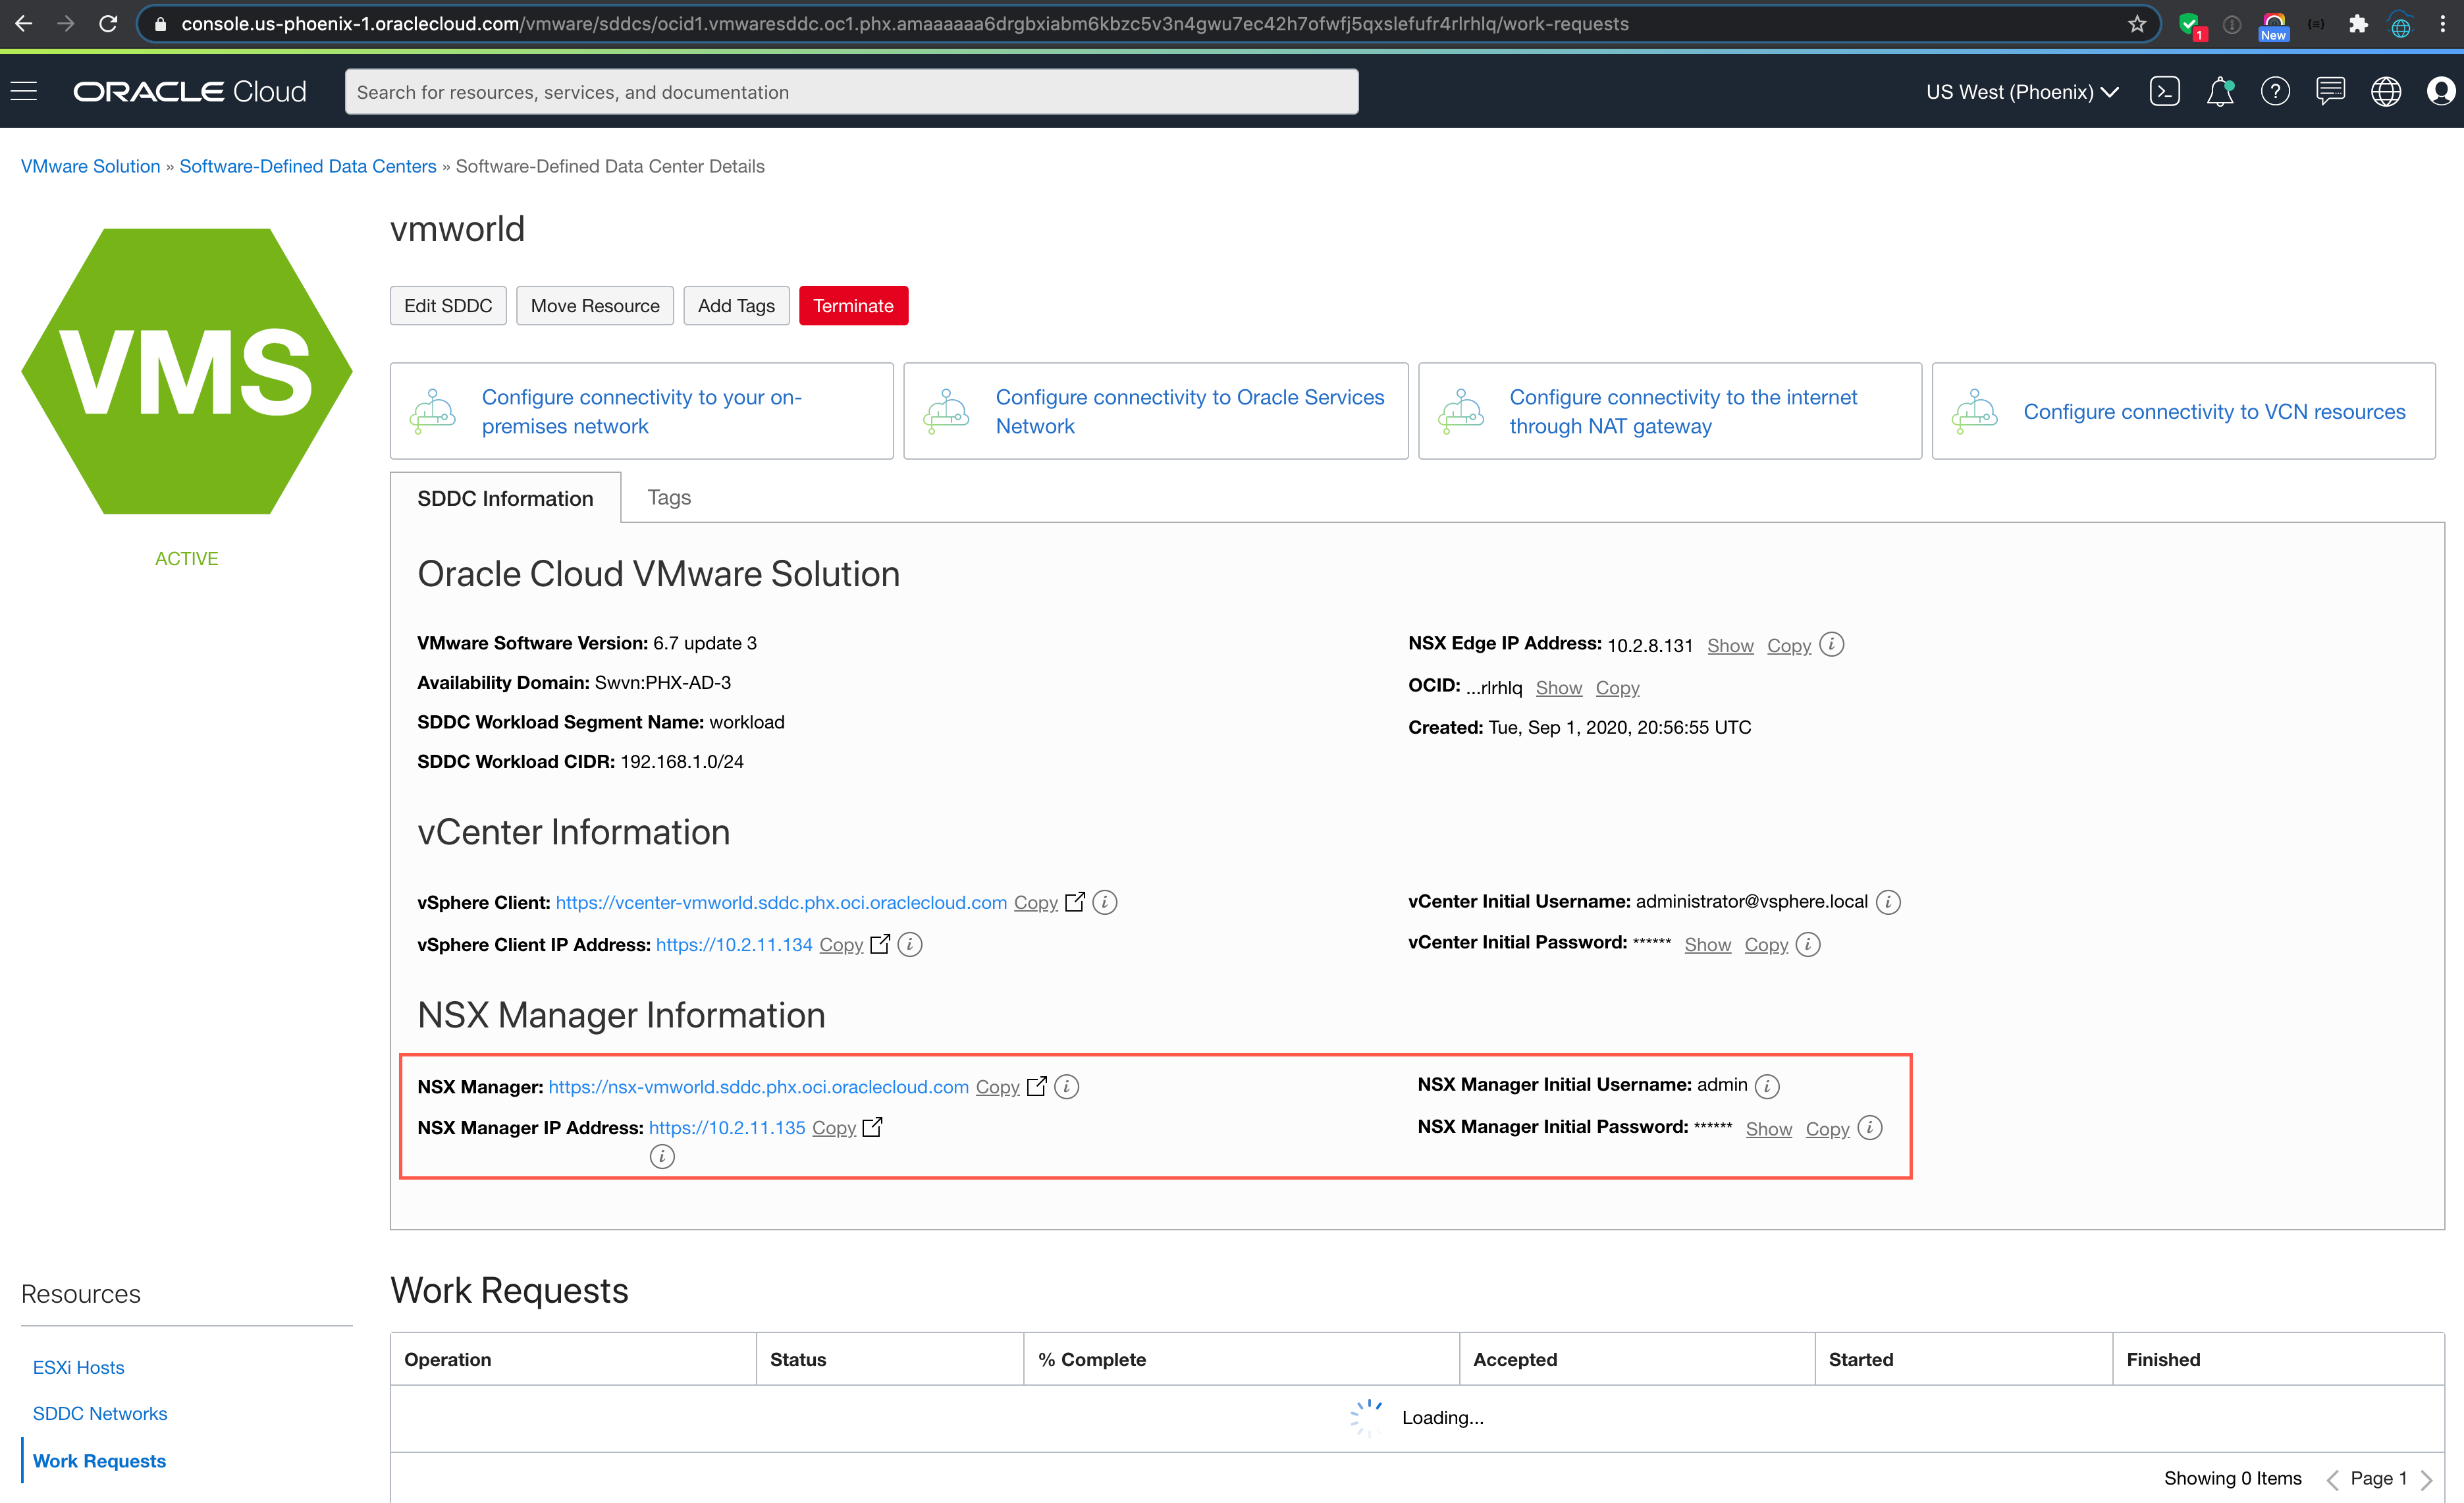
Step 1 - In the OCVS, locate your SDDC and retrieve the NSX-T Manager URL and credentials.
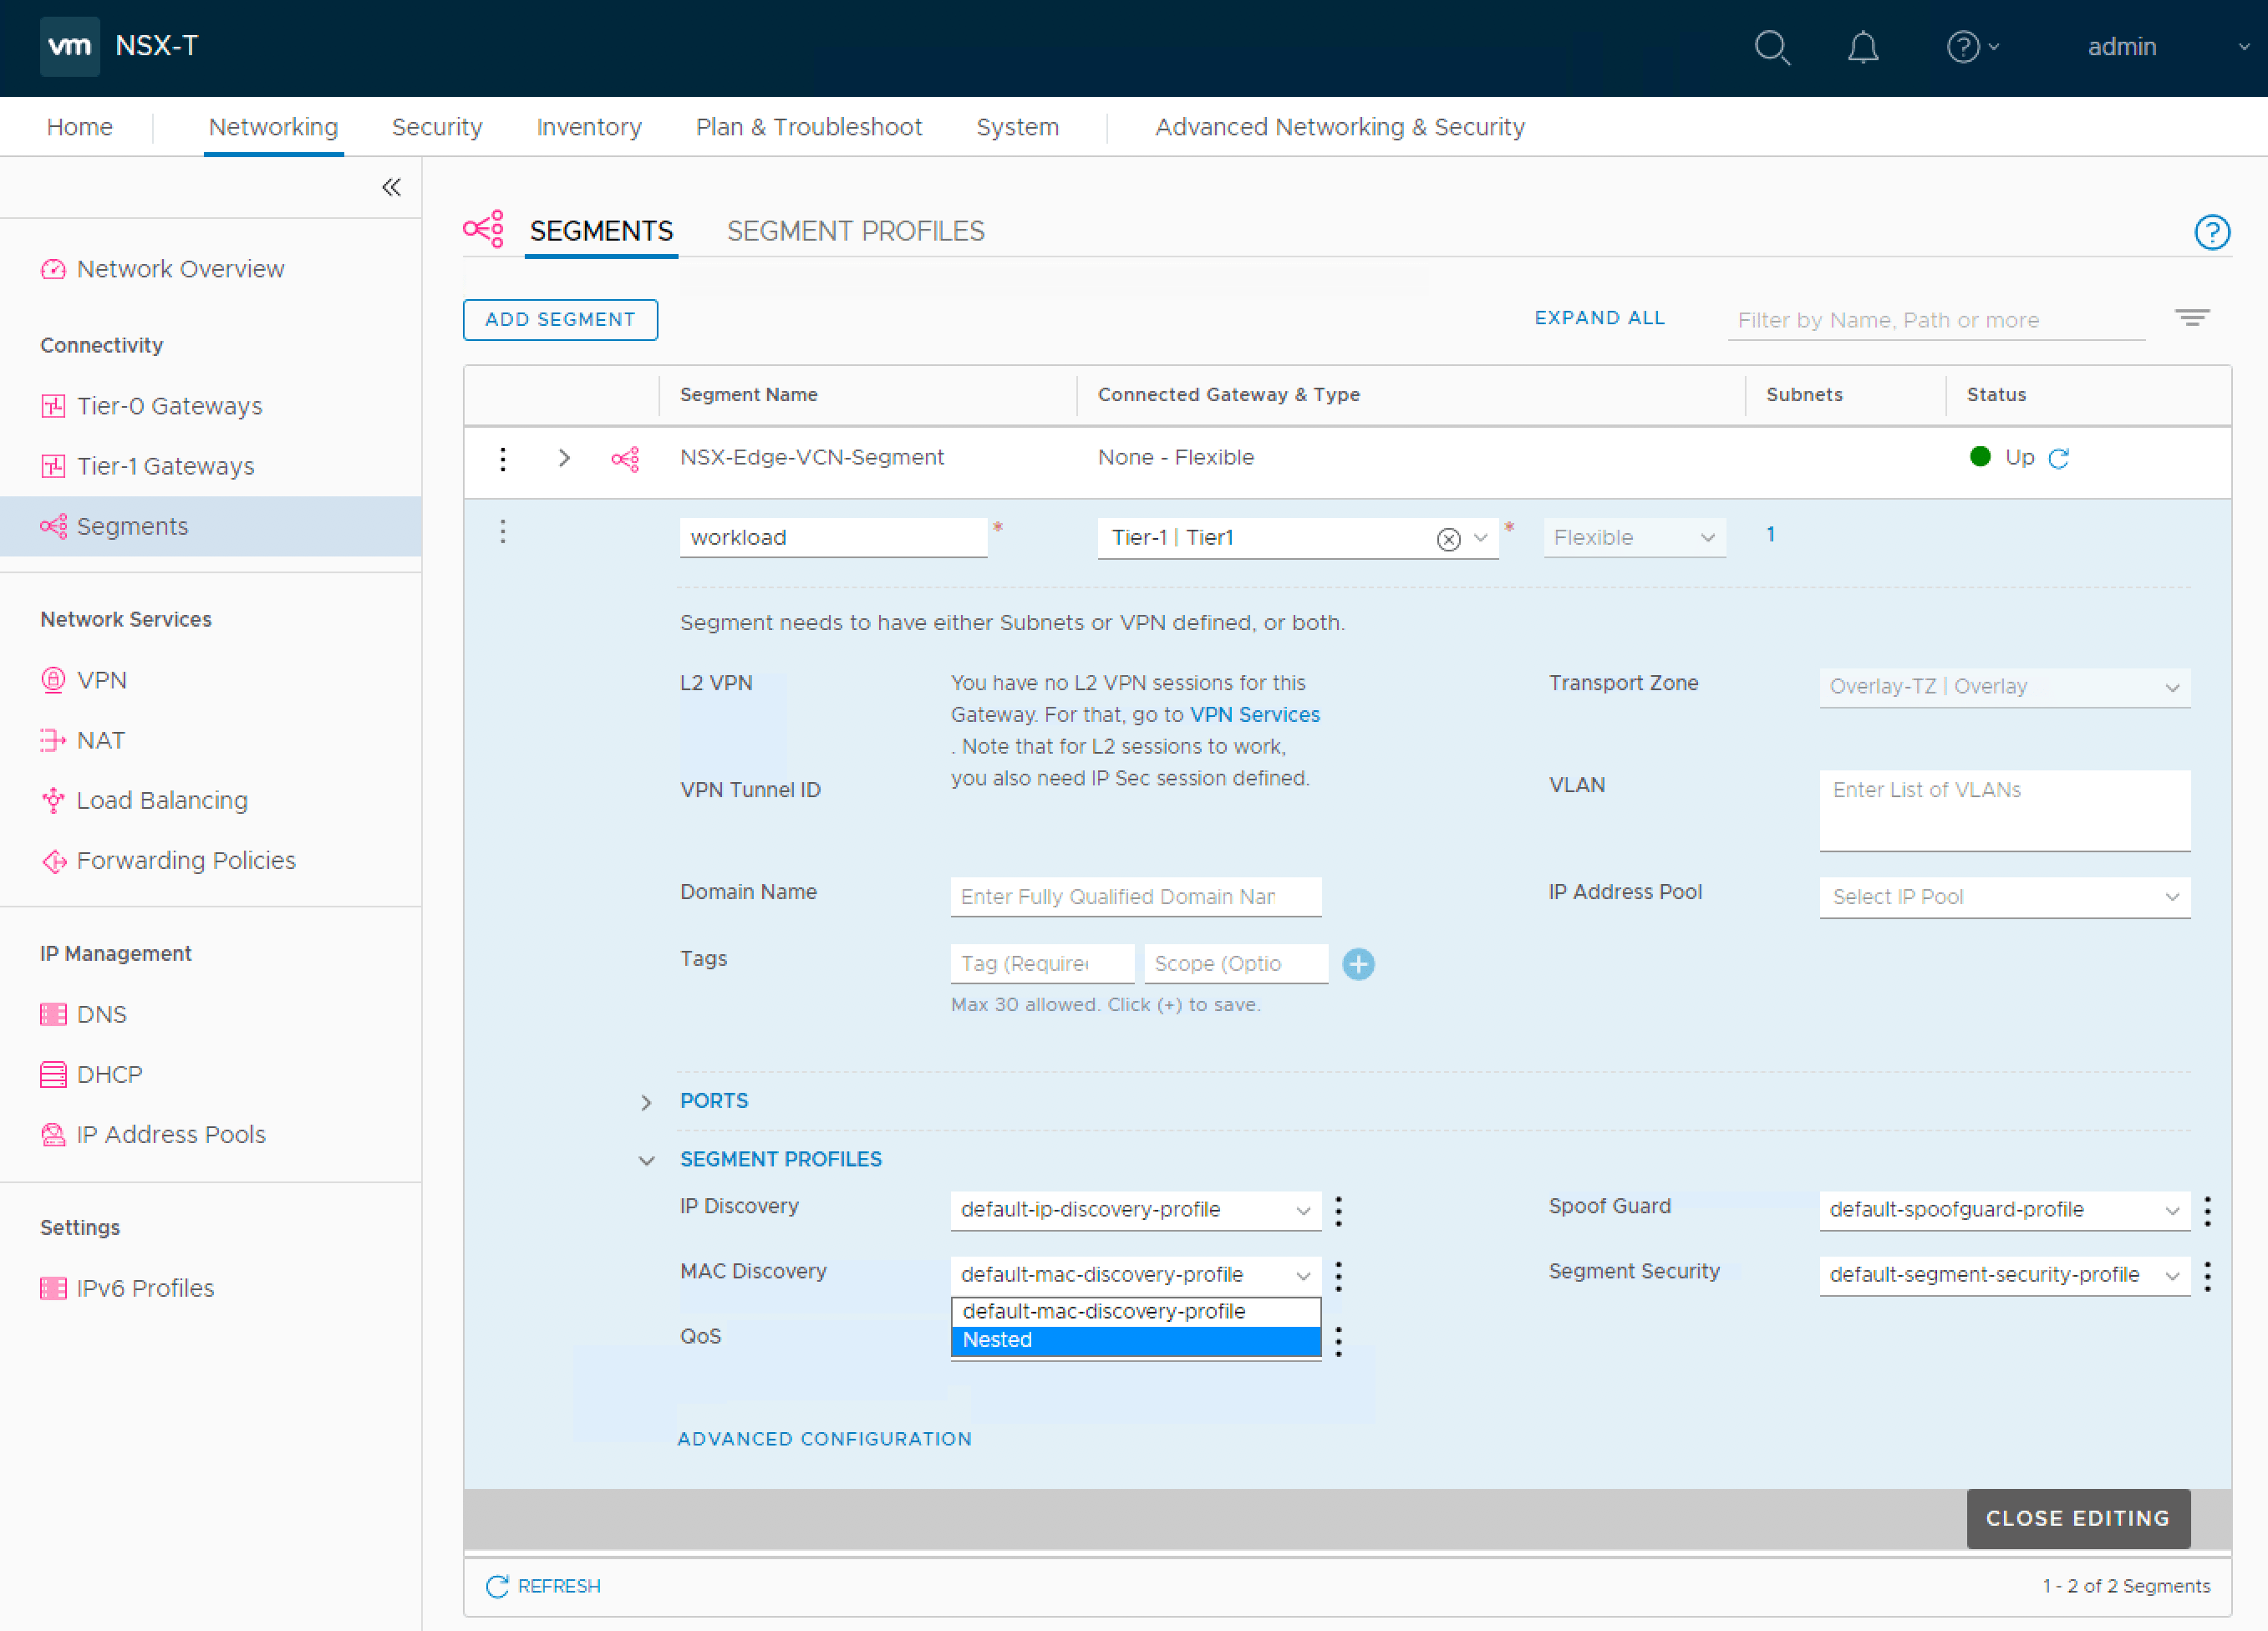
Step 2 - Next, login to NSX-T Manager with admin and the credentials that was configured when creating the SDDC. Under Networking, select Segment Profiles and create a new Segment Profile called Nested with the MAC Learning feature enabled.
Step 3 - Under Segments, either select an existing or create a new NSX-T Segment with the desired network configurations and make sure to select our custom Nested for MAC Discovery section while leaving the defaults for the other profiles.
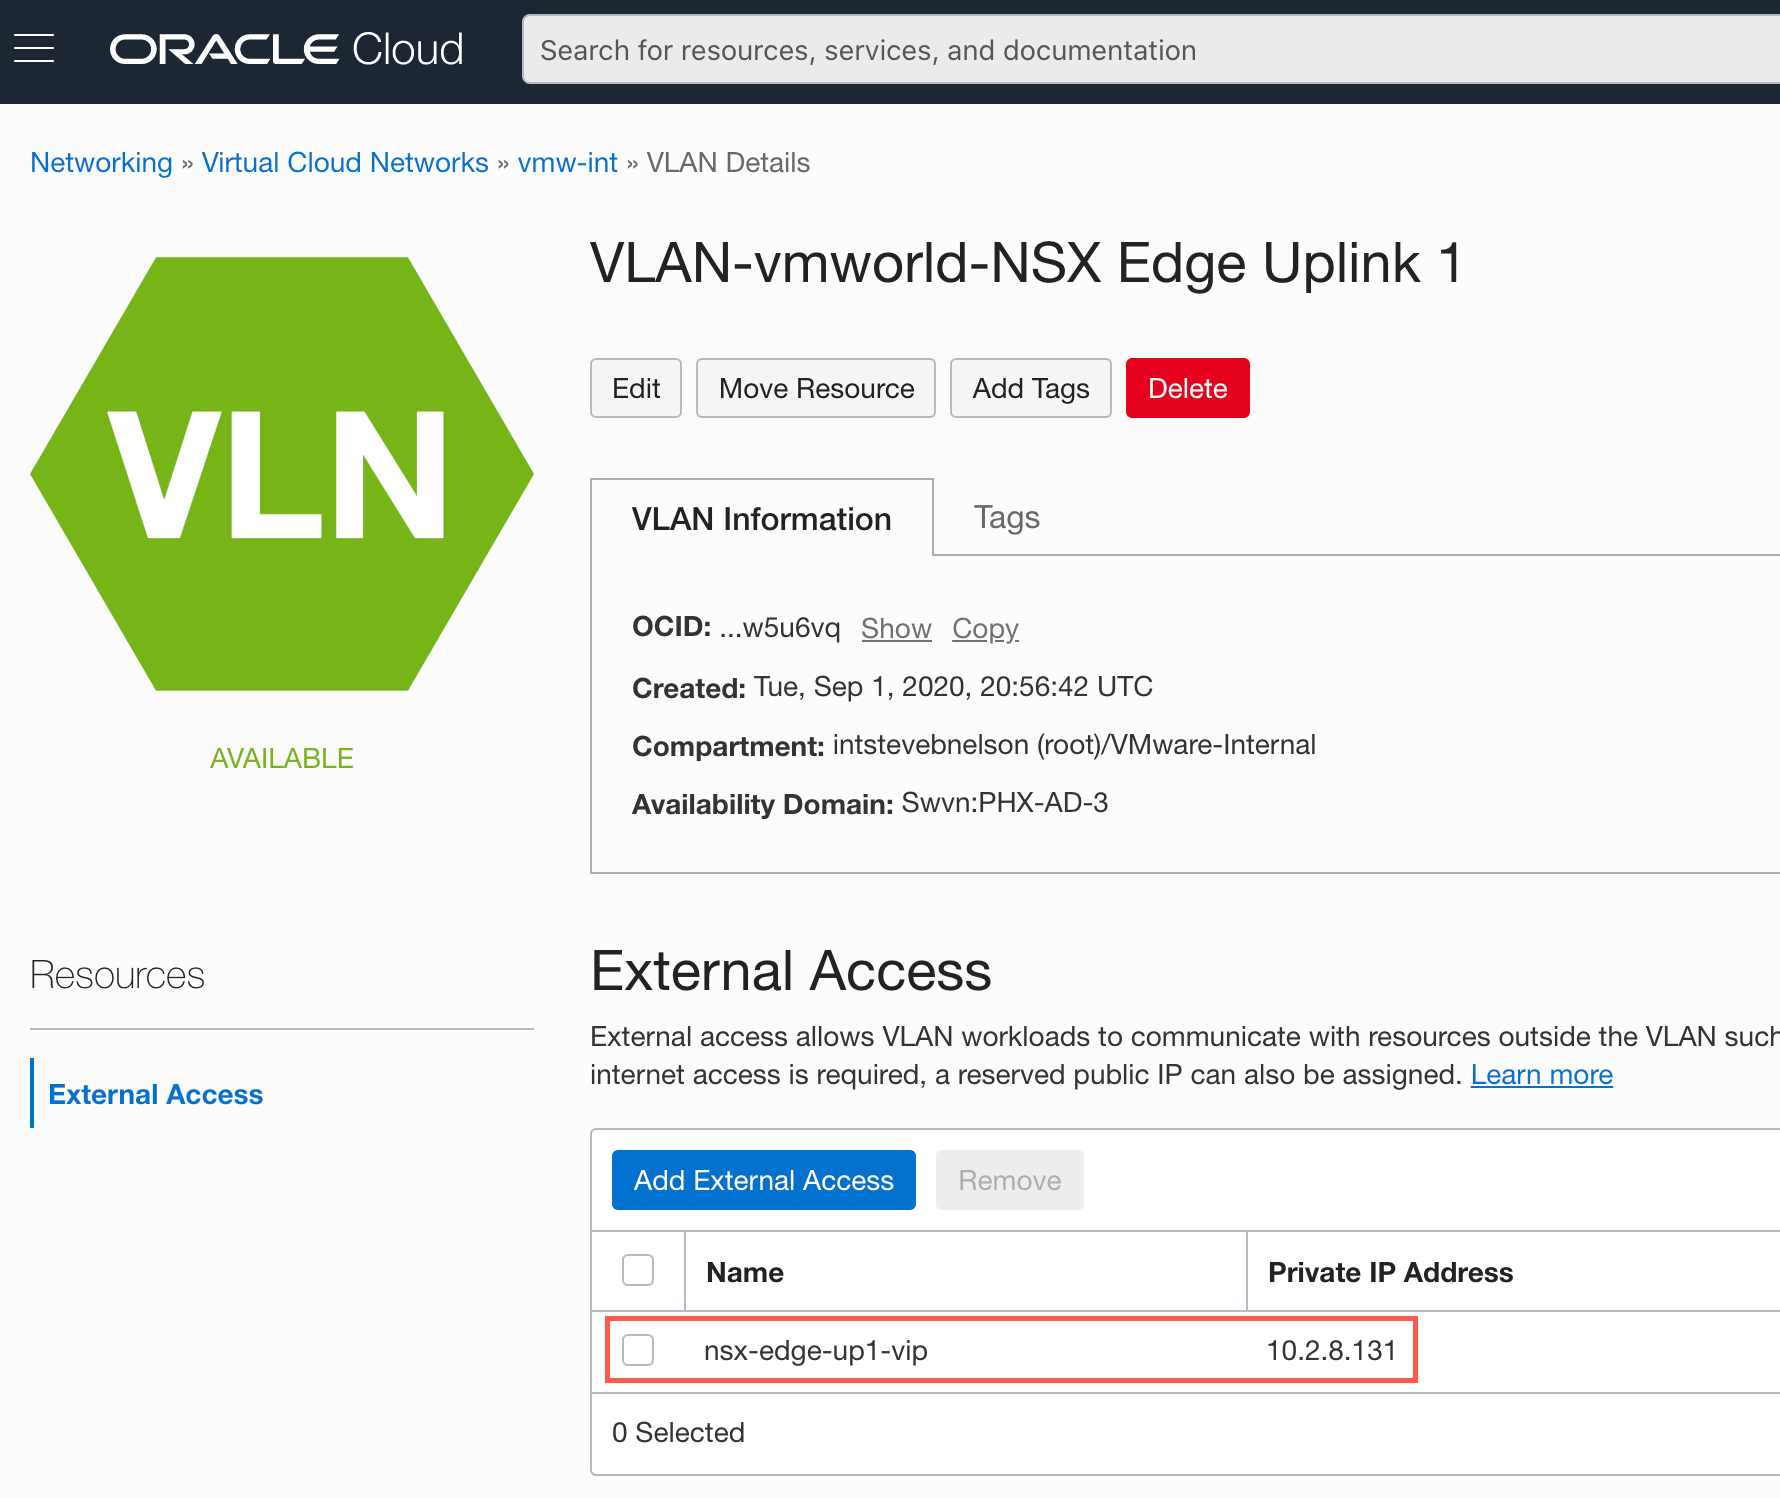
Step 4 - Next, we need to retrieve the IP Address of our active NSX-T Edge by navigating to Networking->Virtual Cloud Networks (VCN) and the VCN that was created while setting up your SDDC. In our example, the private address is 10.2.8.131 and make a note of this as we will need it in the next step.
Step 5 -We now need to create a couple of NAT rules within the NSX-T Manager to ensure we have proper connectivity from our NSX-T segment to our SDDC. Navigate to Advanced Networking->NAT and create the following two rules where 10.2.0.0/20 is the SDDC CIDR block and 10.2.8.131 is the NSX-T Edge IP:
| Action | Protocol | Source IP | Source Ports | Destination IP | Destination Ports | IP | Ports |
|---|---|---|---|---|---|---|---|
| NO_NAT | Any | 0.0.0.0/0 | Any | 10.2.0.0/20 | Any | Any | Any |
| SNAT | Any | Any | Any | 0.0.0.0 | Any | 10.2.8.131 | Any |

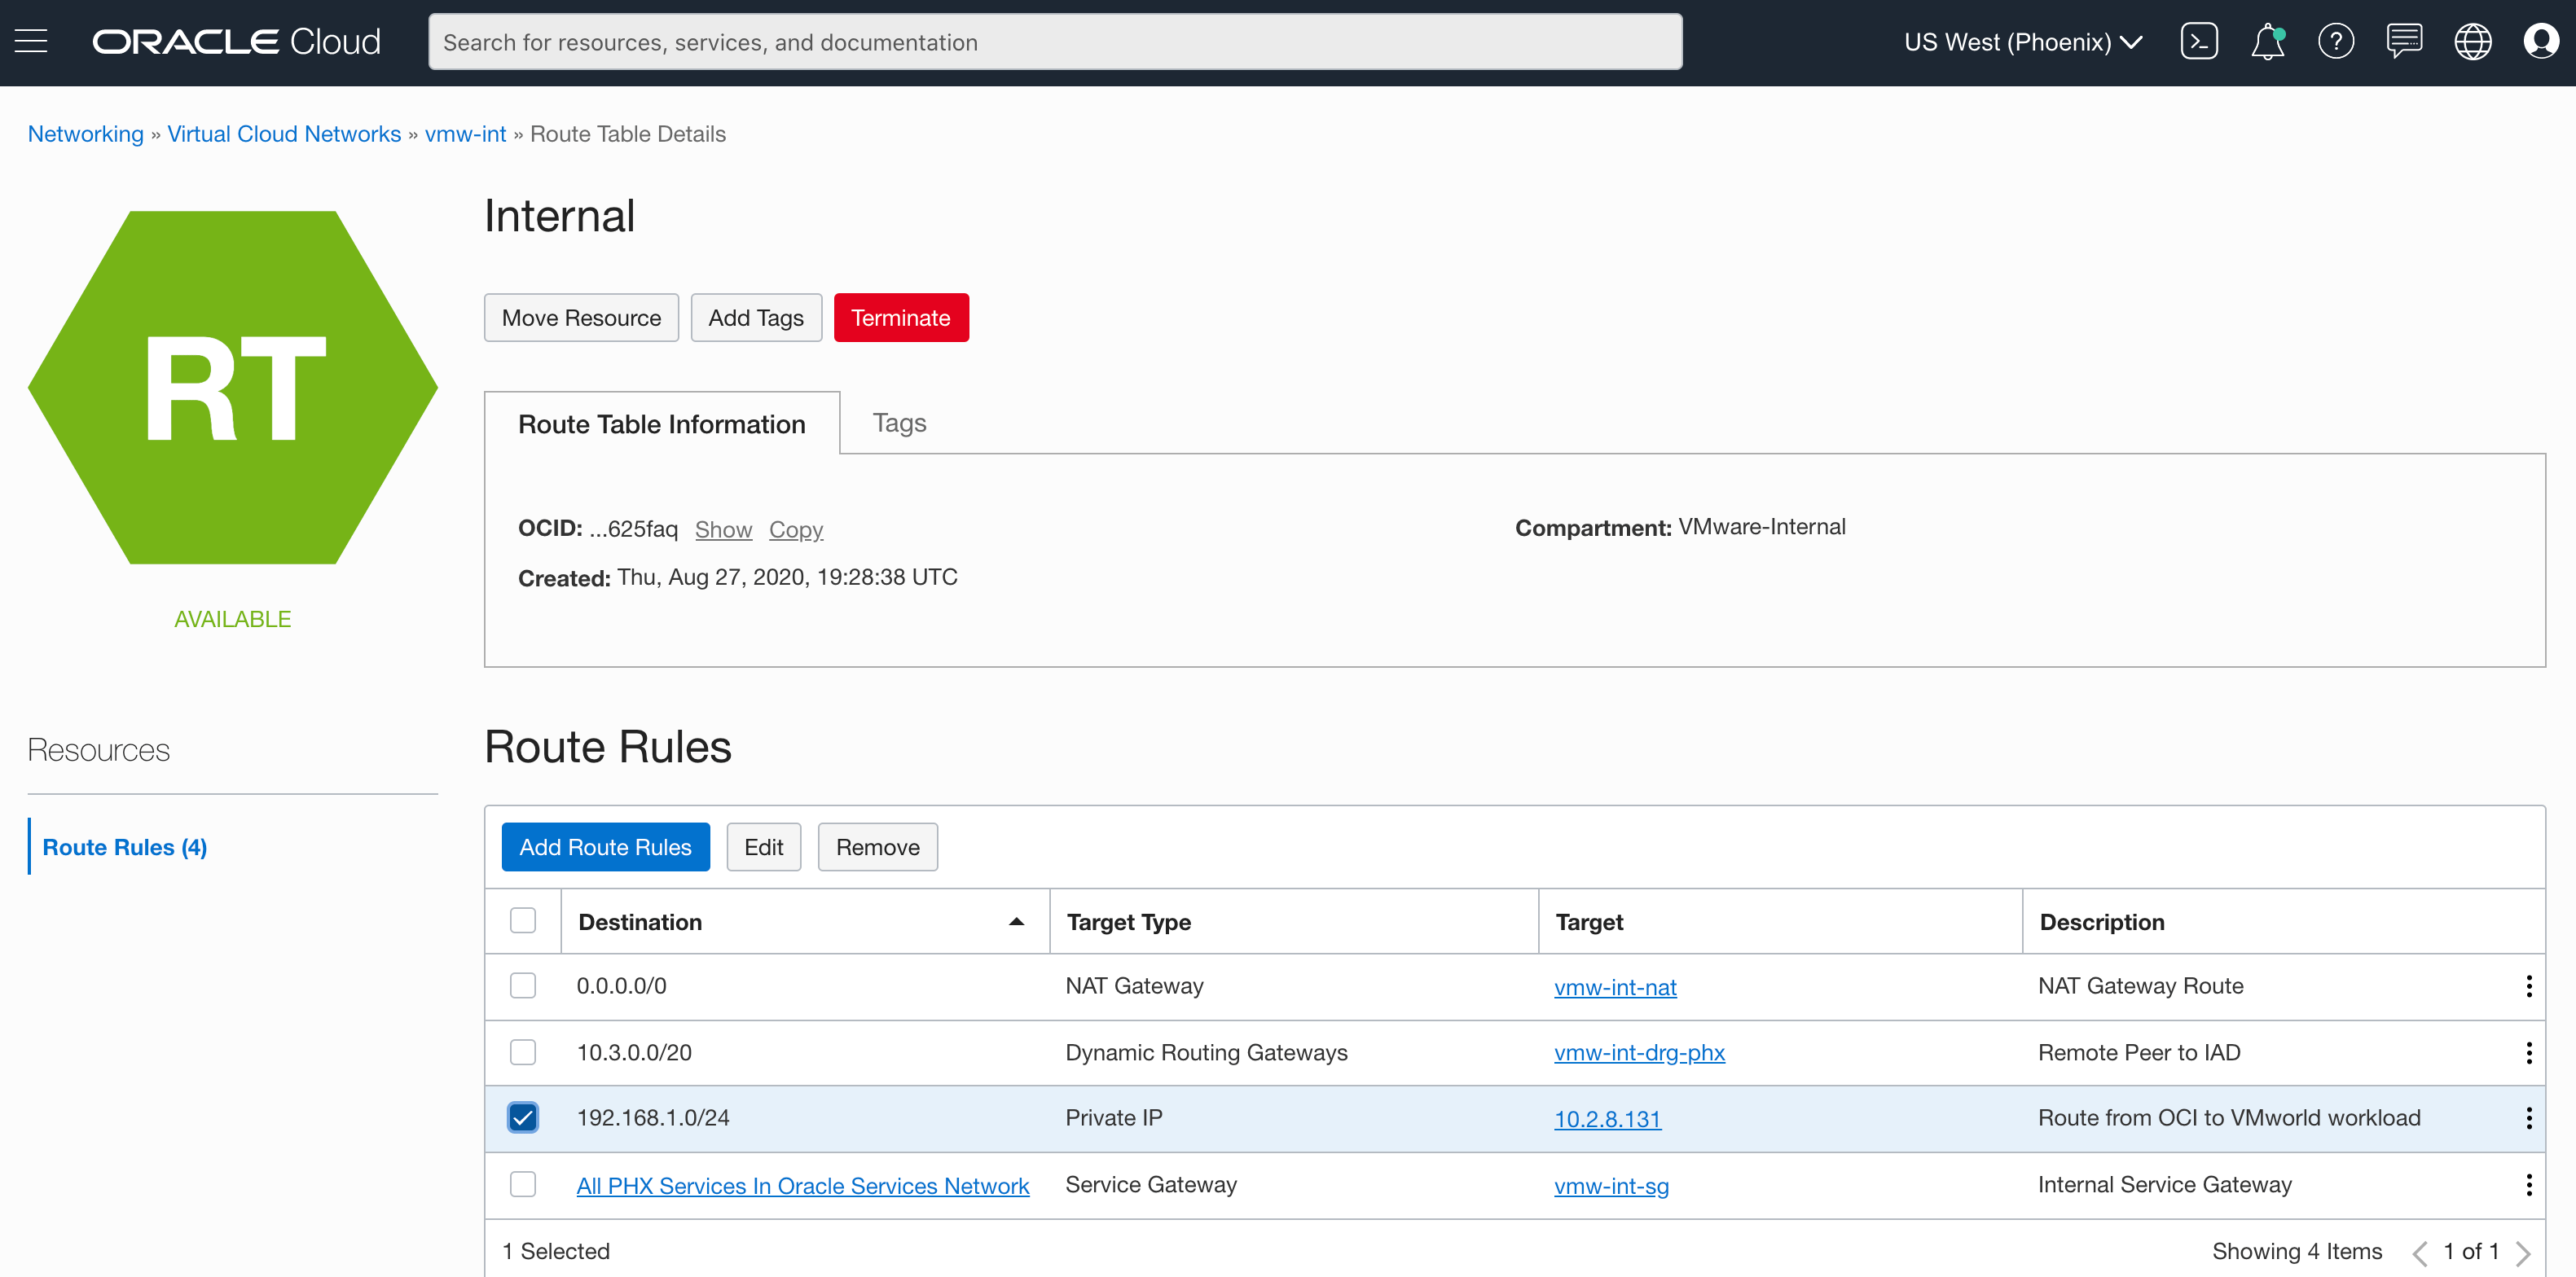
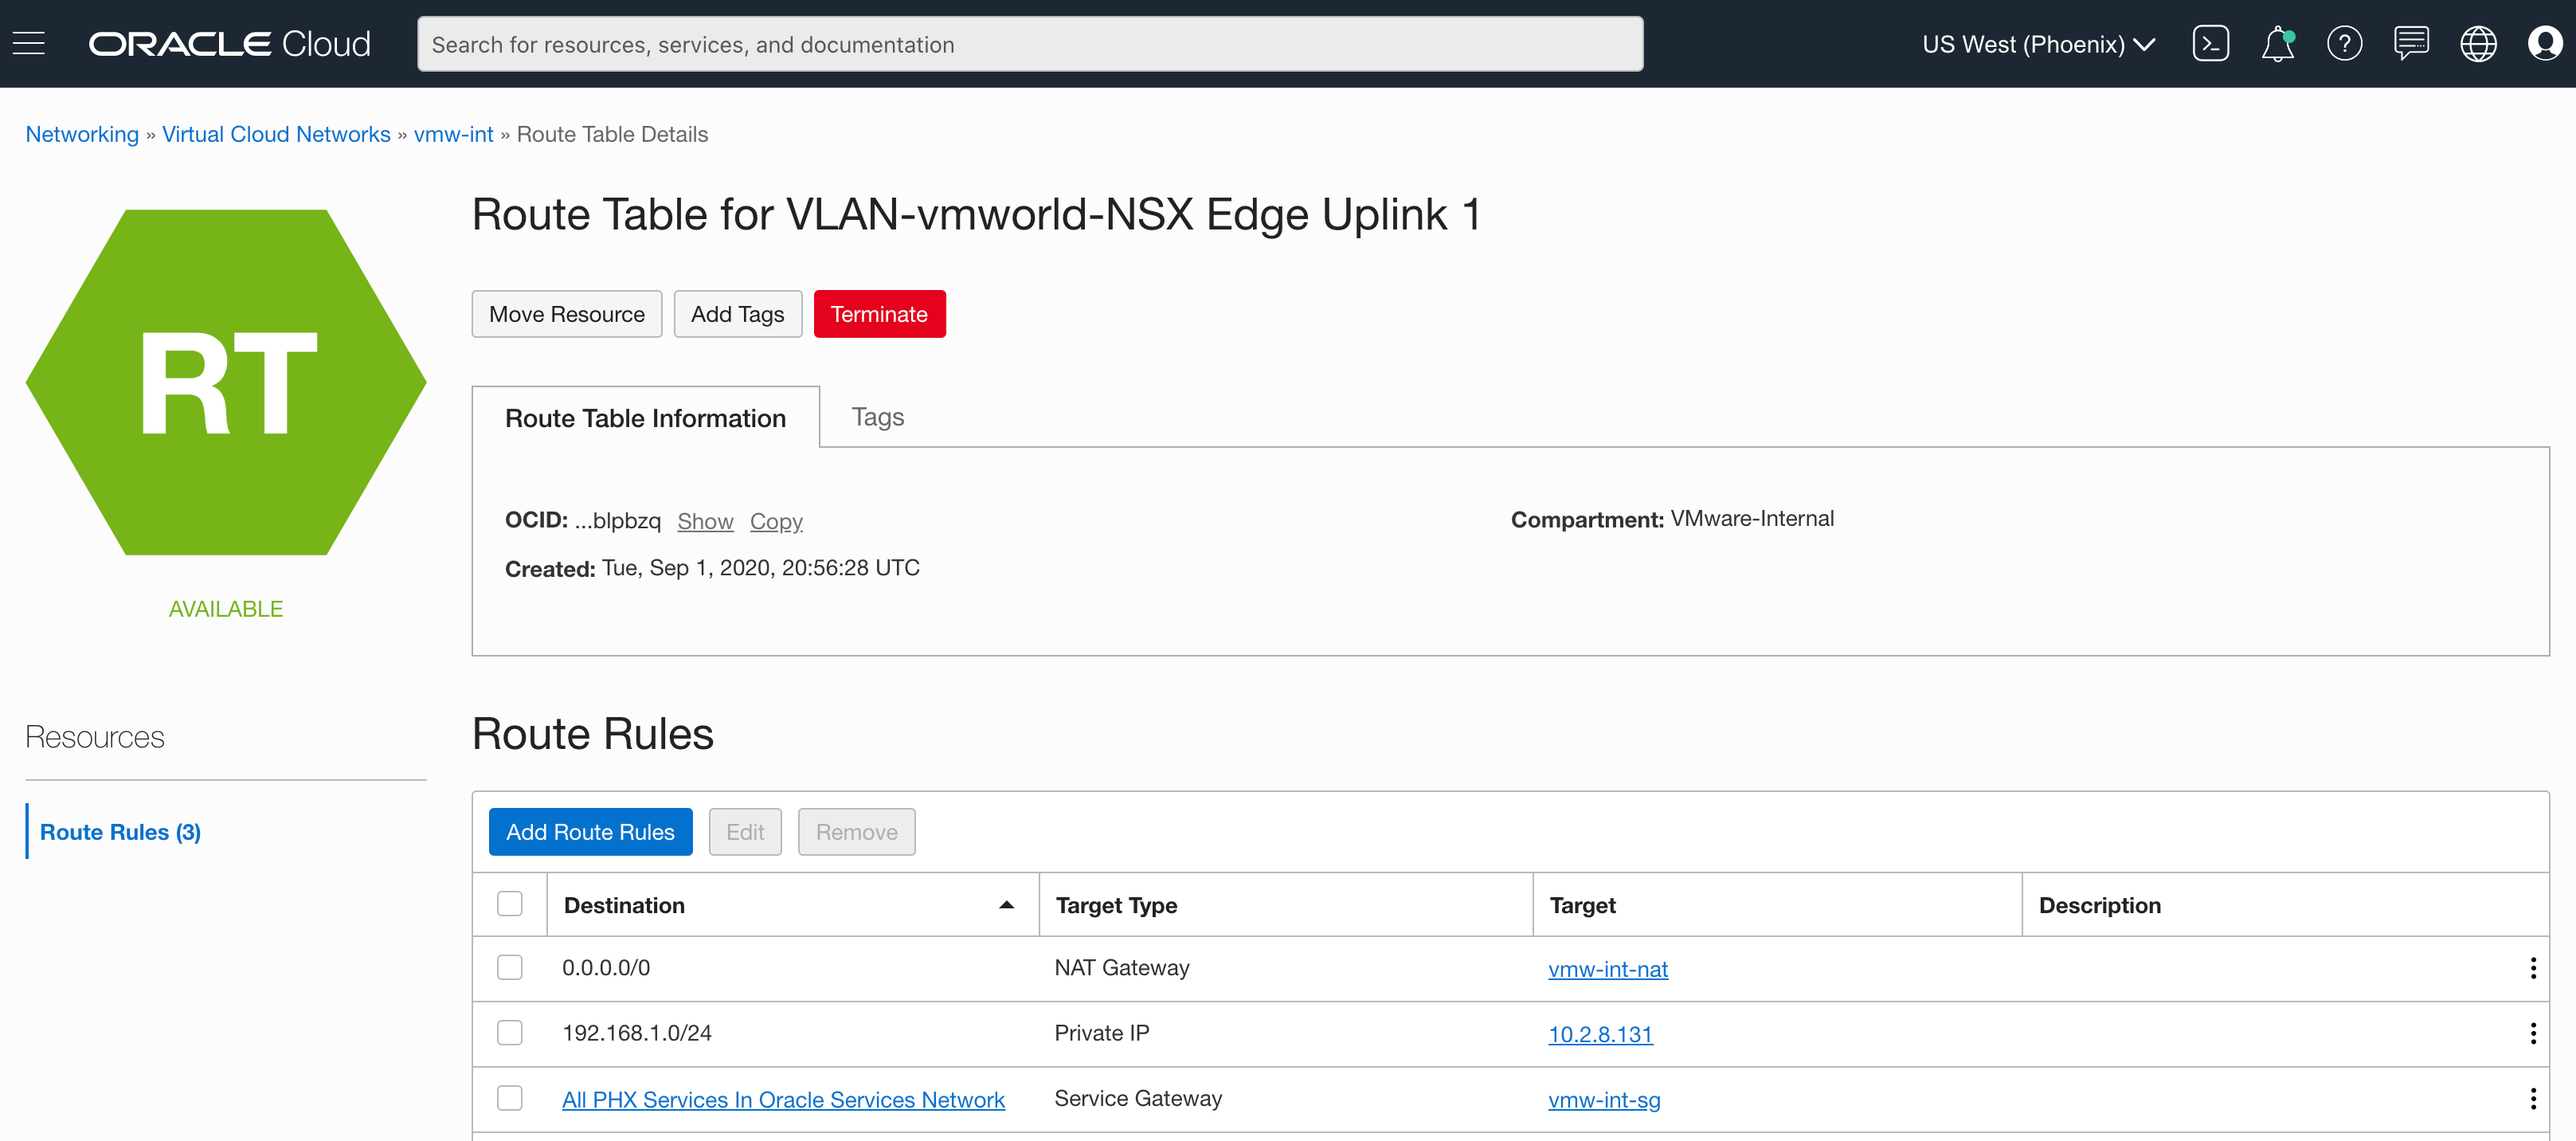
Step 6 - Within the VCN, we need to create and/or edit a new Internal route table allowing our 192.168.1.0/24 network to NSX-T Edge as shown in the screenshot below.
Step 7 - Within the VCN, we need to edit the NSX Edge Uplink 1 route table with the following configuration as shown in the screenshot below.
After saving these changes, you are now ready to begin the deployment.
Step 7 - Download the nested-sddc-lab-deployment.ps1 script and transfer that and the OVAs to the Bastion/Jumphost.
Step 8 - Update the script (details can be found on the Github repo) that reflects your environment. For those who have used my previous Automated Nested Lab Deployment scripts, this should feel very simliar. The only key difference is specifying the SDDC Provider ID which the script will properly handle the uniqueness for each respective VMware Cloud SDDC environment.
Step 9 - Once you have saved your changes, you can execute the script and a summary output as shown in the screenshot below will be provided prior to actually starting the deployment.
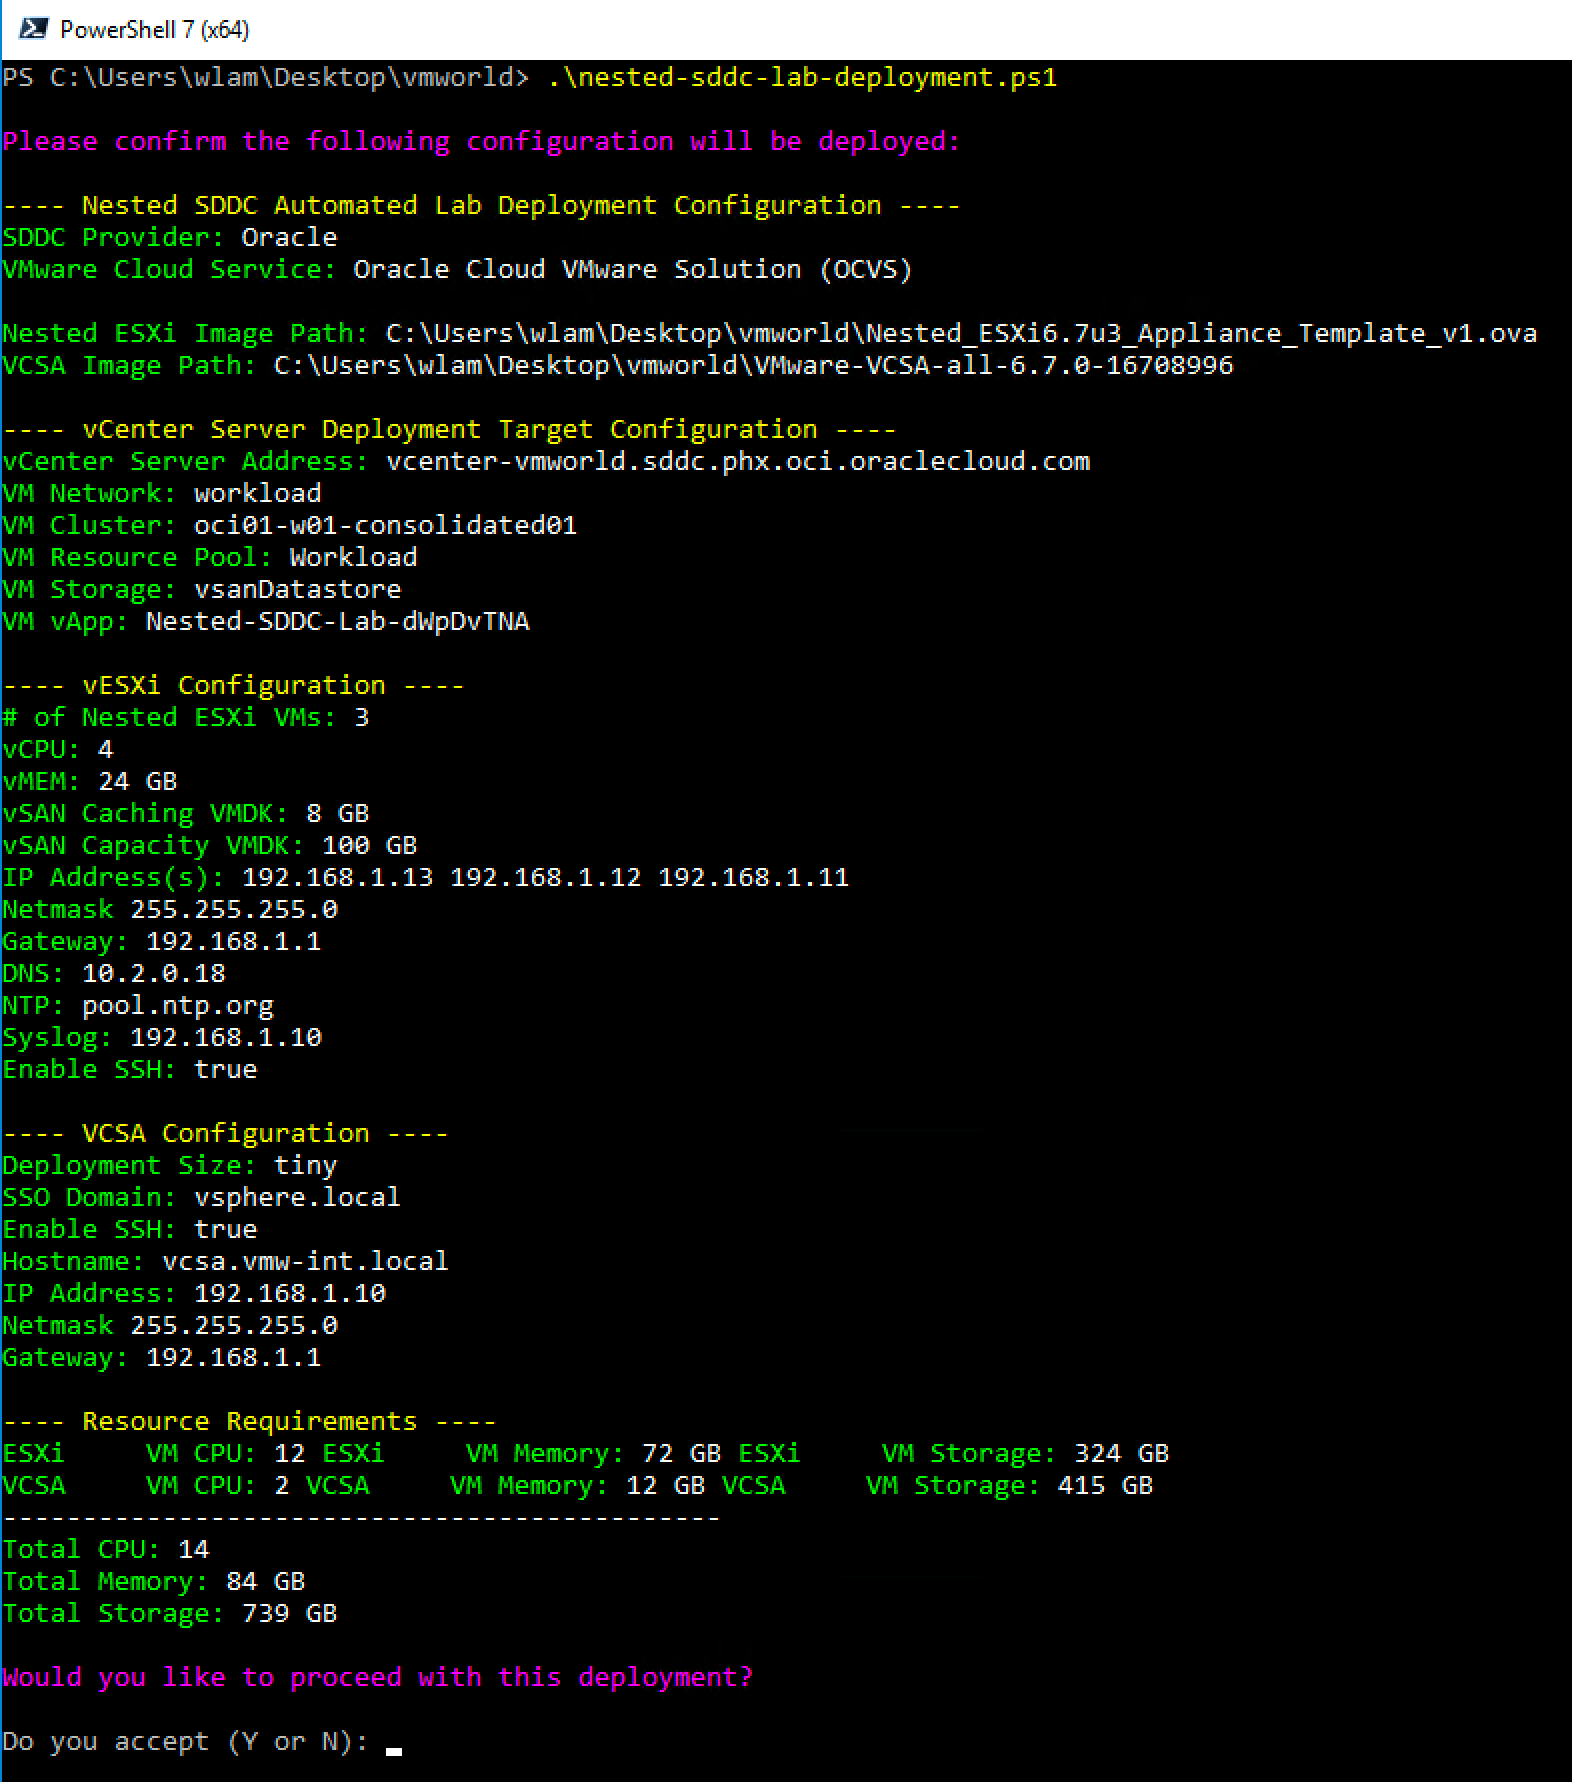
If everything was setup correctly, the script will take ~20minutes to deploy a fully configured VCSA with 3 x ESXi VM (default) and attached to our NFS VM to provide shared storage across the ESXi hosts.

If you have DNS configured and enabled in the script, you can then connect to your VCSA instance using the various CLI/API or the vSphere UI of the FQDN that you had specified for the VCSA. If not, then you would connect using the IP Address. You will notice that all VMs deployed as part of the script will be placed inside of a vApp construct.

Thanks for the comment!