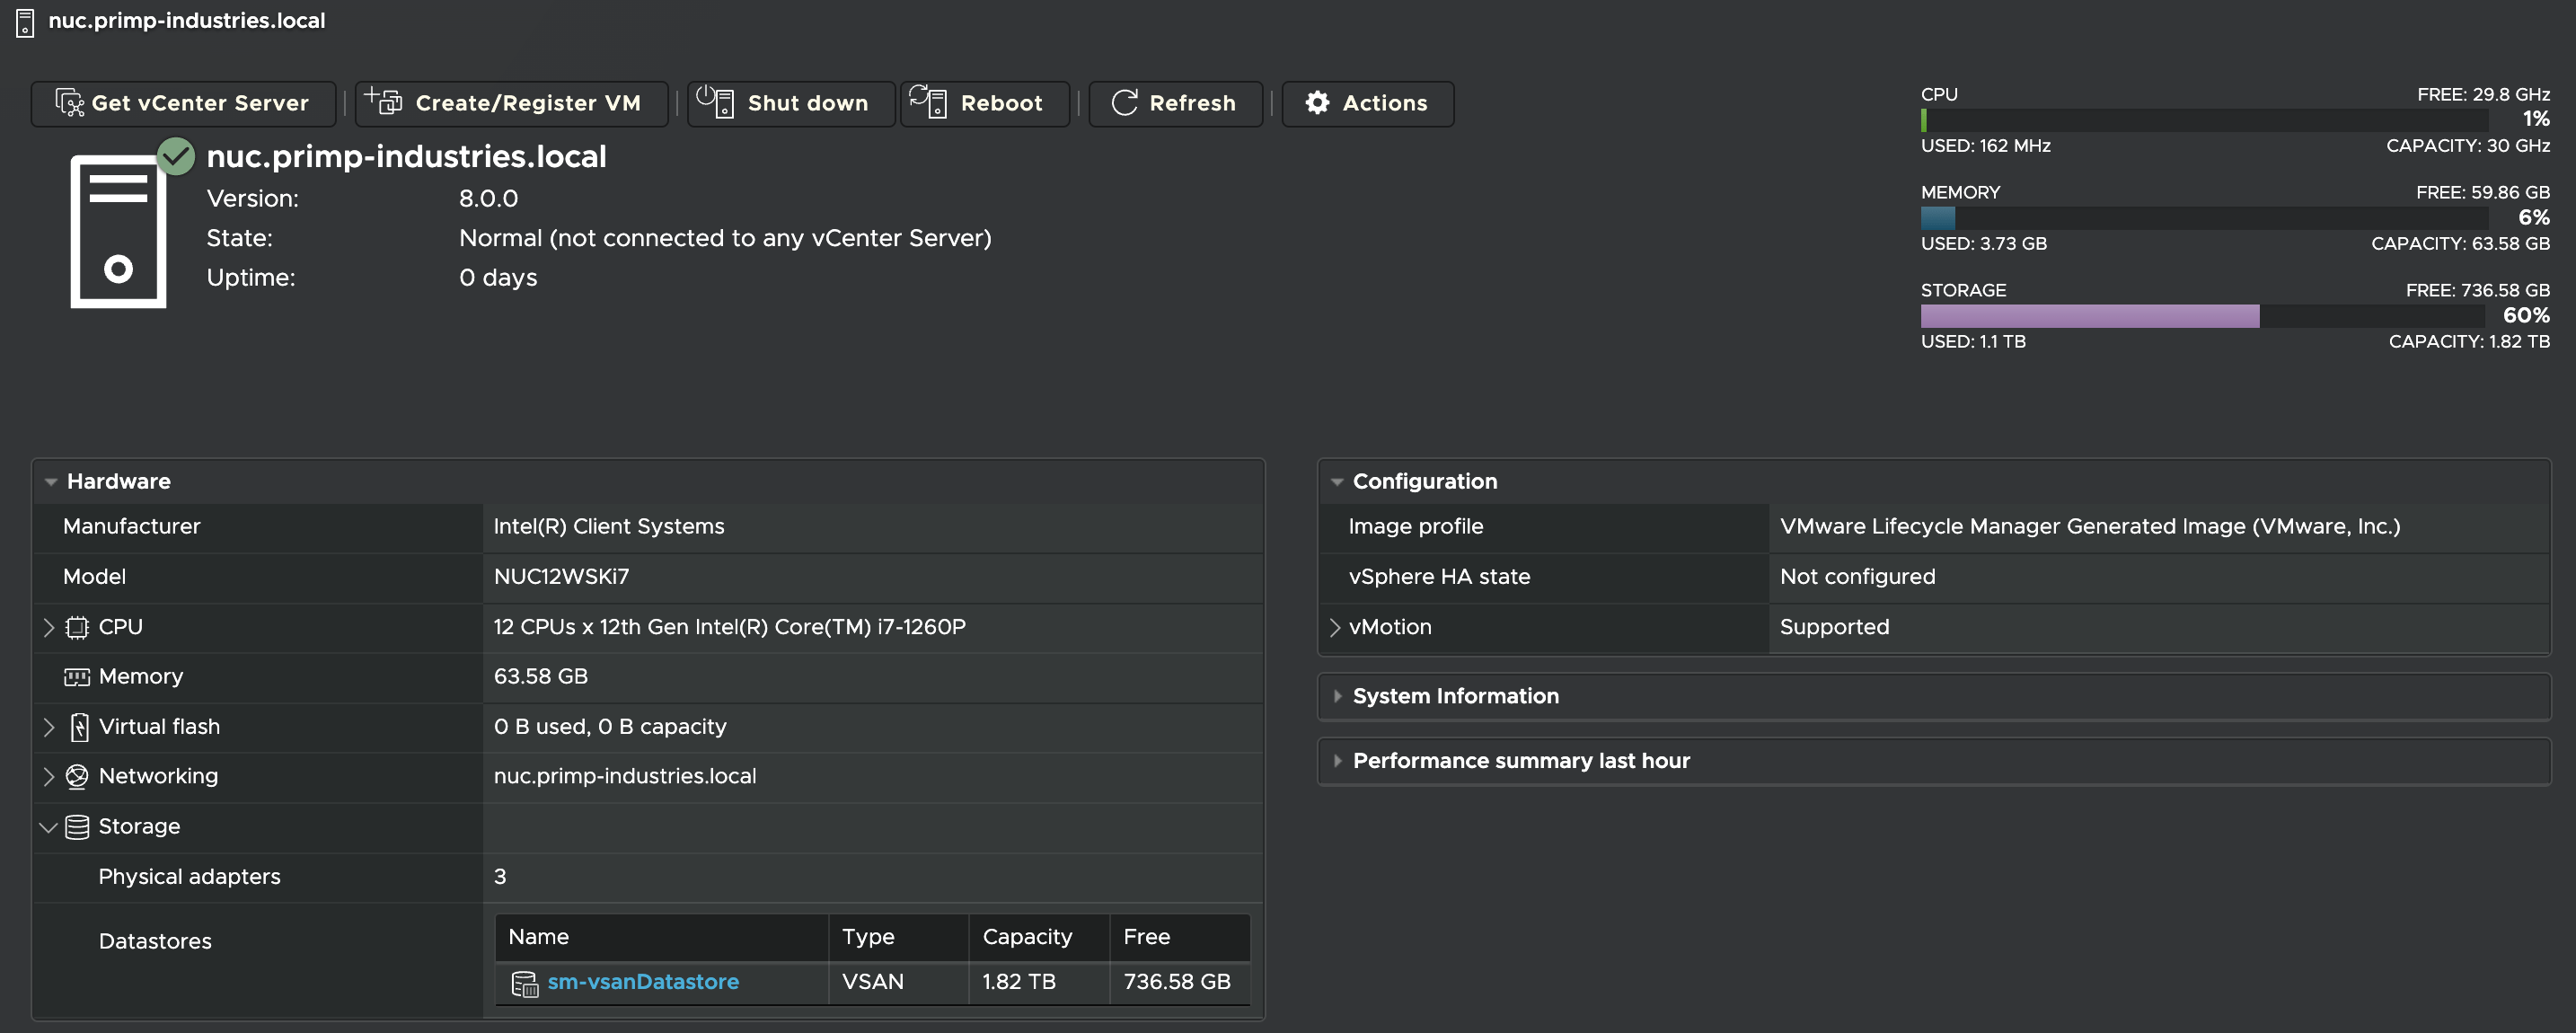
After documenting the process for bootstrapping vSAN Express Storage Architecture (ESA) using my Intel NUC 12 Pro, I was looking for an easier way to share my physical vSAN storage, which is powered by a single Supermicro E200-8D, to other physical ESXi hosts for testing purposes.
I had recently been playing with the vSAN HCI Mesh feature, which was launched back in 2020, as I was running out of spare NVMe devices when needing to test different physical hardware kits. While my use case for the storage is typically short lived, it means I do not have to play musical chairs with the limited number of NVMe devices I have installed in the various kits I have.
The vSphere UI in vCenter Server already provides a very simple workflow to mount a remote vSAN storage on an ESXi compute-only node, but I was also looking at this from a bootstrapping point of view and what if vCenter Server was not deployed or even available? Could I still make this work? After a bit of trial and error, I was able to figure out this can be accomplished by using a series of ESXCLI commands!
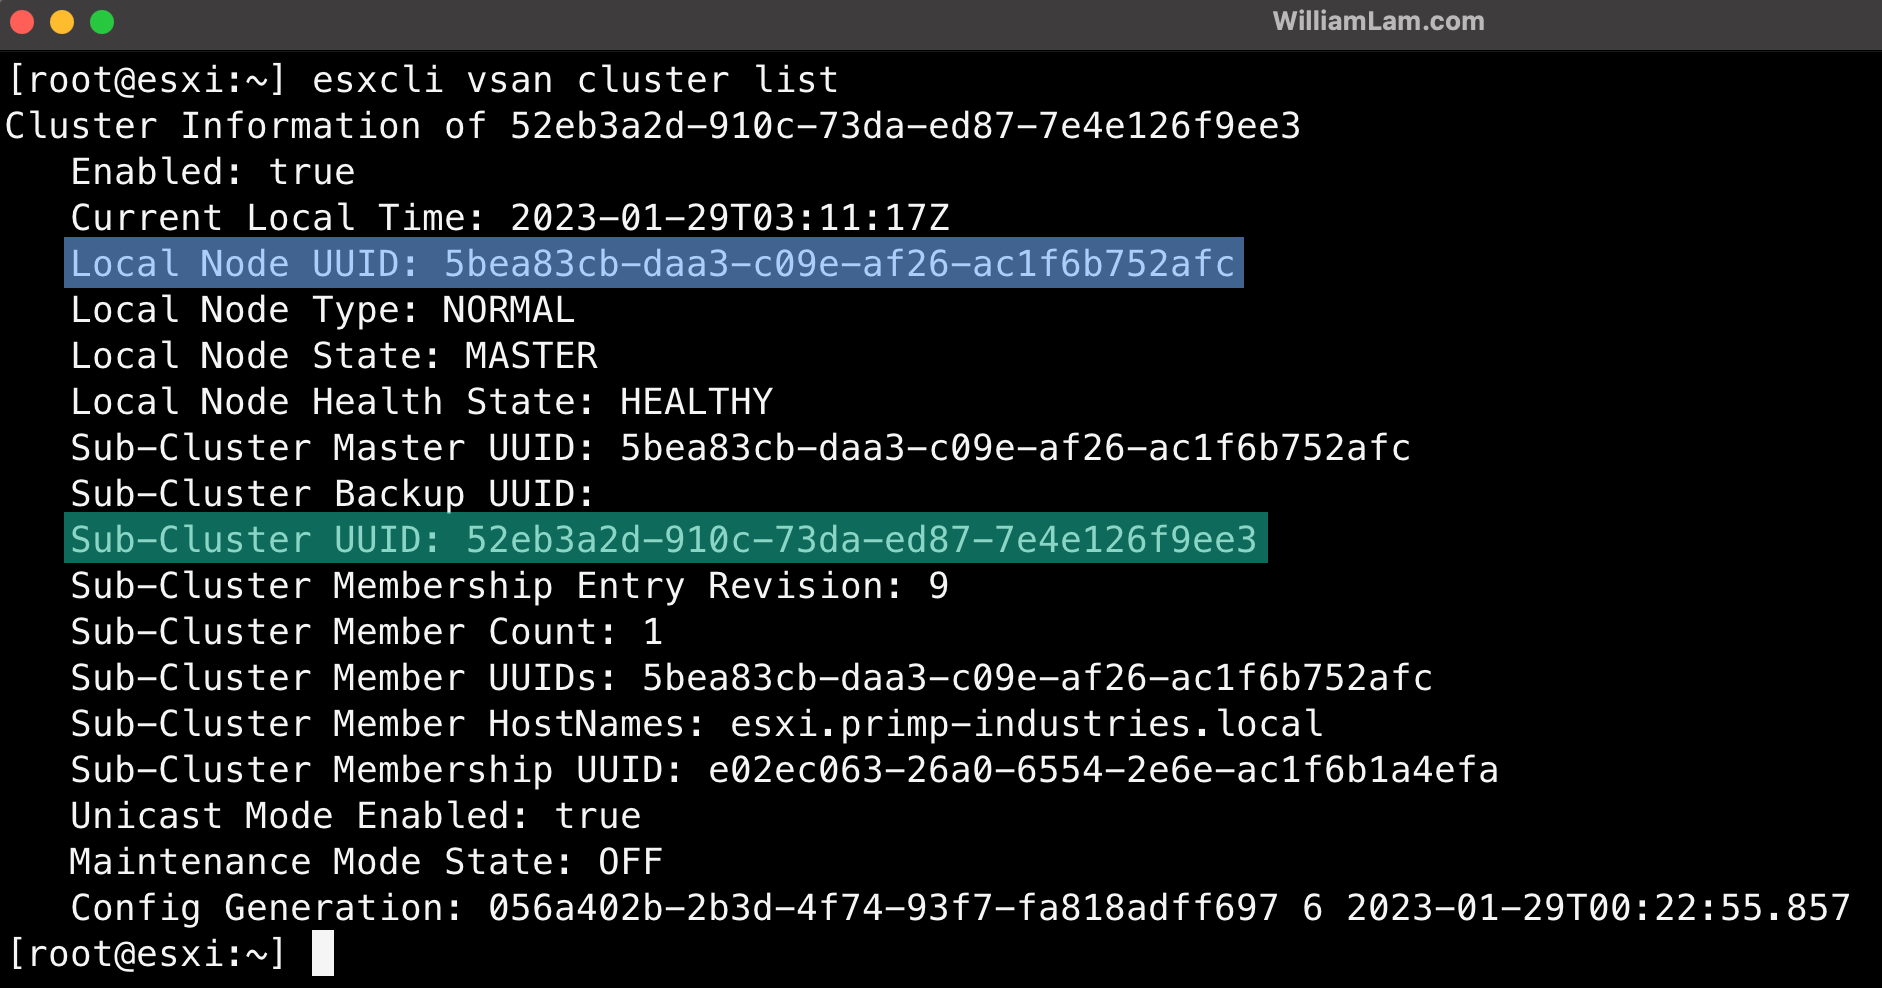
Step 1 - SSH to one of the ESXi hosts which is providing the vSAN OSA storage and run the following ESXCLI command and make a note of the Local Node UUID and Sub-Cluster UUID values:
esxcli vsan cluster list
Next, make a note of both the Datastore UUID and User Friendly Name from running this command:
esxcli vsan datastore list

Step 2 - SSH to the ESXi compute-only host and enable vSAN traffic on one of your VMKernel interfaces by running the following command:
esxcli vsan network ipv4 add -i vmk0
Step 3 - Create a new vSAN OSA cluster that is acting as a compute-only node by running the following command:
esxcli vsan cluster new -c
Once the operation has completed, we can confirm our new ESXi compute-only node by running the following command:
esxcli vsan cluster get

Step 4 - Now, we are going to configure the remote vSAN datastore that we will want to use by running the following command and specifying the Sub-Cluster UUID, Datastore UUID and User Friendly Name that you had obtained from Step 1:
esxcli vsan datastore add -c 52eb3a2d-910c-73da-ed87-7e4e126f9ee3 -u 52eb3a2d-910c-73da-ed87-7e4e126f9ee3 -n sm-vsanDatastore

Step 5 - Finally, we add the address of the unicastagent for our remote vSAN host by running the following command and specifying the IP Address of the remote vSAN ESXi host, Sub-Cluster UUID and Local Node UUID that you had also obtained in Step 1:
esxcli vsan cluster unicastagent add -a 192.168.30.5 -c 52eb3a2d-910c-73da-ed87-7e4e126f9ee3 -t remote -u 5bea83cb-daa3-c09e-af26-ac1f6b752afc
![]()
If everything was successfully configured, you should now be able to list the following directory /vmfs/volumes/<User Friendly Name> and you should now see files from your remote vSAN datastore!
Thanks for the comment!