Creating scripts to help automate repetitive tasks or generate reports is a common need for every VMware administrator, and with Agentic coding tools like Claude Code, Codex, and Cursor, to name a few, the barrier to entry has been significantly lowered. In fact, when I spoke with attendees at VMware Explore Las Vegas 2026 about their use of coding agents, I saw a dramatic shift compared to the previous year, from maybe 20% to now over 80%!
However, one key challenge you may have experienced when using AI models (LLMs) is that they can still hallucinate and make up a non-existent REST API endpoint or PowerCLI cmdlet. LLMs are designed to always provide an answer, even when that answer may be wrong.
To help address this challenge and provide modern LLMs with the required VCF context for developing scripts and automation, a new Fling has just been released called VCF Agentic AI Hub (VCF-AI), which is delivered as a standalone virtual appliance. VCF-AI includes a VCF Code Assist MCP Server that currently supports code generation for the following VCF SDKs:
- VCF PowerCLI
-
- vCenter Server
- vSAN
- VCF Operations
- SDDC Manager
- NSX
- vSphere Supervisor
- HCX
- SRM
- VCF Python SDK
- vCenter Server
- vSAN
- vSAN Data Protection
- VCF Operations
- VCF Installer
- SDDC Manager
- NSX
- vSphere Supervisor
- VCF Operations for Networks
- Log Management
- VCF Fleet and SDDC LCM
VCF-AI includes all the OpenAPI specifications and documentation for the two SDKs, which cover a number of VCF components along with skill files that have been created by VCF Engineering to allow users to easily create automation using their favorite Agentic coding agent.
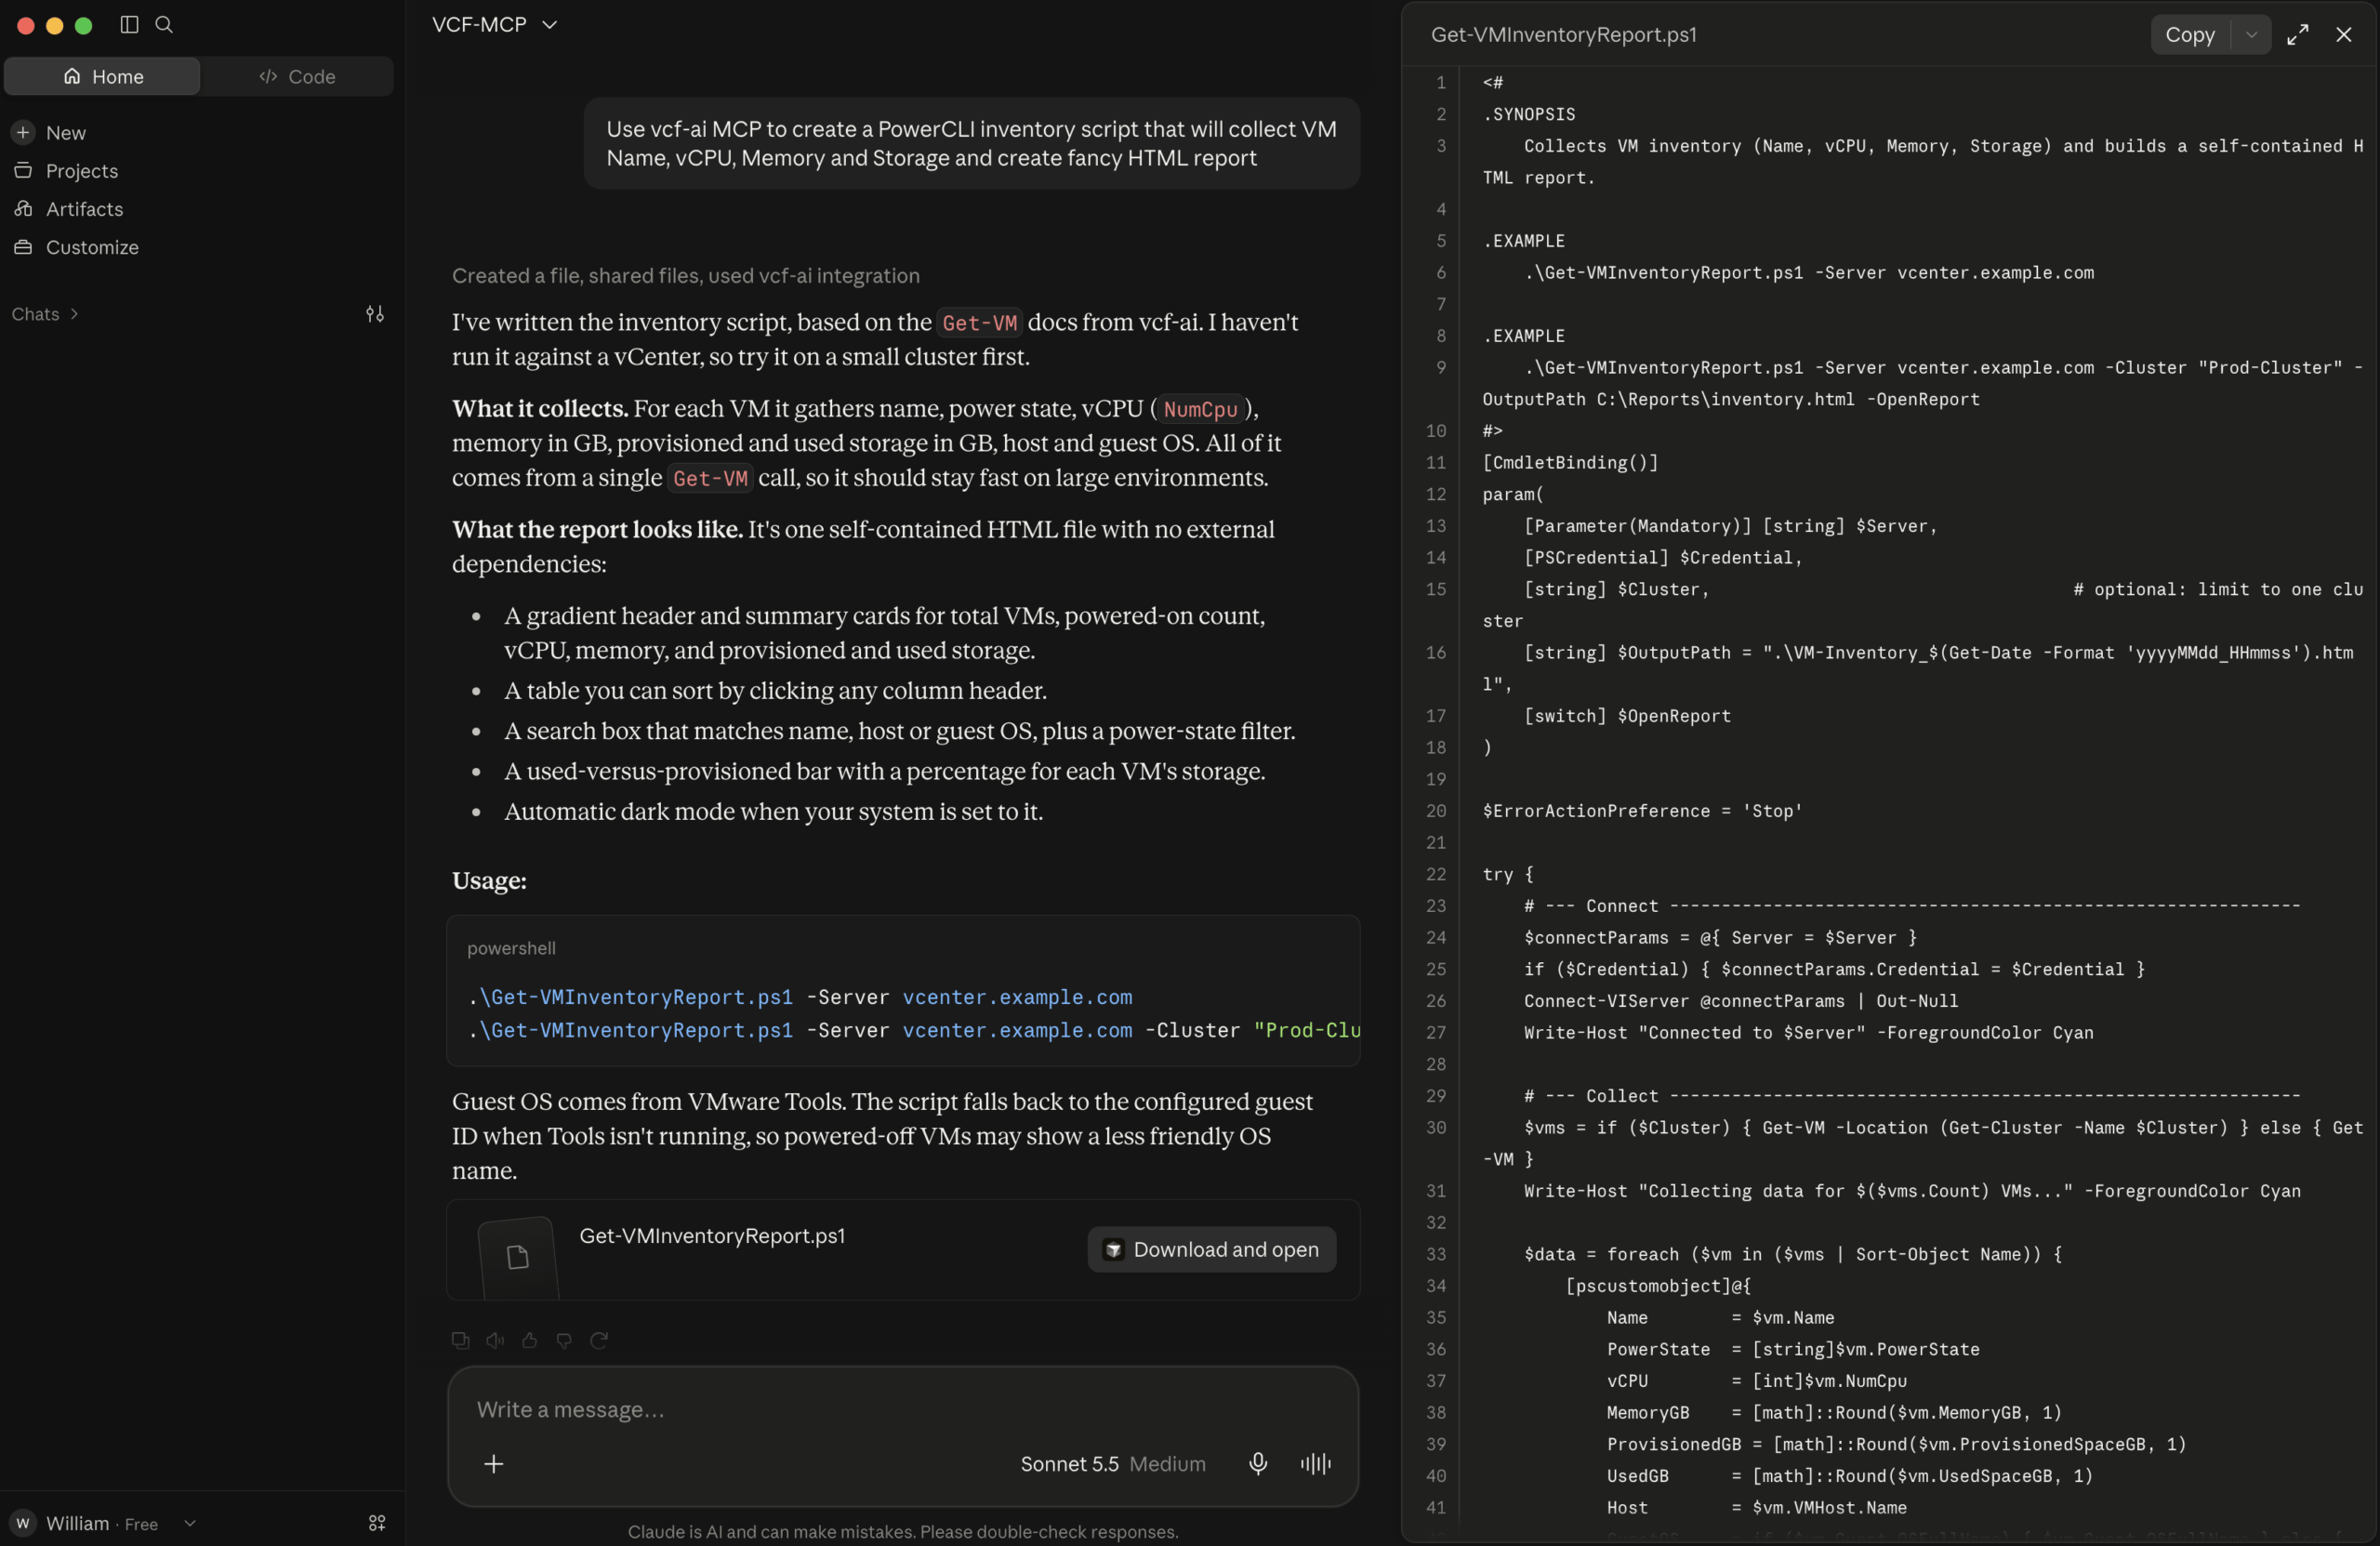
Requirements:
- VCF-AI OVA requires 16 vCPU / 32GB memory
- 4 x consecutive IP Addresses, with the first address requiring an FQDN
- Client machine with browser access to run the VCF-AI Installer
- Bi-directional connectivity between the deployed VCF-AI OVA and the VCF-AI Installer client machine
- If bi-directional connectivity is not possible, deploy an Ubuntu or Windows VM where you can run VCF-AI Installer on same network as VCF-AI OVA
- Agentic Coding tool that supports an MCP Server
Getting Started:
Step 1 - Download the free VCF-AI Fling from the Broadcom Support Portal (BSP), along with the PDF documentation.
Step 2 - Unzip the VCF-AI Fling and run the platform-specific installer, which will automatically launch your web browser and load the VCF-AI graphical installer.
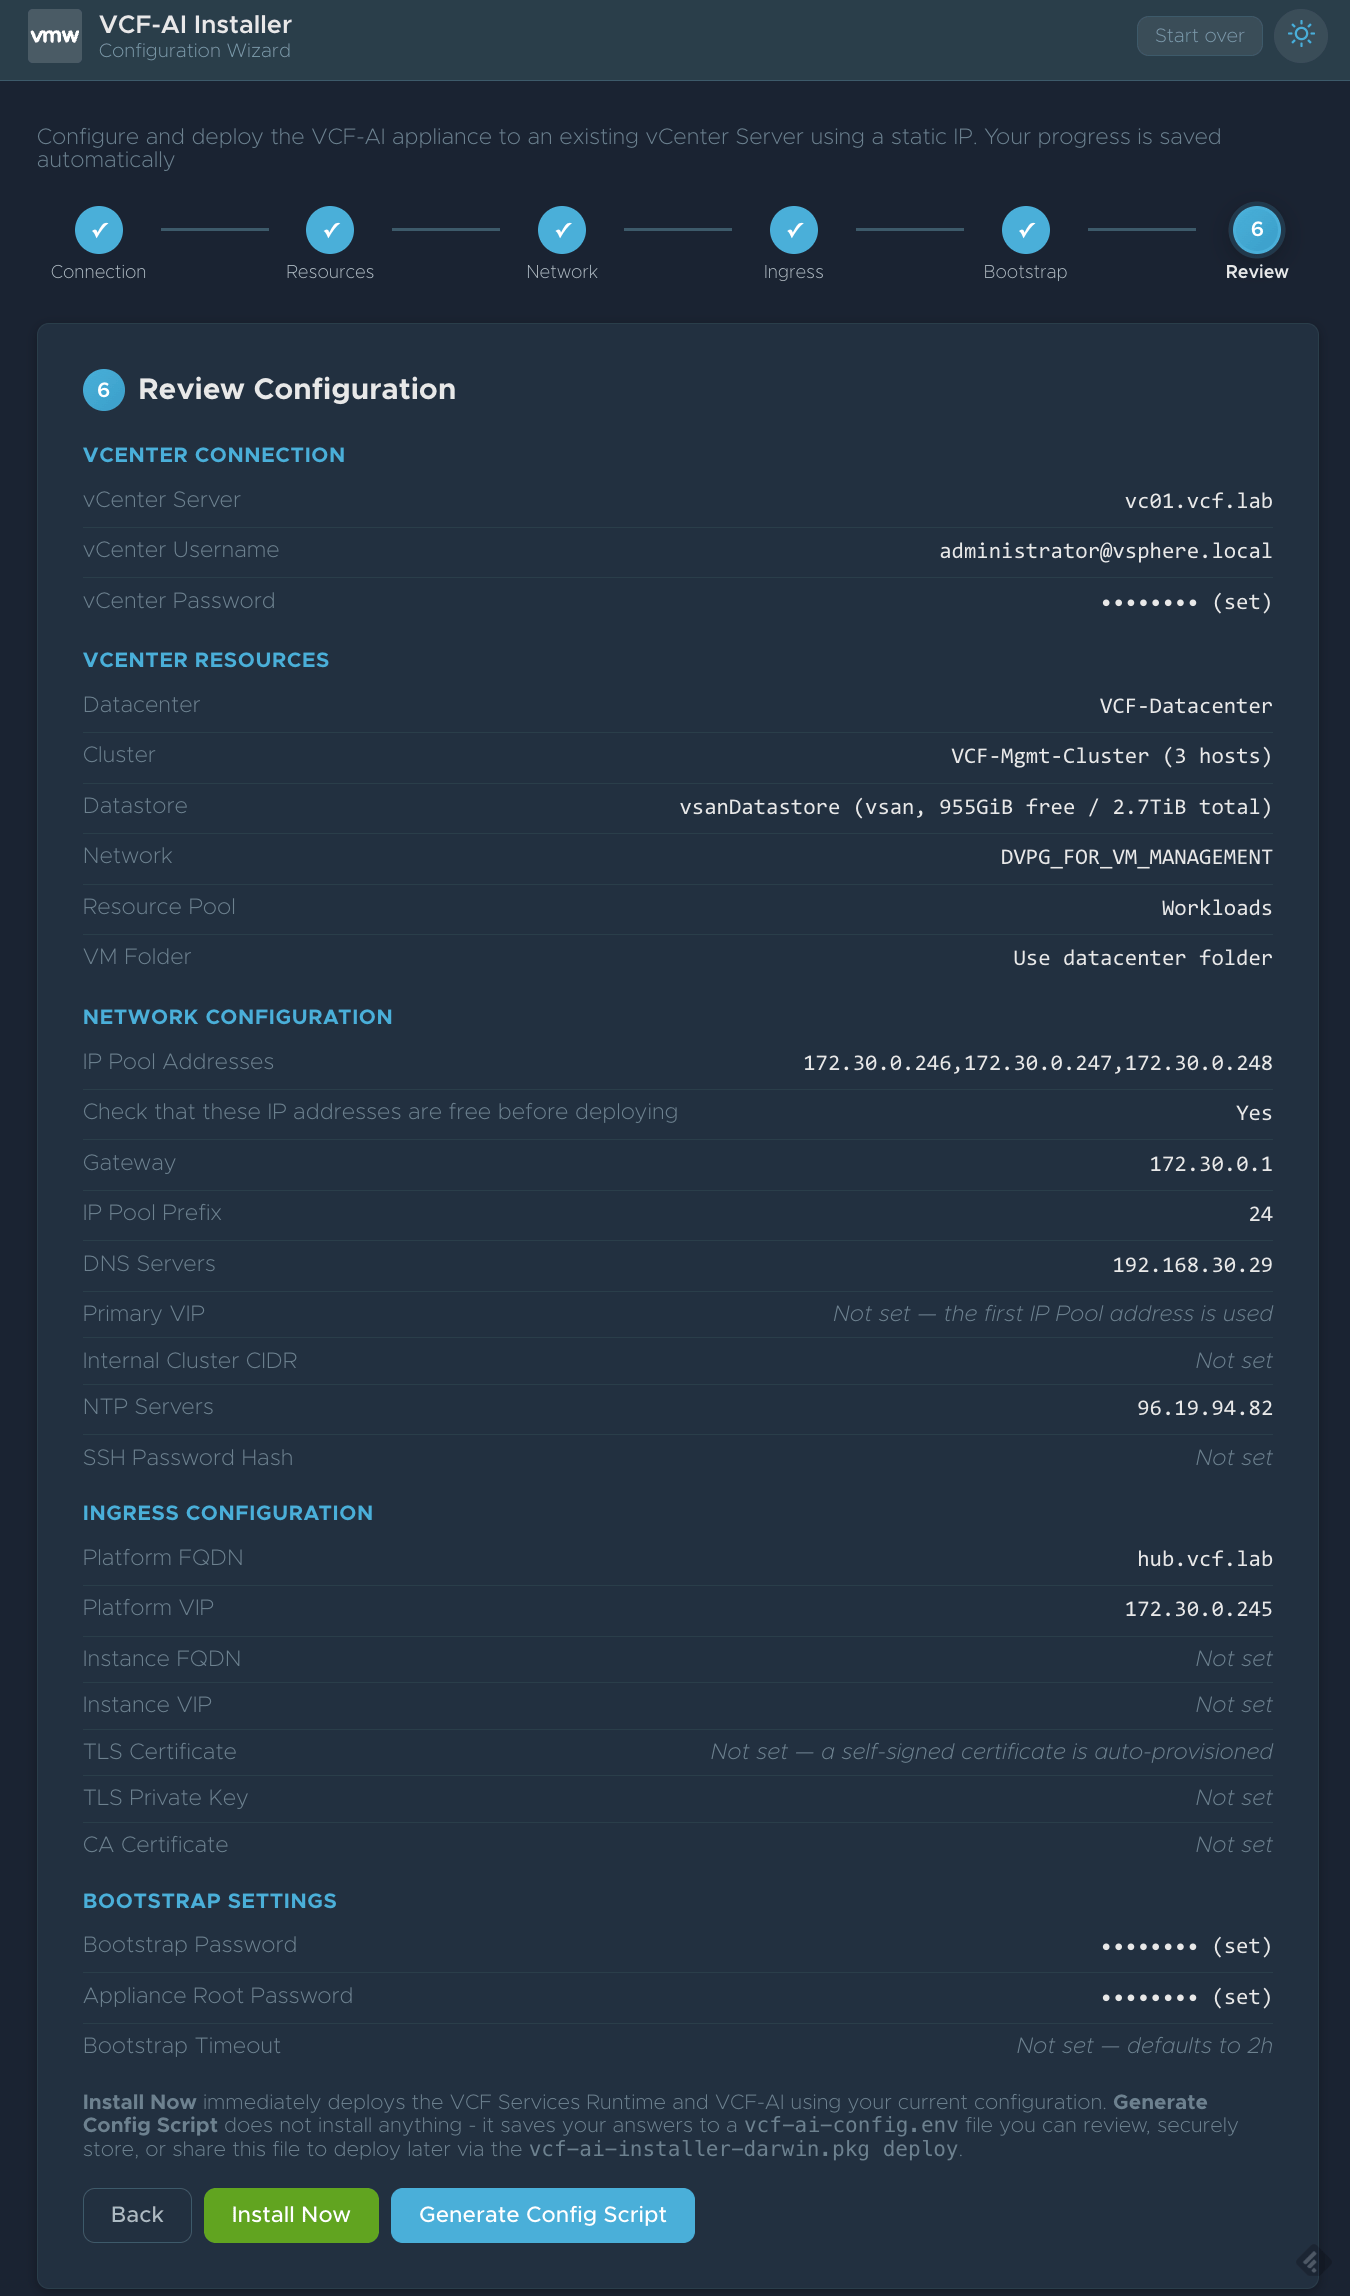
For my setup, I am using 172.30.0.245-172.30.0.248 for the required IP addresses, with 172.30.0.245 mapped to hub.vcf.lab as the FQDN.
Note: For those with a keen eye for detail, you may have noticed that VCF-AI is a Kubernetes-based application and that the VCF-AI appliance is actually based on VCF Management Services (VCFMS). 😎
Once the VCF-AI appliance is up and running, follow the PDF documentation to create a local user that will be allowed to connect to the VCF-AI MCP Server. VCF-AI includes an embedded instance of Keycloak that provides user authentication between the VCF-AI MCP Server and your coding agent.
Step 3 - Configure your coding agent to connect to the VCF-AI MCP Server. While I use Claude Code for work, I do not have a personal paid Claude Code subscription, and I found that the Claude Code UI for adding an MCP server requires one. After some experimentation and trial and error, I was able to use a free Claude Code account and manually configure the VCF-AI MCP Server on my macOS (x86) system.
Claude (Free)
Step 1 - Install Node and mcp-remote which will be used to connect to the VCF-AI MCP Server
brew install node
mkdir -p ~/.npm-global npm config set prefix '~/.npm-global' echo 'export PATH=~/.npm-global/bin:$PATH' >> ~/.zshrc source ~/.zshrc
npm install -g mcp-remote --strict-ssl=false
Step 2 - Manually update claude_destkop_config.json and append the following:
"mcpServers": {
    "vcf-ai": {
      "command": "mcp-remote",
      "args": [
        "https://hub.vcf.lab/mcp"
      ],
      "env": {
        "NODE_TLS_REJECT_UNAUTHORIZED": "0",
        "PATH": "/Users/lamw/.local/bin:/opt/homebrew/bin:/usr/local/bin:/usr/bin:/bin"
      }
    }
  }
Note: On macOS (x86), you can find the Claude configuration file located at ~/Library/Application\ Support/Claude/claude_desktop_config.json
Step 3 - Open Claude Code and it should attempt to connect to your configure VCF-AI MCP Server. If not, you can debug by navigating to Settings > Developer and view logs to see what might be the issue.
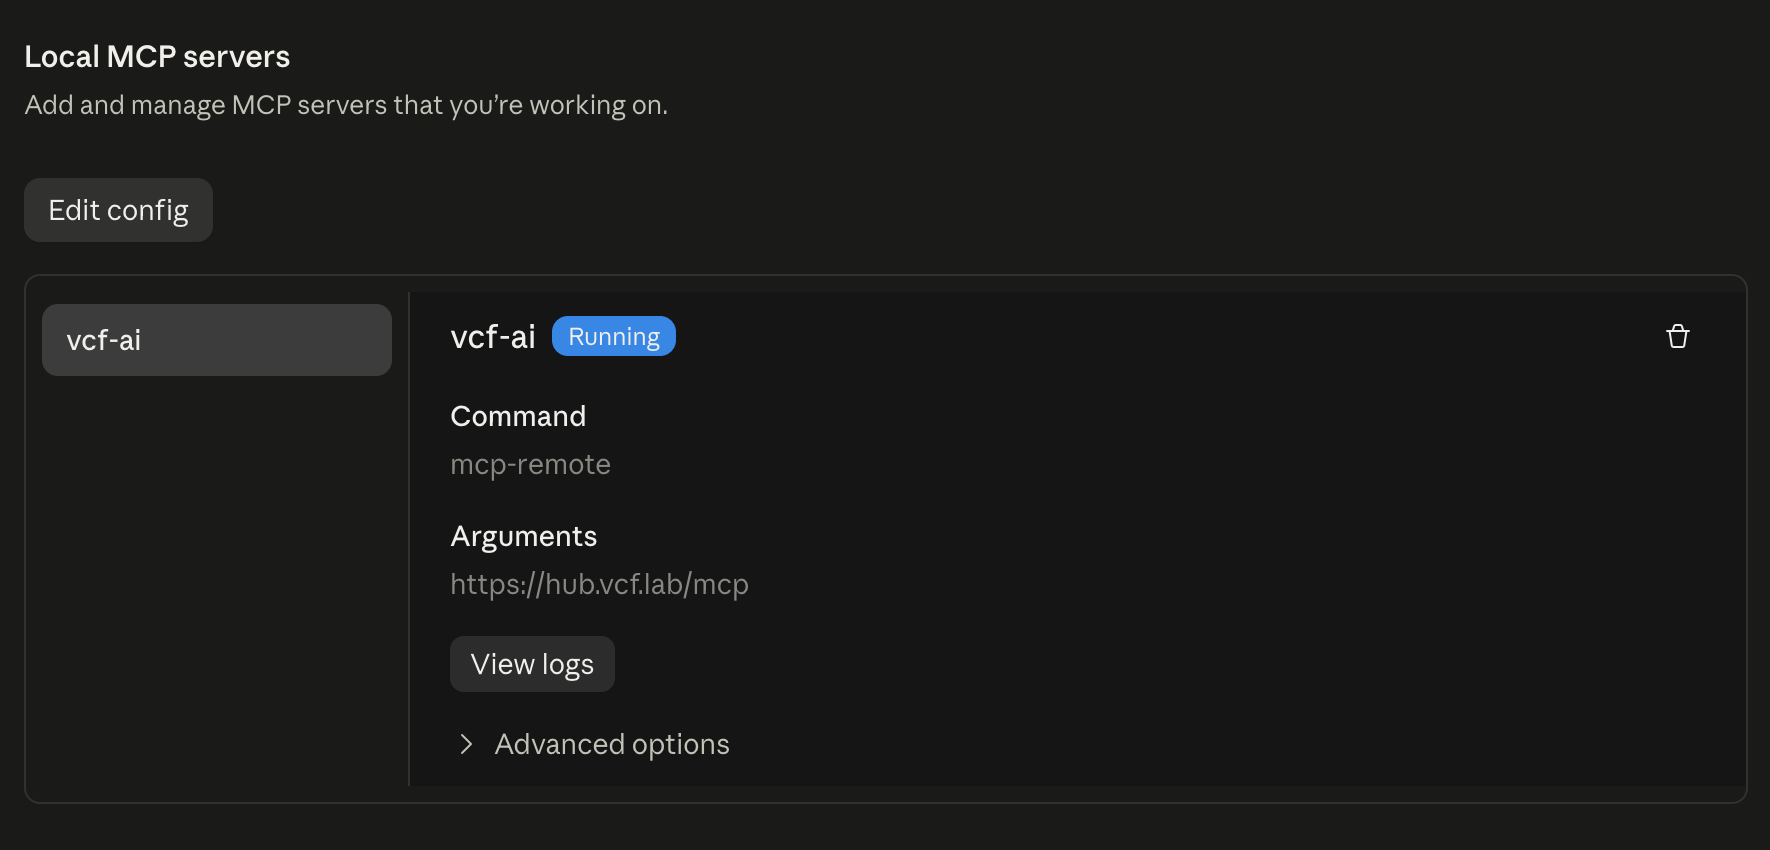
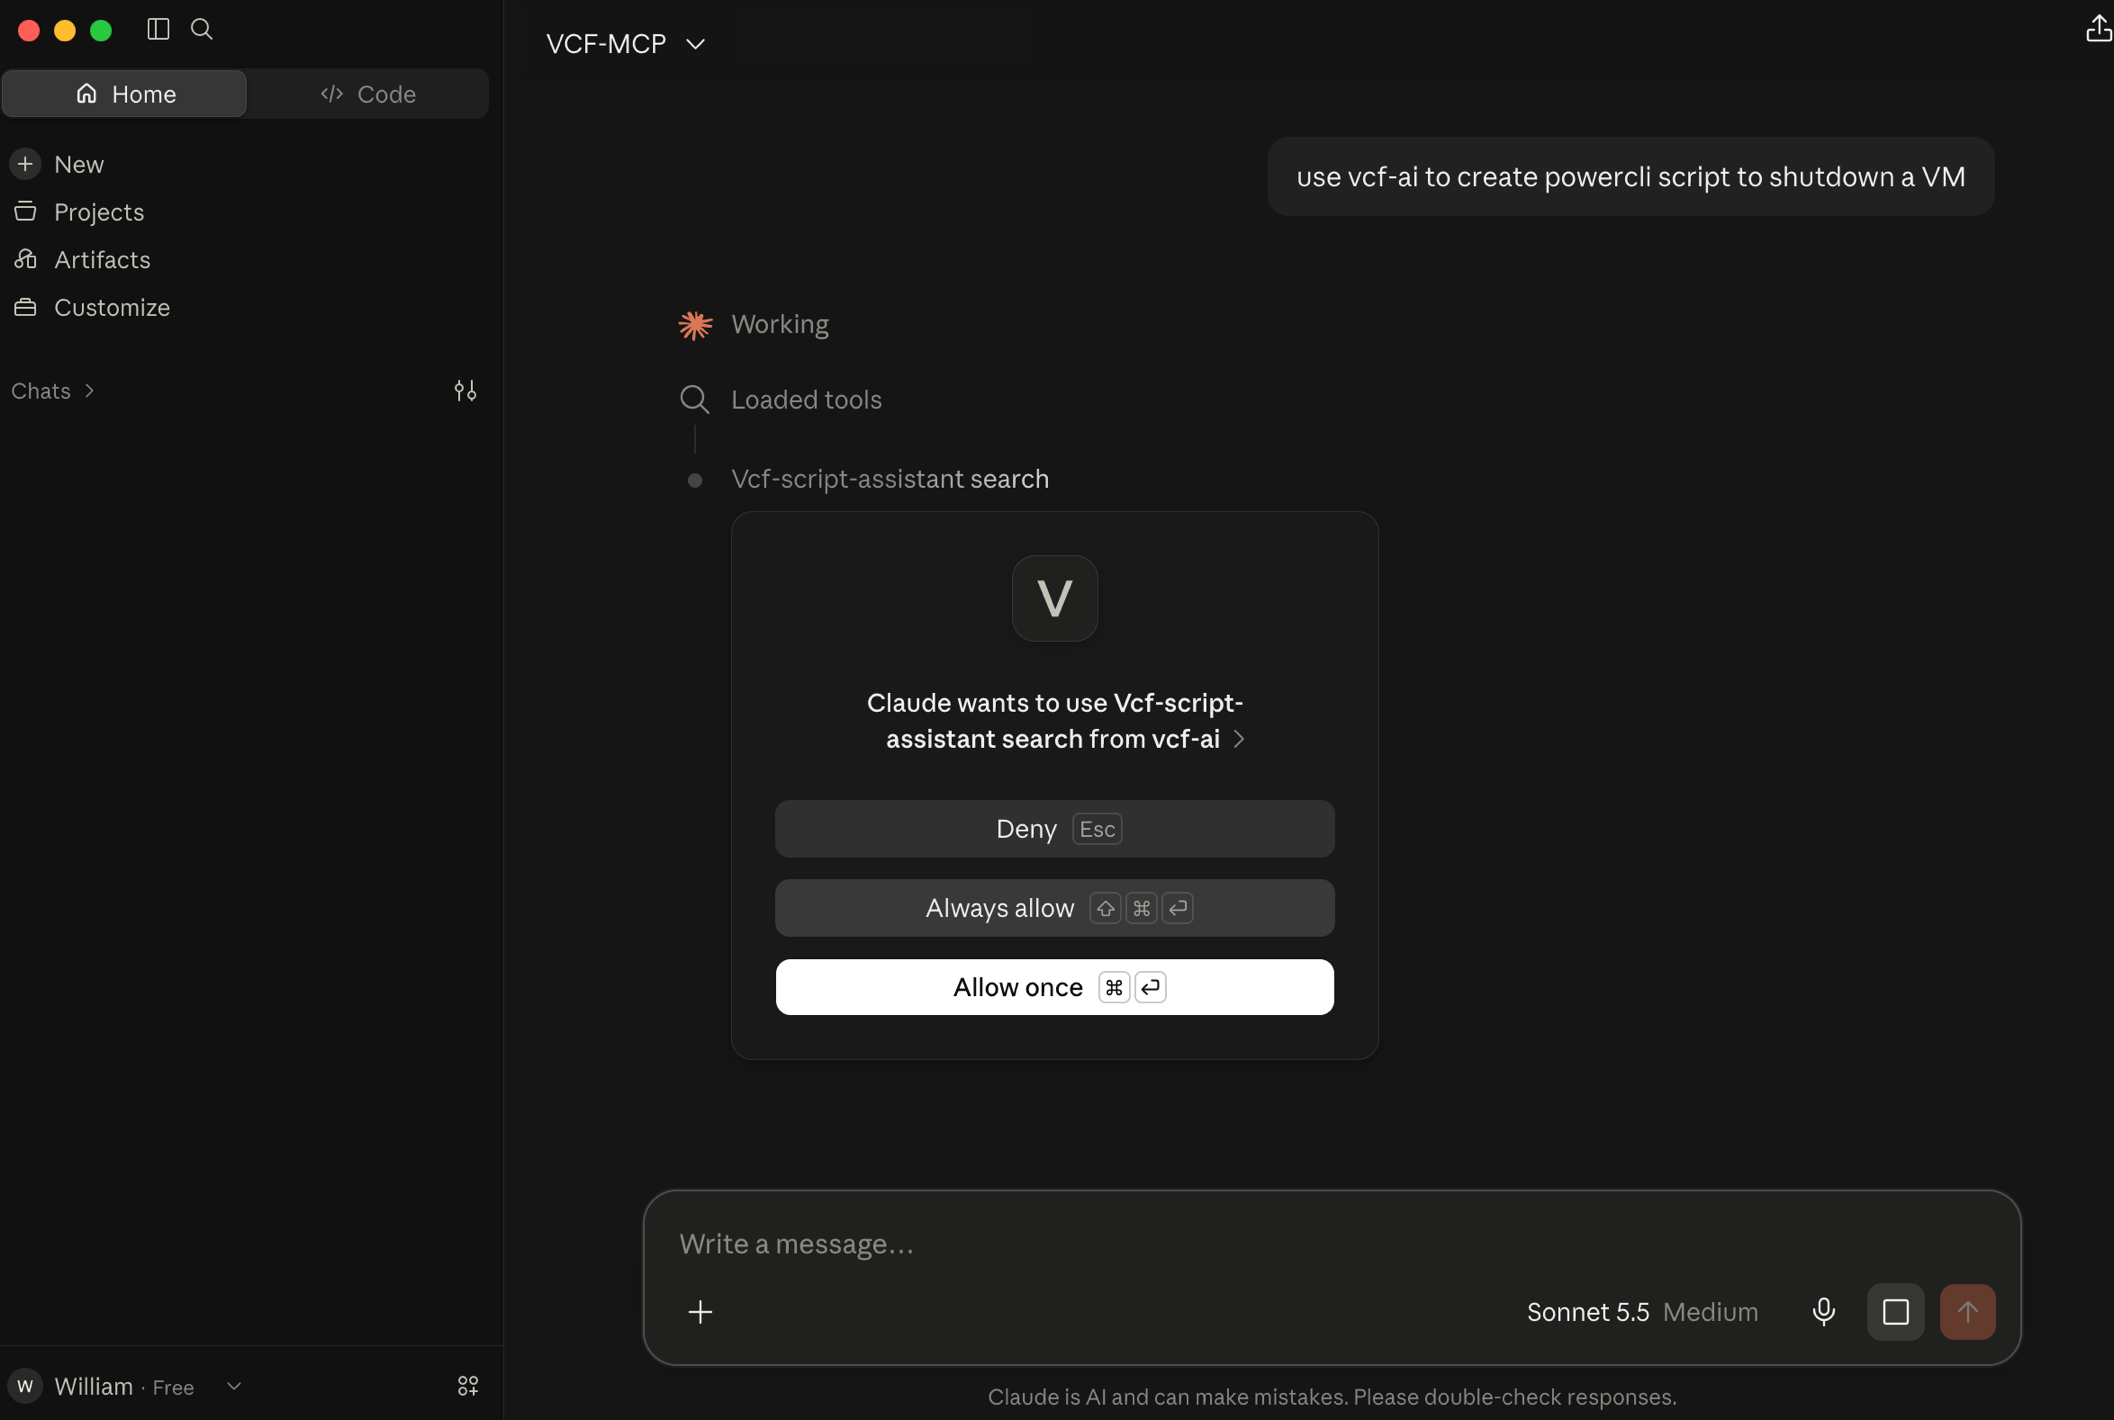
Step 4 - To use the VCF-AI MCP Server, make sure to include “Using vcf-ai MCP ...” in your prompt, which will trigger the authentication flow using the local user you created earlier.
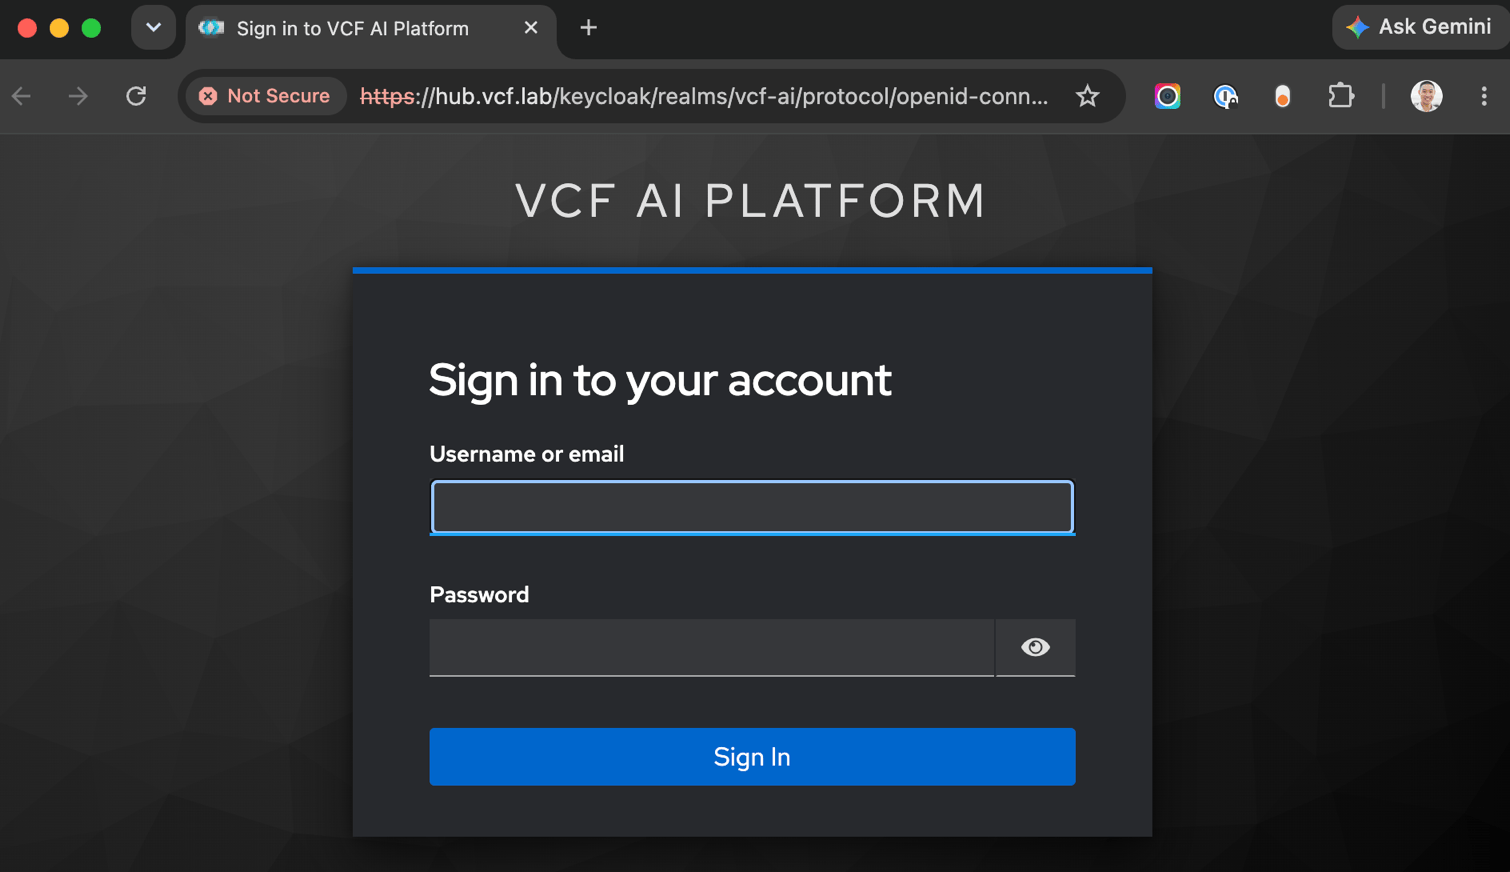
You should automatically be redirected to the VCF-AI Keycloak instance, and after successfully authenticating, you will be redirected back to Claude Code and can begin using the VCF-AI MCP Server! 🥳
Cursor (Free)
Step 1 - Install Node and mcp-remote which will be used to connect to the VCF-AI MCP Server
brew install node
mkdir -p ~/.npm-global npm config set prefix '~/.npm-global' echo 'export PATH=~/.npm-global/bin:$PATH' >> ~/.zshrc source ~/.zshrc
npm install -g mcp-remote --strict-ssl=false
Step 2 - Run the following command to retrieve the path to mcp-remote, which will be required in the next step.
which mcp-remote
Step 3 - Manually update ~/.cursor/mcp.json and append the following:
{
  "mcpServers": {
    "vcf-ai": {
      "command": "/Users/lamw/.npm-global/bin/mcp-remote",
      "args": [
        "https://hub.vcf.lab/mcp"
      ],
      "env": {
        "PATH": "/Users/lamw/.local/bin:/Users/lamw/.npm-global/bin:/opt/homebrew/bin:/usr/local/bin:/usr/bin:/bin",
        "NODE_TLS_REJECT_UNAUTHORIZED": "0"
      }
    }
  }
}
Step 4 - To use the VCF-AI MCP Server, make sure to include “Using vcf-ai MCP ...” in your prompt, which will trigger the authentication flow using the local user you created earlier.

Note: I have found for Cursor, it did not properly redirect to VCF-AI Keycloak for authentication and just got stuck. I was not able to figure out why but using Claude to perform the authentication allowed me to use Cursor.

Codex (Free)
Step 1 - Install Node and mcp-remote which will be used to connect to the VCF-AI MCP Server
brew install node
mkdir -p ~/.npm-global npm config set prefix '~/.npm-global' echo 'export PATH=~/.npm-global/bin:$PATH' >> ~/.zshrc source ~/.zshrc
npm install -g mcp-remote --strict-ssl=false
Step 2 - Manually update ~/.codex/config.toml and append the following:
[mcp_servers.vcf_ai]
command = "npx"
args = ["-y", "--package=mcp-remote", "--", "mcp-remote", "https://hub.vcf.lab/mcp"]

[mcp_servers.vcf_ai.env]
NODE_TLS_REJECT_UNAUTHORIZED = "0"
Step 3 - To use the VCF-AI MCP Server, make sure to include “Using vcf-ai MCP ...” in your prompt, which will trigger the authentication flow using the local user you created earlier.
If you are creating automation for your VCF environment using Agentic coding tools, definitely give the VCF-AI (Code Assist) Fling a try! Instead of fighting with or constantly having to guide the AI, you can now provide it with the right VCF context to help build your next script!

If you have any feedback or feature enhancements, feel free to leave a comment and I will be sure the product team is made aware.
It would be nice to have a MCP to lookup issues, techdocs, requirements, how components interact and more. Navigating the neverending landscape of VCF is dizzyiny.