WilliamLam.com

  • About
    • About
    • Privacy
  • VMware Cloud Foundation
  • VKS
  • Homelab
    • Resources
    • Nested Virtualization
  • VMware Nostalgia
  • Apple

How to deploy a Kubernetes Cluster on vSphere?

09.05.2014 by William Lam // 18 Comments

In the previous article, we walked through the installation of govmomi which is the vSphere SDK for Go and govc which is a command-line interface that uses the SDK to expose vSphere functionality which is used in the Kubernetes vSphere Provider. Now that we have all the prerequisites installed, we are now ready to deploy a Kubernetes Cluster onto a vSphere based infrastructure.

google-kubernetes-vmware-vsphere
UPDATE (10/26/15) - It looks like the instructions on setting up a Kubernetes Cluster has since changed and I have updated the instructions below. One of the main changes is instead of building from source we are just downloading the Kubernetes binaries.

tep 1 - You will need to download the latest Kubernetes binary (kubernetes.tar.gz) which can be found here. At the time of updating this article, the latest is v1.2.0-alpha2.

Step 2 - Go ahead and extract the contents of kubernetes.tar.gz file by running the following command:

tar -zxvf kubernetes.tar.gz

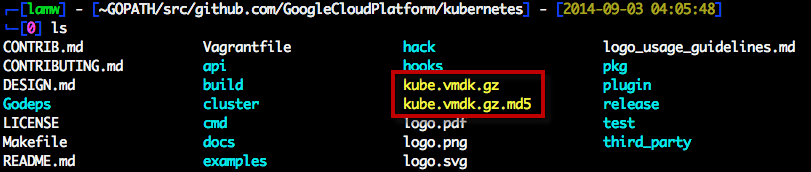
Step 2 - Download the Kubernetes VMDK using either "wget" or "curl" depending on what is available on your system. Since I am on a Mac, it only has curl by default. Here are the two commands depending on the which download utility you have access to:

wget https://storage.googleapis.com/govmomi/vmdk/kube.vmdk.gz{,.md5}
curl -O https://storage.googleapis.com/govmomi/vmdk/kube.vmdk.gz{,.md5}

deploy-kubernetes-on-vsphere-1
Once the download has completed, you should now see two files in your working directory: kube.vmdk.gz and kube.vmdk.gz.md5

deploy-kubernetes-on-vsphere-2
Step 3 - Next we need to un-compress the VMDK by running the following command:

gzip -d kube.vmdk.gz

Step 4 - Once the VMDK has been extracted, we will need to upload it to a vSphere datastore. Before doing so, we need to set a couple of environmental variables that provide connection details to your vSphere environment. Below are the commands to set the environmental variables, you will need to replace the information from your own environment.

export GOVC_URL='https://[USERNAME]:[PASSWORD]@[ESXI-HOSTNAME-IP]/sdk'
export GOVC_DATASTORE='[DATASTORE-NAME]'
export GOVC_DATACENTER='[DATACENTER-NAME]'
export GOVC_RESOURCE_POOL='*/Resources'
export GOVC_GUEST_LOGIN='kube:kube'
export GOVC_INSECURE=true

You can leave the last three variables as-is. The GOVC_RESOURCE_POOL defines the full path to root Resource Pool on an ESXi host which will always exists and for vCenter Server, it is the name of the vSphere Cluster or Resource Pool the GOVC_GUEST_LOGIN is the credentials to the Kubernetes Master/Node VMs which are defaulted in the VMDK that was downloaded. The last variable GOVC_INSECURE is if you have an ESXi or vCenter Server using self-signed SSL Certificate, you will need to ensure this variable is set.

To upload the kube.vmdk to the vSphere Datastore and under the kube directory which will be created for you, you will run the following command:

govc datastore.import kube.vmdk kube

deploy-kubernetes-on-vsphere-3
Step 5 - We now have our base kube.vmdk uploaded to our ESXi host and before we are ready to deploy our Kubernetes Cluster, we need to set the provider by running the following command:

export KUBERNETES_PROVIDER=vsphere

Step 6 - We are now ready to deploy the Kubernetes Cluster which consists of Kubernetes Master and 4 Kubernetes Minions and they will be derived from the kube.vmdk that we just uploaded. To do so, you will run the following command:

kubernetes/cluster/kube-up.sh

deploy-kubernetes-on-vsphere-6
Note: If you see a message about "Docker failed to install on kubernetes-minion-N" it is possible that this related to a timing issue in which the Minion may not be up when the Master is checking. You can verify this by running the next command, else you can follow the instructions to bring down the Kubernetes Cluster and re-creating it.

Step 7 - In the previous step, we deployed the Kubernetes Cluster and you will see the assigned IP Addresses for the Master/Minions along with the credentials (auto-generated) for the Docker Containers. We can confirm that the everything was created successfully by checking the number of running Minions by running the following command:

cluster/kubecfg.sh list minions

Screen Shot 2014-09-04 at 9.52.13 PM
Step 8 - Once we have confirmed we have 4 running Minions, we can now deploy a Docker Container onto our Kubernetes Cluster. Here is an example of deploying 2 nginx mapping from port 8080 to 80 instances by running the following command:

cluster/kubecfg.sh -p 8080:80 run dockerfile/nginx 2 myNginx

deploy-kubernetes-on-vsphere-8
Step 9 - We should expect to see two "Pods" for the nginx instances we have instantiated and we can do so by running the following command:

cluster/kubecfg.sh list pods

deploy-kubernetes-on-vsphere-9
Here are some additional commands to stop and remove the Pods:

cluster/kubecfg.sh stop myNginx
cluster/kubecfg.sh rm myNginx

You can also bring down the Kubernetes Cluster (which will destroy the Master/Minion VMs) by running the following command:

cluster/kube-down.sh

Hopefully this gave you a good introduction to the new Kuberenetes vSphere Provider and I would like to re-iterate that this is still being actively developed on and the current build is an Alpha release. If you have any feedback/requests or would like to contribute, be sure to check out the Kubernetes and govmomi Github repository and post your issues/pull requests.

Categories // Automation, Docker, ESXi, vSphere Tags // Docker, ESXi, go, govc, govmomi, Kubernetes, vSphere

New VMware Fling to improve Network/CPU performance when using Promiscuous Mode for Nested ESXi

08.28.2014 by William Lam // 44 Comments

I wrote an article awhile back Why is Promiscuous Mode & Forged Transmits required for Nested ESXi? and the primary motivation behind the article was in regards to an observation a customer made while using Nested ESXi. The customer was performing some networking benchmarks on their physical ESXi hosts which happened to be hosting a couple of Nested ESXi VMs as well as regular VMs. The customer concluded in his blog that running Nested ESXi VMs on their physical ESXi hosts actually reduced overall network throughput.

UPDATE (04/24/17) - Please have a look at the new ESXi Learnswitch which is an enhancement to the existing ESXi dvFilter MAC Learn module.

UPDATE (11/30/16) - A new version of the ESXi MAC Learning dvFilter has just been released to support ESXi 6.5, please download v2 for that ESXi release. If you have ESXi 5.x or 6.0, you will need to use the v1 version of the Fling as it is not backwards compat. You can all the details on the Fling page here.

This initially did not click until I started to think about this a bit more and the implications when enabling Promiscuous Mode which I think is something that not many of us are not aware of. At a very high level, Promiscuous Mode allows for proper networking connectivity for our Nested VMs running on top of a Nested ESXi VMs (For the full details, please refer to the blog article above). So why is this a problem and how does this lead to reduced network performance as well as increased CPU load?

The diagram below will hopefully help explain why. Here, I have a single physical ESXi host that is connected to either a VSS (Virtual Standard Switch) or VDS (vSphere Distributed Switch) and I have a portgroup which has Promiscuous Mode enabled and it contains both Nested ESXi VMs as well as regular VMs. Lets say we have 1000 Network Packets destined for our regular VM (highlighted in blue), one would expect that the red boxes (representing the packets) will be forwarded to our regular VM right?

nested-esxi-prom-new-01
What actually happens is shown in the next diagram below where every Nested ESXi VM as well as other regular VMs within the portgroup that has Promiscuous Mode enabled will receive a copy of those 1000 Network Packets on each of their vNICs even though they were not originally intended for them. This process of performing the shadow copies of the network packets and forwarding them down to the VMs is a very expensive operation. This is why the customer was seeing reduced network performance as well as increased CPU utilization to process all these additional packets that would eventually be discarded by the Nested ESXi VMs.

nested-esxi-prom-new-02
This really solidified in my head when I logged into my own home lab system which I run anywhere from 15-20 Nested ESXi VMs at any given time in addition to several dozen regular VMs just like any home/development/test lab would. I launched esxtop and set the refresh cycle to 2seconds and switched to the networking view. At the time I was transferring a couple of ESXi ISO’s for my kicskstart server and realized that ALL my Nested ESXi VMs got a copy of those packets.

nested-esxi-mac-learning-dvfilter-0
As you can see from the screenshot above, every single one of my Nested ESXi VMs was receiving ALL traffic from the virtual switch, this definitely adds up to a lot of resources being wasted on my physical ESXi host which could be used for running other workloads.

I decided at this point to reach out to engineering to see if there was anything we could do to help reduce this impact. I initially thought about using NIOC but then realized it was primarily designed for managing outbound traffic where as the Promiscuous Mode traffic is all inbound and it would not actually get rid of the traffic. After speaking to a couple of Engineers, it turns out this issue had been seen in our R&D Cloud (Nimbus) which provides IaaS capabilities to the R&D Organization for quickly spinning up both Virtual/Physical instances for development and testing.

Christian Dickmann was my go to guy for Nimbus and it turns out this particular issue has been seen before. Not only has he seen this behavior, he also had a nice solution to fix the problem in the form of an ESXi dvFilter that implemented MAC Learning! As many of you know our VSS/VDS does not implement MAC Learning as we already know which MAC Addresses are assigned to a particular VM.

I got in touch with Christian and was able to validate his solution in my home lab using the latest ESXi 5.5 release. At this point, I knew I had to get this out to the larger VMware Community and started to work with Christian and our VMware Flings team to see how we can get this released as a Fling.

Today, I am excited to announce the ESXi Mac Learning dvFilter Fling which is distributed as an installable VIB for your physical ESXi host and it provides support for ESXi 5.x & ESXi 6.x

esxi-mac-learn-dvfilter-fling-logo
Note: You will need to enable Promiscuous Mode either on the VSS/VDS or specific portgroup/distributed portgroup for this solution to work.

You can download the MAC Learning dvFilter VIB here or you can install directly from the URL shown below:

To install the VIB, run the following ESXCLI command if you have VIB uploaded to your ESXi datastore:

esxcli software vib install -v /vmfs/volumes/<DATASTORE>/vmware-esx-dvfilter-maclearn-0.1-ESX-5.0.vib -f

To install the VIB from the URL directly, run the following ESXCLI command:

esxcli software vib install -v http://download3.vmware.com/software/vmw-tools/esxi-mac-learning-dvfilter/vmware-esx-dvfilter-maclearn-1.0.vib -f

A system reboot is not necessary and you can confirm the dvFilter was successfully installed by running the following command:

/sbin/summarize-dvfilter

You should be able see the new MAC Learning dvFilter listed at the very top of the output.

nested-esxi-mac-learning-dvfilter-2
For the new dvFilter to work, you will need to add two Advanced Virtual Machine Settings to each of your Nested ESXi VMs and this is on a per vNIC basis, which means you will need to add N-entries if you have N-vNICs on your Nested ESXi VM.

    ethernet#.filter4.name = dvfilter-maclearn
    ethernet#.filter4.onFailure = failOpen

This can be done online without rebooting the Nested ESXi VMs if you leverage the vSphere API. Another way to add this is to shutdown your Nested ESXi VM and use either the “legacy” vSphere C# Client or vSphere Web Client or for those that know how to append and reload the .VMX file as that’s where the configuration file is persisted
on disk.

nested-esxi-mac-learning-dvfilter-3
I normally provision my Nested ESXi VMs with 4 vNICs, so I have four corresponding entries. To confirm the settings are loaded, we can re-run the summarize-dvfilter command and we should now see our Virtual Machine listed in the output along with each vNIC instance.

nested-esxi-mac-learning-dvfilter-4
Once I started to apply this changed across all my Nested ESXi VMs using a script I had written for setting Advanced VM Settings, I immediately saw the decrease of network traffic on ALL my Nested ESXi VMs. For those of you who wish to automate this configuration change, you can take a look at this blog article which includes both a PowerCLI & vSphere SDK for Perl script that can help.

I highly recommend anyone that uses Nested ESXi to ensure you have this VIB installed on all your ESXi hosts! As a best practice you should also ensure that you isolate your other workloads from your Nested ESXi VMs and this will allow you to limit which portgroups must be enabled with Promiscuous Mode.

Categories // ESXi, Home Lab, Nested Virtualization, vSphere, vSphere 6.0 Tags // dvFilter, ESXi, fling, mac learning, nested, nested virtualization, promiscuous mode, vib

Community stories of VMware & Apple OS X in Production: Part 5

08.19.2014 by William Lam // 2 Comments

Company: Artwork Systems Nordic A/S (AWSN)
Software: VMware vSphere
Hardware: Apple Mac Pro

[William] - Hi Mads, thank you for taking some time this morning to share with the community your past experiences managing a VMware and Apple OS X environment. Before we get started, can you introduce yourself and what you currently do?

[Mads] - My name is Mads Fog Albrechtslund, and I currently work as a vSphere Consultant for Businessman A/S Denmark. The reason for my current employment, is primarily a Mac based vSphere project I did at my former employer, Artwork Systems Nordic A/S also in Denmark. Before I became a vSphere Consultant, my primary job function was as a Mac Consultant, in which I have several Apple related certifications.

[William] - Could you describe what your vSphere project was about?

[Mads] - The vSphere Project, was that of virtualizing and consolidating the infrastructure of Artwork Systems Nordic A/S (AWSN). AWSN is a reseller of hardware and software to the graphical industry, thereby running a lot of Apple systems and software that require Mac OS X underneath.

When I started at the company in early 2009, there were around 8-10 servers, and only 9 employees. Every server was just a desktop Mac or PC, running multiple services at once, trying to use the hardware at best. I started by consolidating and somewhat standardizing all these machines, into a Rack cabinet.

But I still wanted to make it better, more flexible and faster to deploy new OS'es when they are needed. I also wanted to move away from running multiple services on a single OS. I started looking into virtualization around late 2010, before VMware even made vSphere compatible with the Mac's. And we started working with a competitor of VMware, which at the time was about to release a bare-metal hypervisor that was compatible with Mac hardware.

We invested time, money and hardware in that initial project, only to around 6 month later to find out that the vendor would drop that bare-metal software again.

[William] - Ouch! I guess that is one of the risks when working with a new company/startup. So what did you end up doing after the company dropped support for bare-metal support?

[Mads] - So when VMware release vSphere 5.0 which was compatible with Apple hardware, I asked my boss to try again. He said "Sure, go ahead…. but we don't have a lot of money to do this with". So I needed to make this project as cheap as possible.

What I ended up with was 3 Mac Pro's (2x 2008 and 1x 2009), which I got almost free from a customer, extra RAM (32GB in each Mac Pro), extra NIC's (4 NIC's in each Mac Pro), a Synology RS812+ NAS and VMware vSphere Essentials bundle.

Here is a picture of the 3 Mac Pros:

awsn-mac-pro
[William] - I too remember when VMware announced support for Apple Hardware with vSphere 5.0, that was a huge deal for many customers. Were there any performance or availability requirements that you had to take into considerations while designing this solution? Did all Virtual Machines run off of the NAS system or was it a mix between local and remote storage?

[Mads] - All VM's ran off the NAS over iSCSI. I did consider the availability of that design, but given the constraints of the money of the project, there was not much of a choice. I did not want to run the VM's on the local disks inside each Mac Pro, considering that if one Mac Pro died, I would not easily have the possibility to power-on that VM on another Mac Pro.

The performance of the NAS was not great, but good enough. After I left, the NAS was upgraded to a Synology DS1813+, and then using the old Synology RS812+ as a backup destination. The load on the VM's was light, as there only was 10 employees in the company, and most of the VM's was only for testing or designing solutions for the customers.

[William] - What type of Virtual Machines and applications were you running on the Mac Pros?

[Mads] - The 3 Mac Pro's are running around 20 VM's, where most of them are either OS X based or Linux Virtual Appliance's. My plan was to do one service per OS, to keep it as simple as possible. Almost all the OS X based VMs are running OS X 10.8 Mountain Lion. Some of them are just plain Client installations, but most of them have the Server app installed, to run Open Directory, DNS or File Server.

The Client installations are running specific software that the company sells, like graphical processing software from Enfocus or FTP software from Rumpus. There is also an older OS X based VM, running Mac OS X Server 10.6, which runs a special graphical procession software called Odystar from a company called Esko. This software only exist on Mac OS X, and it also requires a HASP USB dongle for its license. Most of the VM's are configured as low as possible, which for most is 1 vCPU and 2GB ram.

The Mail server for the company, is based on Kerio Connect software, which is also something that the company is a reseller of for its smaller graphical customers. That software exist either as a virtual appliance, a Windows install or a Mac based install. We ended up with choosing a Mac based installation, because we knew it better.

[William] - How did you go about monitoring the Virtual Machines as well as the underlying hardware? Any particular tools that you found worked well for your organization?

[Mads ] - We did not do much of monitoring, of neither the VMs or the hardware. I was onsite, and sitting almost beside the rack most of the time, so if there was any trouble either physically or virtual, I could fix it fast. I had configured email reporting in all the solutions that gave the option (vCenter Server, Synology NAS and some of the applications).

[William] - I know you had started this project back in 2010 and there was definitely a limited amount of hardware options to run Apple OS X VMs. Today, there are a few more options and if you were to do it again, would you have done anything differently? Would you still consider the Mac Pro (Tower) or look at potentially the newer Mac Pro (Black) or even the Mac Mini’s?

[Mads] - We did start out by looking at the Mac Mini's, but considering that we could only run 3 hosts because of the vSphere Essential license, we needed to get more RAM in each host, than the Mac Mini's could provide. The Tower based Mac Pro is still the best option for this installation, given that it is available for a reasonable price, runs more than 16GB ram and you can get 2x CPU sockets in each host.

The new black version of the Mac Pro, is especially not a good fit, primarily because of the price and because of the dual GPU's and only 1 CPU. I would love a Mac Mini with 32GB ram, that would properly fit perfectly, considering the advances in CPU technology over the 2008/2009 CPU's in the Mac Pro's currently running the environment.

[William] - Mads, thank you very much for spending your morning and sharing with us your experiences with running vSphere on the Mac Pros. You have provided a lot of good information that I know will surely help the VMware and Apple community. One final question before I let you go. Is there any tips/tricks you would recommend for someone looking to start a similar project? Any particular resources you would recommend people check out?

[Mads] - First of a big thanks to yourself, for provide great content on http://www.virtuallyghetto.com. I have also provided my own experiences both on my personal blog www.hazenet.dk and on businessman's company blog bmspeak.businessmann.dk

On my own blog, I have written about issues with screensavers in Mac OS X VM's and I have also written a long blog post about how make a never booted Mac OS X template VM, which don't have any UUID's set.

If you are interested in sharing your story with the community (can be completely anonymous) on how you use VMware and Mac OS X in Production, you can reach out to me here.

  • Community stories of VMware & Apple OS X in Production: Part 1
  • Community stories of VMware & Apple OS X in Production: Part 2
  • Community stories of VMware & Apple OS X in Production: Part 3
  • Community stories of VMware & Apple OS X in Production: Part 4
  • Community stories of VMware & Apple OS X in Production: Part 5
  • Community stories of VMware & Apple OS X in Production: Part 6
  • Community stories of VMware & Apple OS X in Production: Part 7
  • Community stories of VMware & Apple OS X in Production: Part 8
  • Community stories of VMware & Apple OS X in Production: Part 9
  • Community stories of VMware & Apple OS X in Production: Part 10


Categories // Apple, ESXi, vSphere Tags // apple, ESXi, mac pro, osx, vSphere

  • « Previous Page
  • 1
  • …
  • 42
  • 43
  • 44
  • 45
  • 46
  • …
  • 61
  • Next Page »

Search

Thank Author

Author

William is Distinguished Platform Engineering Architect in the VMware Cloud Foundation (VCF) Division at Broadcom. His primary focus is helping customers and partners build, run and operate a modern Private Cloud using the VMware Cloud Foundation (VCF) platform.

Connect

  • Bluesky
  • Email
  • GitHub
  • LinkedIn
  • Mastodon
  • Reddit
  • RSS
  • Twitter
  • Vimeo

Recent

  • Programmatically accessing the Broadcom Compatibility Guide (BCG) 05/06/2025
  • Quick Tip - Validating Broadcom Download Token  05/01/2025
  • Supported chipsets for the USB Network Native Driver for ESXi Fling 04/23/2025
  • vCenter Identity Federation with Authelia 04/16/2025
  • vCenter Server Identity Federation with Kanidm 04/10/2025

Advertisment

Privacy & Cookies: This site uses cookies. By continuing to use this website, you agree to their use.
To find out more, including how to control cookies, see here: Cookie Policy

Copyright WilliamLam.com © 2025


Loading Comments...