WilliamLam.com

  • About
    • About
    • Privacy
  • VMware Cloud Foundation
  • VKS
  • Homelab
    • Hardware Options
    • Hardware Reviews
    • Lab Deployment Scripts
    • Nested Virtualization
    • Homelab Podcasts
  • VMware Nostalgia
  • Apple

Search Results for: Intel NUC

ESXi Thunderbolt Driver to Fibre Channel Storage from ATTO

09.12.2016 by William Lam // 6 Comments

esxi-thunderbolt-driver-atto
One of the things I always enjoy doing at VMworld, when I am not running around and I have a few minutes to myself, is to check out the VMware Solutions Exchange. This is where you can learn and interact with hundreds of our VMware Certified Partners showcasing their new solutions and innovations that they have built on top of VMware's products.

UPDATE (08/22/17) - ATTO's ESXi Thunderbolt Driver is now officially on the VMware HCL, please see this blog post here for more details.

While walking through the show floor, I had stopped by the ATTO Technology booth who has been a long time partner of VMware in the storage and networking connectivity space. What caught my eye was that they had just released a Beta of an ESXi Thunderbolt Driver in the form of an ESXi VIB that would allow customers to connect their Apple Mac Pro 6,1 using the Thunderbolt 2 interface to an external Fibre Channel storage array. I believe ATTO might be the first vendor ever to produce a Thunderbolt Driver for ESXi. This is really exciting news if you ask me, especially as more and more of our customers are looking to virtualize Mac OS X guests in their Datacenters using vSphere. 

Historically, the only option to connect a Mac Pro 6,1 to an external Fibre Channel array was to use something like a Sonnet Chassis. Now, you can potentially connect up to 6 of the built-in Thunderbolt 2 interfaces on the Mac Pro's to your external storage array using this new solution from ATTO. Before I go into some of the details, ATTO did want me to mention that this solution is currently not officially supported by VMware nor is it on VMware's HCL. ATTO will be providing full support on their software as well as VMware's software stack during the duration of the beta program. In terms of official certification on VMware's HCL, I suspect that it will most likely depend on customer demand which would influence whether ATTO applies for an official certification, which again, would be the first of its kind for Thunderbolt.

The way in which this solution works is that you install the ATTO Thunderbolt Driver on your ESXi host and this will allow it to communicate with an ATTO ThunderLink device which provides the Thunderbolt 2 to Fibre Channel connectivity. You have the option of using either the FC2082 which provides 20Gb/s Thunderbolt 2 (2-port) to 8Gb/s FC (2-Port) Device or the FC2182 which provides 20Gb/s Thunderbolt 2 (2-port) to 16Gb/s FC (2-Port) Device. Below is a diagram from the ATTO digital solution brief on Thunderbolt Driver for ESXi which outlines the configuration.

esxi-thunderbolt-driver-atto-1
If you are interested in taking part in ATTO's ESXi Thunderbolt Driver Beta program or would like to learn more about the solution, you can reach out directly to Carllene Mowry (*protected email*) who is running the program. For more information be sure to check out the ATTO digital brief on Thunderbolt Driver for ESXi.

Lastly, I was also fortunate to have a quick chat with Carllene and team to get a few additional exclusive tidbits on some of the things the ATTO team is working on next. The first of which is support for the Thunderbolt 3 (aka USB-C) interface to Fibre Channel which will be quite nice for newer platforms that include that interface, including home lab setups such as the Intel NUC. Speaking of Intel NUC, this is just one of the many other platforms that include either Thunderbolt 2 or 3 interfaces. Although the solution today is specifically supporting the Mac Pro, I know ATTO folks are interested to hear from customers on other systems with Thunderbolt interface and providing similiar capabilities.

The other really exciting development that is currently being investigated is support for Thunderbolt 2 or 3 to 10GbE connectivity on ESXi. As you can imagine, this is really going to open up some really cool new use cases, especially around things like VSAN which can easily benefit from this. It is still in early development but from my understanding, ATTO is already seeing a lot of interest in this area as well as how this might work with VSAN. I am hoping I will be able to share more details as this further develops. If any of these updates sounds interesting, do leave a comment to let the ATTO folks know and I will make sure they monitor the thread.

Categories // Apple, ESXi, VSAN Tags // apple, ATTO, fibre channel, mac pro, thunderbolt, USB-c, Virtual SAN, VSAN

Functional USB 3.0 Ethernet Adapter (NIC) driver for ESXi 5.5 & 6.0

03.28.2016 by William Lam // 81 Comments

Earlier this month I wrote an article demonstrating a functional USB ethernet adapter for ESXi 5.1. This was made possible by using a custom built driver for ESXi that was created over three years ago by a user named Trickstarter. After having re-discovered the thread several years later, I had tried reaching out to the user but concluded that he/she has probably moved on given the lack of forum activity in the recent years. Over the last few weeks I have been investigating to see if it was possible to compile a new version of the driver that would function with newer versions of ESXi such as our 5.5 and 6.0 release.

UPDATE (02/12/19) - A new VMware Native Driver for USB-based NICs has just been released for ESXi 6.5/6.7, please use this driver going forward. If you are still on ESXi 5.5/6.0, you can continue using the existing driver but please note there will be no additional development in the existing vmklinux-based driver.

UPDATE (01/22/17) - For details on using a USB-C / Thunderbolt 3 Ethernet Adapter, please see this post here.

UPDATE (11/17/16) - New driver has been updated for ESXi 6.5, please find the details here.

After reaching out to a few folks internally, I was introduced to Songtao Zheng, a VMware Engineer who works on some of our USB code base. Songtao was kind enough to provide some of assistance in his spare time to help with this non-sanction effort that I was embarking on. Today, I am please to announce that we now have a functional USB ethernet adapter driver based on the ASIX AX88179 that works for both ESXi 5.5 and 6.0. This effort could not have been possible without Songtao and I just want to say thank you very much for all of your help and contributions. I think it is safe to say that the overall VMware community also thanks you for your efforts. This new capability will definitely enable new use cases for vSphere home labs that were never possible before when using platforms such as the Intel NUC or Apple Mac Mini for example. Thank you Songtao! I would also like to extend an additional thank you to Jose Gomes, one of my readers, who has also been extremely helpful with his feedback as well as assistance on testing the new drivers.

Now, Before jumping into the goods, I do want to mention there are a few caveats to be aware of and that I think it is important to understand them before making any purchasing decisions.

  • First and foremost, this is NOT officially supported by VMware, use at your own risk.
  • Secondly, we have observed there is a substantial difference in transfer speeds between Transmit (Egress) and Receive (Ingress) traffic which may or may not be acceptable depending on your workload. On Receive, the USB network adapter is performing close to a native gigabit interface. However, on Transmit, the bandwidth mysteriously drops by ~50% which includes very inconsistent transfer speeds. We are not exactly sure why this is the case, but given ESXi does not officially support USB based ethernet adapters, it is possible that the underlying infrastructure was never optimized for such devices. YMMV
  • Lastly, for the USB ethernet adapter to properly function, you will need a system that supports USB 3.0 which kind of makes sense for this type of a solution to be beneficial in the home lab. If you have a system with USB 2.0, the device will probably not work at least from testing that we have done.

Note: For those interested in the required source code changes to build the AX88179 driver, I have published all of the details on my Github repo here.

Disclaimer: In case you some how missed it, this is not officially supported by VMware. Use at your own risk.

Without further ado, here are the USB 3.0 gigabit ethernet adapters that are supported with the two drivers:

  • StarTech USB 3.0 to Gigabit Ethernet NIC Adapter
  • StarTech USB 3.0 to Dual Port Gigabit Ethernet Adapter NIC with USB Port
  • j5create USB 3.0 to Gigabit Ethernet NIC Adapter (verified by reader Sean Hatfield 03/29/16)
  • Vantec CB-U300GNA USB 3.0 Ethernet Adapter (verified by VMware employee 05/19/16)
  • DUB-1312 USB 3.0 Gigabit Ethernet Adapter (verified by twitter user George Markou 07/29/16)

Note: There may be other USB ethernet adapters that uses the same chipset which could also leverage this driver but these are the only two that have been verified.

usbnic
Here are the ESXi driver VIB downloads:

  • ESXi 5.5 Update 3 USB Ethernet Adapter Driver VIB or ESXi 5.5 Update 3 USB Ethernet Adapter Driver Offline Bundle
  • ESXi 6.0 Update 2 USB Ethernet Adapter Driver VIB or ESXi 6.0 Update 2 USB Ethernet Adapter Driver Offline Bundle
  • ESXi 6.5 USB Ethernet Adapter Driver VIB or ESXi 6.5 USB Ethernet Adapter Driver Offline Bundle
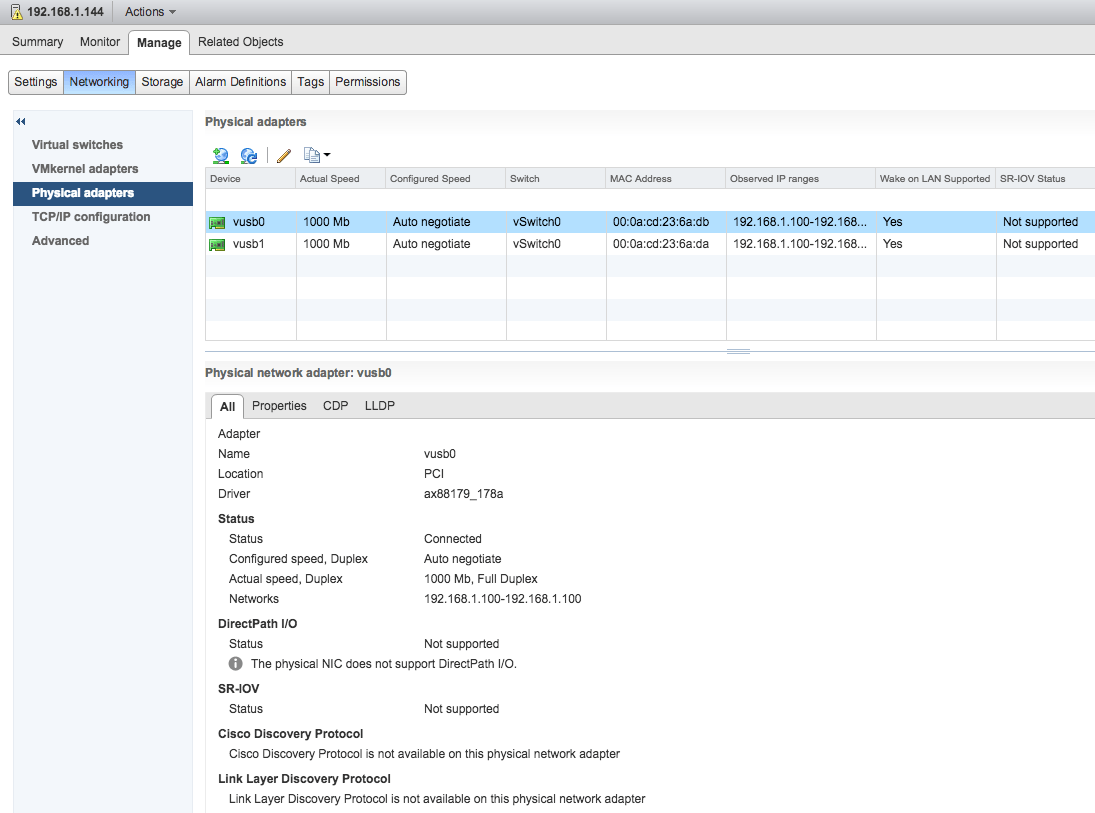
Note: Although the drivers were compiled against a specific version of ESXi, they should also work on the same major version of ESXi, but I have not done that level of testing and YMMV.

Verify USB 3.0 Support

As mentioned earlier, you will need a system that is USB 3.0 capable to be able to use the USB ethernet adapter. If you are unsure, you can plug in a USB 3.0 device and run the following command to check:

lsusb

usb3nic-0
What you will be looking for is an entry stating "Linux Foundation 3.0 root hub" which shows that ESXi was able to detect a USB 3.0 port on your system. Secondly, look for the USB device you just plugged in and ensure the "Bus" ID matches that of the USB 3.0 bus. This will tell you if your device is being claimed as a USB 3.0 device. If not, you may need to update your BIOS as some systems may have USB 2.0 enabled by default like earlier versions of Intel NUC as desribed here. You may also be running pre-ESXi 5.5 which did not support USB 3.0 as mentioned here, so you may need to upgrade your ESXi host to at least 5.5 or greater.

Install Driver

You can either install the VIB directly onto your ESXi host or by creating a custom ESXi ISO that includes the driver using a popular tool like ESXi Customizer by Andreas Peetz.

To install the VIB, upload the VIB to your ESXi host and then run the following ESXCLI command specifying the full path to the VIB:

esxcli software vib install -v /vghetto-ax88179-esxi60u2.vib -f

usb3nic-1
Lastly, you will need to disable the USB native driver to be able to use this driver. To do so, run the following command:

esxcli system module set -m=vmkusb -e=FALSE

You will need to reboot for the change to go into effect.

To verify that the USB network adapter has been successfully claimed, run either of the following commands to list your physical NICs:

esxcli network nic list
esxcfg-nics -l

usb3nic-2
To add the USB uplink, you will need to either use the vSphere Web Client or ESXCLI to add the uplink to either a Virtual or Distributed Virtual Switch.

usb3nic-3
To do so using ESXCLI, run the following command and specify the name of your vSwitch:

esxcli network vswitch standard uplink add -u vusb0 -v vSwitch0

Uninstall Driver

To uninstall the VIB, first make sure to completely unplug the USB network adapter from the ESXi first. Next, run the following ESXCLI command which will automatically unload the driver and remove the VIB from your ESXi host:

esxcli software vib remove -n vghetto-ax88179-esxi60u2

Note: If you try to remove the VIB while the USB network adapter is still plugged in, you may hang the system or cause a PSOD. Simply reboot the system if you accidentally get into this situation.

Troubleshooting

If you are not receiving link on the USB ethernet adapter, it is most likely that your system does not support USB 3.0. If you find the a similar message like the one below in /var/log/vmkernel.log then you are probably running USB 1.0 or 2.0.

2016-03-21T23:30:49.195Z cpu6:33307)WARNING: LinDMA: Linux_DMACheckConstraints:138: Cannot map machine address = 0x10f5b6b44, length = 2 for device 0000:00:1d.7; reason = address exceeds dma_mask (0xffffffff))

Persisting USB NIC Configurations after reboot

ESXi does not natively support USB NIC and upon a reboot, the USB NICs are not picked up until much later in the boot process which prevents them from being associated with VSS/VDS and their respective portgroups. To ensure things are connected properly after a reboot, you will need to add something like the following in /etc/rc.local.d/local.sh which re-links the USB NIC along with the individual portgroups as shown in the example below.

esxcfg-vswitch -L vusb0 vSwitch0
esxcfg-vswitch -M vusb0 -p "Management Network" vSwitch0
esxcfg-vswitch -M vusb0 -p "VM Network" vSwitch0

You will also need to run /sbin/auto-backup.sh to ensure the configuration changes are saved and then you can issue a reboot to verify that everything is working as expected.

Summary

For platforms that have limited built-in networking capabilities such as the Intel NUC and Apple Mac Mini, customers now have the ability to add additional network interfaces to these systems. This will now open up a whole new class of use cases for vSphere based home labs that were never possible before, especially with solutions such as VSAN and NSX. I look forward to seeing what our customers can now do with these new networking capabilities.

Additional Info

Here are some additional screenshots testing the dual USB 3.0 ethernet adapter as well as a basic iPerf benchmark for the single USB ethernet adapter. I was not really impressed with the speeds for the dual ethernet adapter which I had shared some more info here. Unless you are limited on number of USB 3.0 ports, I would probably recommend just sticking with the single port ethernet adapter.

usb3nic-5
usb3nic-6

iPerf benchmark for Ingress traffic (single port USB ethernet adapter):
usb3nic-7
iPerf benchmark for Egress traffic (single port USB ethernet adapter):
usb3nic-8

Categories // ESXi, Home Lab, Not Supported, vSphere 6.0 Tags // ESXi 5.5, ESXi 6.0, homelab, lsusb, usb, usb ethernet adapter, usb network adapter, vSphere 5.5

Quick Tip - iPerf now available on ESXi

03.15.2016 by William Lam // 25 Comments

The other day I was looking to get a baseline of the built-in ethernet adapter of my recently upgraded vSphere home lab running on the Intel NUC. I decided to use iPerf for my testing which is a commonly used command-line tool to help measure network performance. I also found a couple of articles from well known VMware community members: Erik Bussink and Raphael Schitz on this topic as well which were quite helpful. Erik's article here outlines how to run the iPerf Client/Server using a pair of Virtual Machines running on top of two ESXi hosts. Although the overhead of the VMs should be negligible, I was looking for a way to benchmark the ESXi hosts directly. Raphael's article here looked promising as he found a way to create a custom iPerf VIB which can run directly on ESXi.

I was about to download the custom VIB and I had just remembered that the VSAN Health Check plugin in the vSphere Web Client also provides some proactive network performance tests to be run on your environment. I was curious on what tool was being leveraged for this capability and in doing a quick search on the ESXi filesystem, I found that it was actually iPerf. The iPerf binary is located in /usr/lib/vmware/vsan/bin/iperf and looks to have been bundled as part of ESXi starting with the vSphere 6.0 release from what I can tell.

UPDATE (10/19/23) - As of ESXi 8.x, you may run into following error when attempting to start running iperf:

iperf3: running in appDom(30): ipAddr = ::, port = 5201: Access denied by vmkernel access control policy

To workaround this, you can run the following command:

esxcli system secpolicy domain set -n appDom -l disabled

and re-enable (use "enforcing" as the value) once you have completed your iperf test both on the server and client ESXi host.

UPDATE (09/20/22) - As of ESXi 7.0 Update 3 20036589 (possibly earlier) and later, you no longer need to make a copy of the iperf3 utility. You can simply run it from /usr/lib/vmware/vsan/bin/iperf3 and you also do NOT have to lower the security by changing ESXi Advanced Setting execInstalledOnly to FALSE

UPDATE (10/02/18) - It looks like iPerf3 is now back in both ESXi 6.5 Update 2 as well as the upcoming ESXi 6.7 Update 1 release. You can find the iPerf binary under /usr/lib/vmware/vsan/bin/iperf3

One interesting thing that I found when trying to run iPerf in "server" mode is that you would always get the following error:

bind failed: Operation not permitted

The only way I found to fix this issue was to basically copy the iPerf binary to another file like iperf3.copy which it would then allow me to start iPerf in "server" mode. You can do so by running the following command on the ESXi Shell:

cp /usr/lib/vmware/vsan/bin/iperf3 /usr/lib/vmware/vsan/bin/iperf3.copy

Running iPerf in "Client" mode works as expected and the copy is only needed when running in "server" mode. To perform the test, I used both my Apple Mac Mini and the Intel NUC which had ESXi running with no VMs.

I ran the iPerf "Server" on the Intel NUC by running the following command:

/usr/lib/vmware/vsan/bin/iperf3.copy -s -B [IPERF-SERVER-IP]

Note: If you have multiple network interfaces, you can specify which interface to use with the -B option and passing the IP Address of that interface.

I ran the iPerf "Client" on the Mac Mini by running the following command and specifying the address of the iPerf "Server":

/usr/lib/vmware/vsan/bin/iperf3 -n 800M -c [IPERF-SERVER]

I also disabled the ESXi firewall before running the test, which you can do by running the following command:

esxcli network firewall set --enabled false

Here is a screenshot of my iPerf test running between my Mac Mini and Intel NUC. Hopefully this will come in handy for anyone needing to run some basic network performance tests between two ESXi hosts without having to setup additional VMs.

esxi-iperf

Categories // ESXi, vSphere 6.0 Tags // ESXi, iperf, network, performance, vSphere 6.0 Update 1, vSphere 6.0 Update 2

  • « Previous Page
  • 1
  • …
  • 36
  • 37
  • 38
  • 39
  • 40
  • …
  • 42
  • Next Page »

Search

Thank Author

Author

William is Distinguished Platform Engineering Architect in the VMware Cloud Foundation (VCF) Division at Broadcom. His primary focus is helping customers and partners build, run and operate a modern Private Cloud using the VMware Cloud Foundation (VCF) platform.

Connect

  • Bluesky
  • Email
  • GitHub
  • LinkedIn
  • Mastodon
  • Reddit
  • RSS
  • Twitter
  • Vimeo

Recent

  • Ultimate Lab Resource for VCF 9.0 06/25/2025
  • VMware Cloud Foundation (VCF) on ASUS NUC 15 Pro (Cyber Canyon) 06/25/2025
  • VMware Cloud Foundation (VCF) on Minisforum MS-A2 06/25/2025
  • VCF 9.0 Offline Depot using Synology 06/25/2025
  • Deploying VCF 9.0 on a single ESXi host? 06/24/2025

Advertisment

Privacy & Cookies: This site uses cookies. By continuing to use this website, you agree to their use.
To find out more, including how to control cookies, see here: Cookie Policy

Copyright WilliamLam.com © 2025


Loading Comments...